How To Replace And Fix A Stuck STIHL Trimmer Head
- February 20, 2024
- 0 comment
When it comes to maintaining your garden equipment, replacing a worn-out trimmer head is a task many gardeners and landscapers will face. Specifically, for STIHL trimmer owners, the process of replacing the trimmer head—and addressing issues when it becomes stuck—is a valuable skill to have. This article will guide you through both replacing a STIHL trimmer head and fixing it if it becomes stuck, using a STIHL FS 55 trimmer as a demonstration model. However, the instructions provided here are applicable to virtually any STIHL trimmer, thanks to the standardized gearbox design across models.
Step By Step Guide: How to Replace and Fix a Stuck STIHL Trimmer Head
Step 1: Removing the Old Trimmer Head
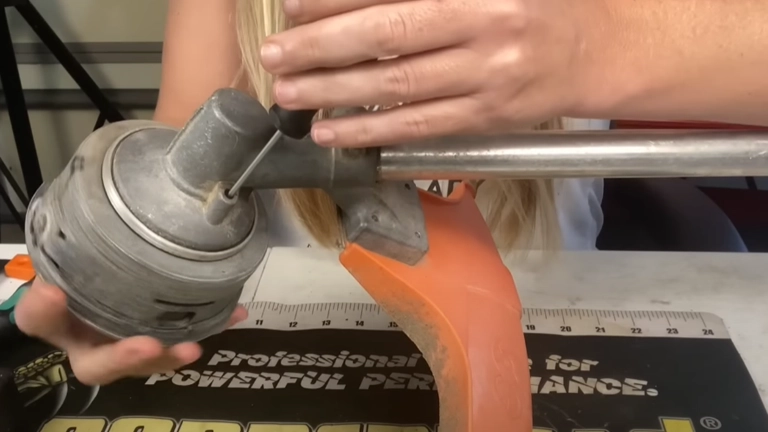
To remove an old or worn-out trimmer head, you’ll first need to lock the gear head. This is done by locating a hole in the back of the gearbox and inserting a small object (ideally, the metal dowel that came with your STIHL trimmer, though any suitable tool will work) to lock it in place. With the gearbox locked, you can unscrew the old head by turning it left (if you’re behind the trimmer) or right (if you’re facing the opposite direction), noting that the threads may be reversed depending on your position.
Step 2: Avoiding Common Mistakes
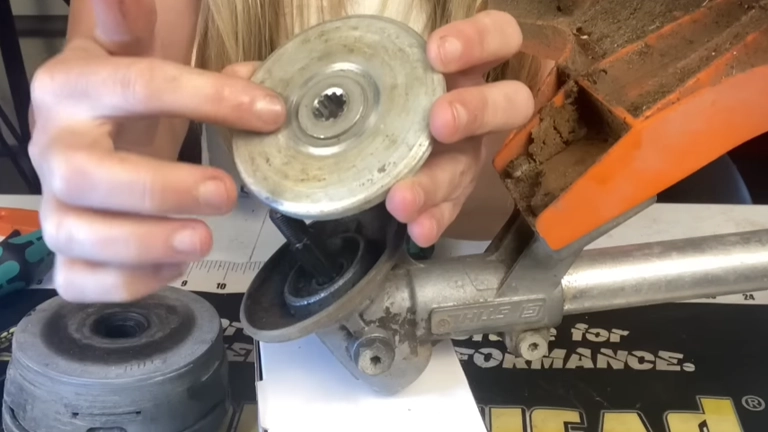
A common mistake during reassembly involves the thrust plate being installed backward. The correct orientation of the thrust plate is flat with a raised center, which allows for a blade attachment. Incorrect installation can lead to the locking mechanisms facing outwards, rendering them useless and causing the assembly to lock up once reassembled. This mistake can prevent the trimmer head from moving and make it impossible to remove without the correct technique.
Step 3: Fixing a Stuck Trimmer Head
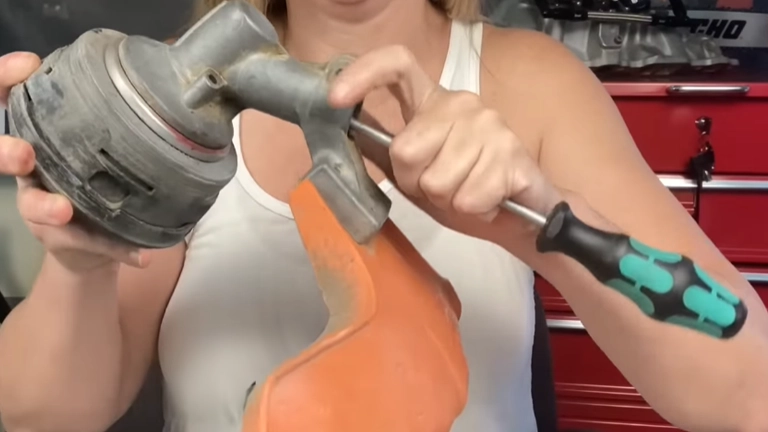
If the trimmer head becomes stuck due to incorrect assembly, the first step is to remove the bolt holding tension on the gear head using a T27 torx. This allows you to slide the gear head off. The challenge then lies in finding a way to lock the square-shaped end of the shaft to unscrew the head. A common solution involves using a flathead screwdriver, which, although not a perfect fit, can be wedged into the shaft to provide the necessary grip. With the screwdriver in place, press down and twist to unlock and remove the gear head.
Step 4: Reassembling Correctly
When putting the gear head back on, ensure it aligns with the marks indicating its previous position for a perfect fit. Tighten the bolt to secure it. Reattach the trimmer head by holding the back plate and screwing on the head, remembering the correct direction for the threads. Use a tool to lock the gearbox and tighten the assembly.
Step 5: Lubricating the Gearbox
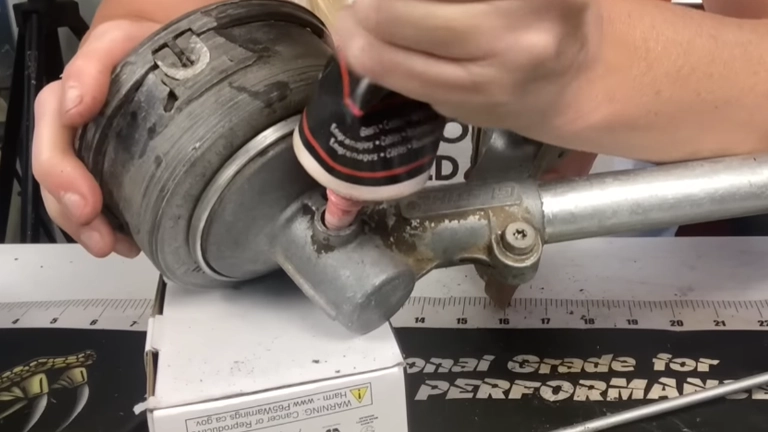
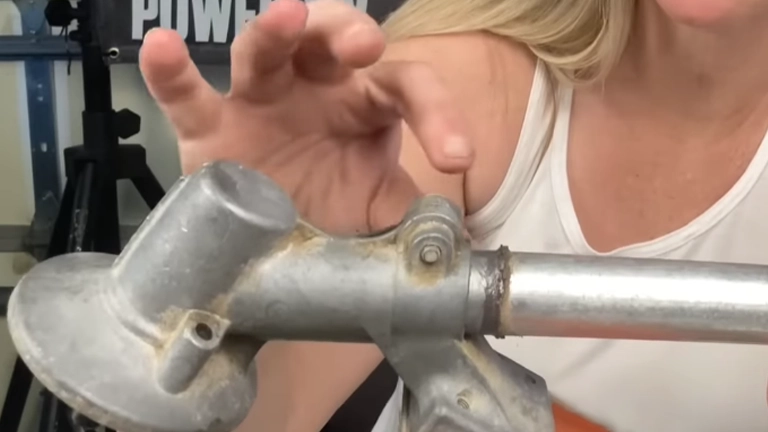
A crucial but often overlooked step is lubricating the gearbox. This involves removing a screw (using a T27 torx) to access the grease port. Apply gear grease while turning the head to ensure even distribution. This step is essential for maintaining the longevity and functionality of your trimmer.
How To Perform a Basic Tune-Up on a Stihl Weed Eater
Stihl Weed Eaters, known for their durability and performance, is a common choice for gardening enthusiasts and professionals alike. Performing a basic tune-up on these devices can ensure they continue to run efficiently and last longer. This guide will walk you through the process of tuning up a Stihl power head, applicable to a wide range of models including curved shaft weed eaters, straight shaft weed eaters, combi units, split shaft ones, and even the Stihl MM 55 Yard Boss Rototiller.
What You Will Need
- Parts: Spark plug, air filter, fuel filter.
- Tools: Spark plug wrench (or a 19mm/3/4 inch deep socket), needle nose pliers, 5/16 or 8mm socket (must be a small, quarter-inch drive).
Step-by-Step Guide
Spark Plug Replacement
- Remove the old spark plug using a spark plug wrench or a deep socket.
- Install a new spark plug. Recommended types include NGK (PMR7A), Bosch (WSR6F), or Champion (RCJ6Y). Screw in by hand until finger-tight, then use the wrench to tighten an additional half turn.
Carburetor and Fuel Filter Check
- To access the fuel filter, first remove the air filter cover and the air filter itself.
- Use the 5/16 or 8mm socket to remove the two nuts securing the carburetor, allowing you to pull off the air filter housing.
- Disconnect two fuel lines and the throttle cable to remove the carburetor.
- Pull the fuel line out of the tank using needle nose pliers to check or replace the fuel filter.
Air Filter Replacement
- With the carburetor off, it’s an excellent time to replace the air filter to ensure optimal air flow. The part number for the replacement air filter is 4140 124 2800.
Tips for a Successful Tune-Up
- Fuel Filter Access: Given the height of the fuel tank, removing the carburetor is necessary to access the fuel filter. This step is crucial for ensuring your fuel system is clean and functioning properly.
- Fuel Line Reattachment: Pay careful attention to the orientation and connection of the fuel lines when reassembling to avoid pinching or kinking, which can restrict fuel flow.
- Throttle Cable Adjustment: If the throttle cable has stretched over time, adjust the throttle lever screw to ensure full throttle capability. This simple adjustment can compensate for wear and maintain performance.
- Safety First: Before starting your tune-up, ensure the Weed Eater is turned off and the fuel tank is depressurized by loosening the cap. Always work in a well-ventilated area.
Conclusion
Whether you’re dealing with a worn-out trimmer head or one that’s become stuck due to improper installation, these steps will help you navigate the repair process with confidence. Regular maintenance, including proper lubrication, not only extends the life of your STIHL trimmer but also ensures it operates at peak efficiency. Remember, taking the time to perform these tasks correctly can save you from potential headaches and keep your garden looking its best.
FAQs
- Can I replace a STIHL trimmer head with a universal head, or do I need a specific model?
While STIHL trimmers are designed to work best with original STIHL heads due to precise engineering and compatibility, there are universal trimmer heads available on the market that can fit STIHL trimmers. However, it’s important to ensure the universal head matches the specifications of your STIHL model for optimal performance and safety. - What should I do if the locking mechanism in the gearbox is damaged or worn out?
If the locking mechanism that is used to hold the gearbox in place during head replacement is damaged, it can make removing the trimmer head difficult. In such cases, it’s advisable to take your trimmer to a professional repair shop or a certified STIHL dealer for repair or replacement of the gearbox to prevent further damage. - How often should I lubricate my STIHL trimmer’s gearbox, and does the frequency change with usage?
Lubricating the gearbox is crucial for the longevity and efficient operation of your STIHL trimmer. It’s recommended to lubricate the gearbox at least once at the start of the trimming season or after every 10 hours of use. However, if you use your trimmer in dusty or sandy conditions, increasing the lubrication frequency can help maintain optimal performance. - Can I convert my STIHL trimmer to use different types of cutting attachments, and how would I do that?
Yes, many STIHL trimmers are versatile and can be converted to use different types of cutting attachments, such as blades for brush cutting, by changing the trimmer head. This usually involves purchasing a conversion kit or compatible attachment and following the specific instructions for your model. Always ensure the attachment is compatible with your trimmer model and installed correctly for safe operation. - What are the environmental impacts of disposing of old trimmer heads, and how can I minimize them?
Disposing of old trimmer heads, especially those made of plastic and metal, can contribute to landfill waste and environmental pollution. To minimize these impacts, consider recycling the old head if possible. Check with local recycling centers to see if they accept garden tool parts. Alternatively, some garden centers or hardware stores offer recycling programs for garden tool components. - What’s the significance of the “secret grease hole” mentioned in the maintenance of the trimmer, and is it unique to STIHL trimmers?
The “secret grease hole” is a feature designed for easy maintenance, allowing users to lubricate the internal components of the gearbox without complete disassembly. This feature is common in high-quality trimmers from brands like STIHL and facilitates regular maintenance. While not entirely unique to STIHL, it’s a hallmark of trimmers designed for durability and prolonged use. - How do I know when it’s time to replace my trimmer head, and are there signs of wear I should look for?
Signs that it’s time to replace your trimmer head include noticeable wear on the head itself, difficulty in feeding the trimmer line, or if the head has been damaged through impact or extensive use. Regular inspection of the trimmer head for cracks, wear, or any deformation can help determine when a replacement is necessary.
We hope this guide helps you keep your STIHL trimmer in top-notch condition! Got any tips, questions, or stories about your own trimmer maintenance experiences? We’d love to hear them! Drop a comment below to share your thoughts and join the conversation. Don’t forget to share this article with fellow gardening enthusiasts and friends who might find it useful. Your insights not only enrich our community but also help others navigate their gardening challenges with ease. Happy trimming!

David Murray
Forestry AuthorI'm David Murry, a forestry equipment specialist with a focus on chainsaw operation. With over 13 years of experience, I've honed my skills in operating and maintaining a wide range of machinery, from chainsaws to log splitters. My passion for the outdoors and commitment to sustainable forestry drive my work, which emphasizes safety, efficiency, and staying updated with industry advancements. Additionally, I'm dedicated to sharing my expertise and promoting environmental awareness within the forestry community.


Leave your comment