How To Sharpen A Hedge Trimmer: A Complete Maintenance Guide
- February 19, 2024
- 4 comment
Maintaining a sharp hedge trimmer is essential for efficient and precise trimming of your garden. Sharpening your hedge trimmer not only improves its performance but also extends its lifespan. In this article, we provide a comprehensive guide on how to sharpen your hedge trimmer yourself, saving you money in the long run and allowing for the convenience of doing it on your schedule.

Taking your hedge trimmer to a professional for sharpening can cost between $45 and $65. However, by investing in the right tools and learning to sharpen the trimmer yourself, you’ll spend about $54 upfront but save significantly over time. This guide utilizes a Dremel Lite, a battery-powered tool perfect for this job, which costs around $54.
For occasional sharpening, a battery-powered Dremel Lite is sufficient, capable of sharpening a hedge trimmer nicely on a single charge. If you have multiple tools to sharpen or need to sharpen frequently, consider an electric Dremel for continuous power without the need for recharging. The Dremel Lite mentioned can be found at Home Depot and similar retailers, and expect about an hour for a full charge.
Necessary Attachments

When purchasing your Dremel, it will come with a basic pack of attachments. However, it is recommended to buy a specific wheel attachment for about $6. This attachment is designed for sharpening and fits the trimmer blades better, avoiding damage to adjacent teeth during the sharpening process.
Preparation and Sharpening Process
1. Align the Teeth
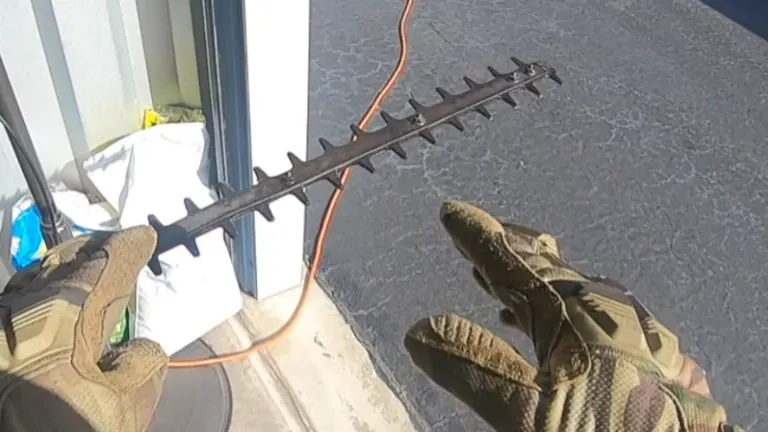
The first step is to ensure that the teeth of the hedge trimmer are correctly aligned. This is crucial because improperly overlapped teeth can lead to uneven wear and tear, potentially damaging the trimmer over time. Carefully adjust the teeth so they are properly positioned before proceeding with the sharpening process.
2. Switching Attachments
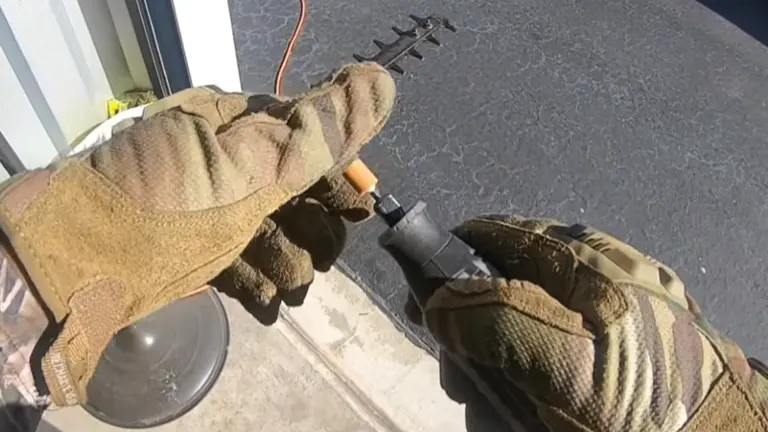
Once the teeth are aligned, you’ll need to switch the current attachment on your Dremel to the sharpening wheel. Press the lock button on your Dremel and twist off the attachment you’re currently using. Then, attach the sharpening wheel, making sure it’s securely locked in place. This ensures that you have the right tool for the job, designed specifically for sharpening the blades of your hedge trimmer.
3. Sharpening Technique

With the sharpening wheel attached, turn on your Dremel to its highest speed setting. Begin sliding the tool gently along each tooth edge of the hedge trimmer. It’s important not to apply too much pressure; let the Dremel do the work for you. The key here is to remove just enough material to sharpen the blade without compromising the blade’s integrity by removing too much.
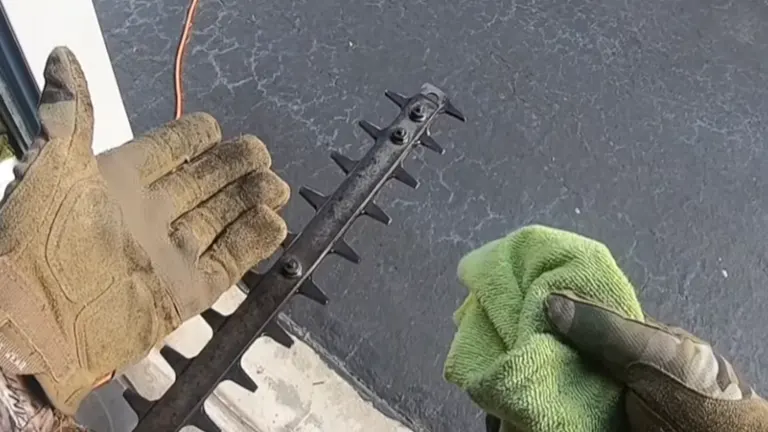
4. Cleaning After Sharpening
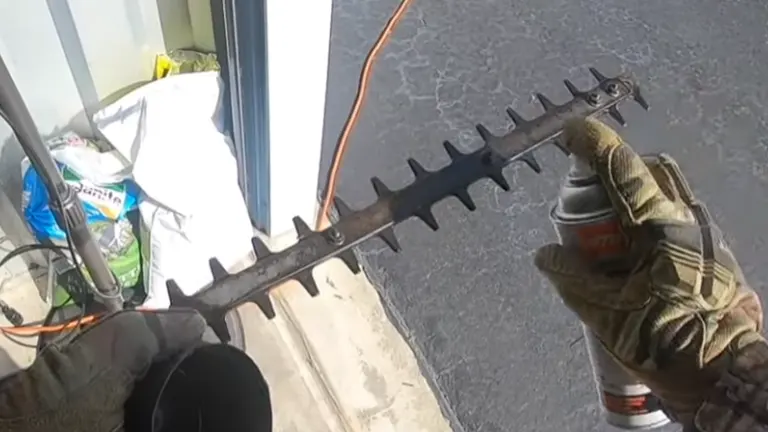
After sharpening, it’s essential to clean the blades thoroughly. Use a hedge trimmer blade cleaner, which can easily be found at a local dealer or online. This specialized cleaner is designed to remove resin, debris, and any other build-up on the blades, keeping them in optimal condition. Avoid using water for this step; simply spray the cleaner onto the blades and wipe them down with a rag or brush.
5. Frequency of Sharpening
How often you should sharpen your hedge trimmer depends on your usage frequency. If you find yourself using the trimmer frequently throughout the week, it’s advisable to sharpen it weekly. Regular sharpening ensures that the blades remain sharp, making your trimming work more efficient and reducing the strain on both the trimmer and the user.
Hedge Trimmer Maintenance: A Step-by-Step Guide
Maintaining your hedge trimmer regularly is crucial for ensuring its longevity, performance, and safety. Whether you have a petrol-driven, cordless, or electric hedge trimmer, certain maintenance steps are essential before and after each use, as well as periodically, to keep your tool in top condition. Here’s what you need to know about keeping your hedge trimmer well-maintained.
Why Regular Maintenance Is Essential
Every use subjects your hedge trimmer to stress, leading to wear and tear that, if ignored, could escalate into significant problems. Regular maintenance allows you to catch and address these issues early, preventing more severe damage and malfunctions. More importantly, a well-maintained tool is a safer tool. Routine inspections can reveal any damage that might impair safe operation, minimizing the risk of injury.
How to Correctly Maintain Your Hedge Trimmer
- Personal Protective Equipment: Wearing sturdy work gloves made from resilient material is a fundamental safety measure when performing maintenance on your hedge trimmer. These gloves protect your hands from sharp edges and moving parts, reducing the risk of cuts and injuries during the maintenance process.
- Before Starting Work: The maintenance routine begins with a comprehensive visual inspection of the hedge trimmer. This step involves checking the rubber coatings for any tears and assessing the tightness of the screws. Both loose and overly tight screws can negatively impact the performance of your hedge trimmer and should be adjusted to the correct tightness. Applying a bit of oil and anti-rust protection to the screws after adjustments ensures they remain in good condition. Additionally, evaluating the blades’ condition is crucial to determine whether they require sharpening. It’s also important to verify that all key functions of the hedge trimmer are operating correctly. For detailed guidance on assessing each component, refer to the operating manual of your tool.
- After Finishing Work: Once you’ve completed your work, cleaning the hedge trimmer, especially the cutting attachment, is essential. Using a damp cloth, wipe off any dirt and moisture from the machine and remove debris caught in the blades. Applying care oil or a maintenance spray to the blades is a critical next step. After application, running the hedge trimmer briefly helps distribute the oil evenly across the moving surfaces, ensuring the blades remain lubricated and function smoothly.
- Occasionally and As Required: Maintaining the sharpness of the cutting blades is necessary for the hedge trimmer’s effective operation. Sharpen the blades as required, and if they are damaged or worn beyond repair, replace them. Using a hedge trimmer with blunt blades can damage your plants, make the cutting task more challenging, and force the machine to work harder than necessary. Additionally, it’s important to keep the cold air intake free from debris to ensure optimal airflow within the machine. Regular checks and re-tightening of all accessible screws help maintain the hedge trimmer’s structural integrity and performance, preventing potential malfunctions during operation.
Petrol Hedge Trimmer Maintenance
Maintaining a petrol hedge trimmer involves several critical steps to ensure its efficient and safe operation. Before any maintenance activity, it’s crucial to set the carburetor to idle mode. This precaution prevents the cutting attachment from activating unexpectedly, which could lead to accidents. Regular inspection for fuel leaks is essential; any sign of fuel escape from the machine necessitates immediate attention to prevent potential hazards and ensure optimal performance. Spark plugs play a vital role in the smooth running of a petrol hedge trimmer and should be replaced after every 100 operating hours to maintain engine efficiency. Alongside this, the air filter requires regular cleaning to prevent clogging and ensure the engine runs smoothly. For those periods when the hedge trimmer won’t be in use for a while, it’s advisable to clean the fuel tank, empty it, and dispose of the old fuel properly to prevent residue buildup. Additionally, the pickup body in the fuel tank should be replaced annually, a service best performed by a dealer to guarantee professional handling and installation.
Cordless Hedge Trimmer Maintenance
Cordless hedge trimmers offer the convenience of mobility and ease of use, but they also require specific maintenance routines, particularly concerning their batteries and chargers. It’s important to regularly check the battery and charger LEDs to ensure they’re functioning correctly. Any abnormalities should prompt a quick consultation of the troubleshooting instructions provided in the operating manual to address and resolve issues promptly. After using the hedge trimmer, the battery should be removed, cleaned with a damp cloth, dried, and stored separately from the machine. To optimize battery life and performance, it should be charged to 40 to 60%. This level of charge is ideal for maintaining battery health during storage, especially if the tool will not be used for an extended period.
Electric Hedge Trimmer Maintenance
When it comes to electric hedge trimmers, safety and maintenance go hand in hand, especially given their reliance on a constant power supply. Before undertaking any form of maintenance, it’s imperative to disconnect the hedge trimmer from the power supply to eliminate the risk of electric shock or unintended operation. The power cord and plug require regular inspection for signs of wear or damage to the insulation. Any detected damage is a signal to stop using the device immediately and have the electrical components inspected and serviced by a qualified electrician to prevent accidents. The maintenance of an electric hedge trimmer also includes regular checks of the carbon brushes, which should be replaced after 100 operating hours to ensure efficient motor operation. Furthermore, a professional dealer should examine the gear unit and connecting rod every 50 operating hours to detect any wear or damage early and maintain the trimmer’s performance and longevity.
Conclusion
In summary, proper maintenance of your hedge trimmer, regardless of its type, is crucial for its efficiency, longevity, and the safety of its operator. Simple yet essential tasks like wearing protective gear, checking for wear, and keeping the blades sharp not only extend the life of the tool but also ensure a smoother, safer gardening experience. Regular upkeep minimizes the risk of malfunction, protects your investment, and contributes to the beauty of your garden. Adhering to a consistent maintenance routine transforms gardening from a potential chore into a rewarding endeavor, making every cut a step closer to realizing your garden’s full potential.
FAQs
- Can I use cooking oil as a substitute for care oil on my hedge trimmer blades?
While it’s not recommended due to its viscosity and potential to attract dirt and degrade under heat, in a pinch, light vegetable oil could be used temporarily. However, it’s best to use the appropriate care oil designed for outdoor power equipment to ensure longevity and proper function. - How often should I replace the spark plugs in a petrol hedge trimmer if I only use it seasonally?
Even with seasonal use, it’s a good practice to inspect the spark plugs annually and replace them if you notice any wear or after 100 operating hours. This ensures your hedge trimmer starts easily and runs smoothly when you need it. - Is it possible to sharpen hedge trimmer blades too much?
Yes, over-sharpening can reduce the blades’ thickness and compromise their strength, potentially leading to increased wear or damage during use. Sharpen only as necessary to maintain the edge without significantly removing material. - Can I leave the battery in my cordless hedge trimmer during the off-season?
It’s best to remove the battery when not in use for extended periods. Store the battery separately, charged to 40 to 60%, to preserve its lifespan and ensure it’s ready for use when you need it again. - What’s the risk of using a hedge trimmer with loose screws?
Loose screws can lead to improper alignment of the cutting blades, reduced cutting efficiency, and increased vibration during use. This not only makes the job harder but can also pose a safety risk. Regularly check and tighten screws as needed.
We hope you found these hedge trimmer maintenance tips helpful and maybe even a bit surprising! If you have any questions, unique tips of your own, or simply want to share your hedge trimming adventures, we’d love to hear from you in the comments below. Your insights not only enrich our community but also inspire fellow gardening enthusiasts. So, don’t hesitate to jump into the conversation and share your thoughts. Happy trimming!

David Murray
Forestry AuthorI'm David Murry, a forestry equipment specialist with a focus on chainsaw operation. With over 13 years of experience, I've honed my skills in operating and maintaining a wide range of machinery, from chainsaws to log splitters. My passion for the outdoors and commitment to sustainable forestry drive my work, which emphasizes safety, efficiency, and staying updated with industry advancements. Additionally, I'm dedicated to sharing my expertise and promoting environmental awareness within the forestry community.
4 comments
Very good information and in detail. Thanks
Blaine Hopkins
February 22, 2024 1:10 amWhat does "Align the Teeth" mean? And how do you do it?
Fred
February 21, 2024 9:49 pmGetting the teeth on your hedge trimmer just right is key to a neat and tidy garden. Before you start, make sure your trimmer is safely off and unplugged. Have a quick look at the blades and gently straighten any teeth that seem out of line. If they're really bent, you might want to let the pros handle it. Once everything looks good, pop the battery back in, give it a test run, and you're all set to make your hedge look fantastic! Remember, a little care goes a long way in keeping your trimmer cutting smoothly.


Very informative and well written article, I enjoyed it. Do you know if Stihl makes or will make a battery powered single sided hedger?
Fred Williams
February 25, 2024 4:23 am