Discover the Hidden Trimmer Trick Known by Few
- February 16, 2024
- 4 comment
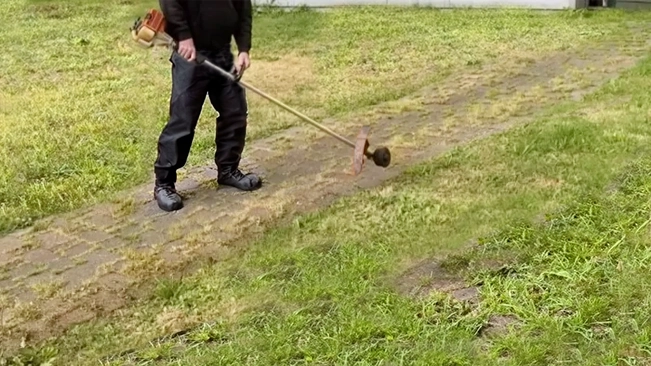
In the world of landscaping and garden maintenance, the art of edging—a technique that creates clean lines between a sidewalk and grass—can transform an ordinary lawn into a masterpiece of precision and beauty. However, achieving this with a string trimmer has often been a task fraught with difficulty and discomfort. That is, until now. We’re about to reveal a trimmer trick so ingenious, yet so simple, that only 1 in 5000 people know about it.
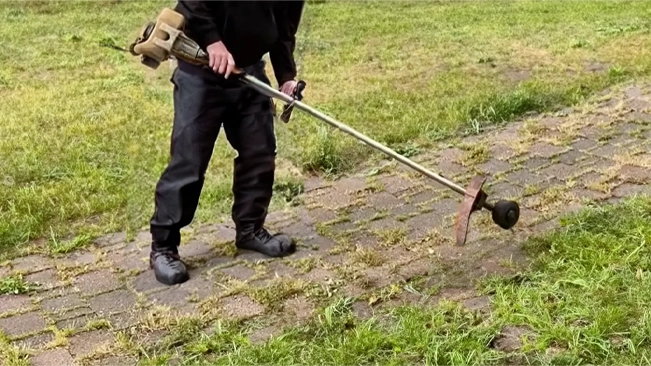
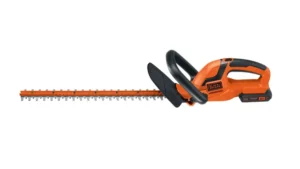
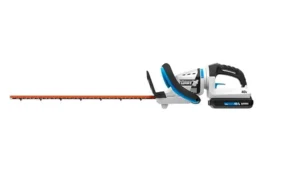
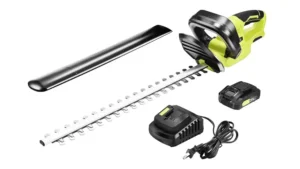
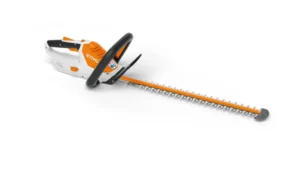
Edging with a string trimmer typically involves rotating the trimmer so that the string operates vertically instead of horizontally. Most individuals accomplish this by awkwardly flipping the trimmer on its side, a method that not only strains the wrists but also proves to be inefficient for longer tasks. Even professional landscapers, who might opt to hold the trimmer upside down for better alignment, find this method cumbersome and physically taxing over time.

But what if there was a way to edge comfortably, using your trimmer in its natural position, without the wrist strain and awkwardness? There is, and the secret lies in a simple adjustment to your trimmer that takes no more than 10 seconds to implement.
Revolutionize Your Lawn Edging with This Simple Trimmer Trick
Achieving a perfectly edged lawn has always been a bit of a chore, requiring precision, patience, and often, a bit of physical discomfort. However, a relatively unknown trimmer trick promises to change the game entirely, making edging not just easier, but also more efficient and comfortable. Here’s a step-by-step guide on how to implement this ingenious method:
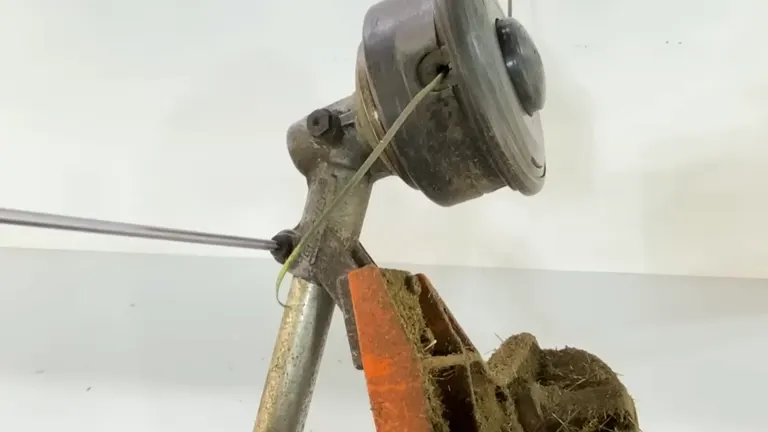
Step 1: Identify the Adjustment Mechanism
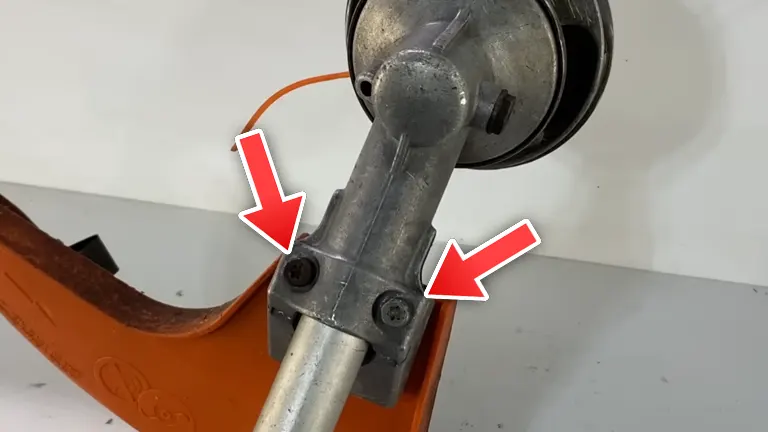
Start by examining the base of your trimmer, specifically where the gear head connects to the shaft. This connection is usually secured by one or two bolts. This mechanism is your key to an easier edging experience.
Step 2: Loosen the Bolt(s)
With the right tool in hand—an Allen wrench or an adjustable wrench, depending on what fits your trimmer model—proceed to slightly loosen the bolt(s) securing the gear head. There’s no need to take the whole assembly apart; just loosen it enough to allow the gear head to rotate.
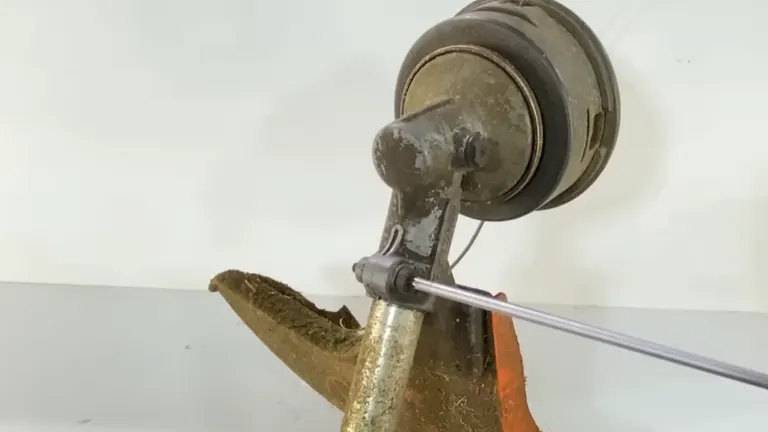
Step 3: Rotate the Gear Head
Now, gently rotate the gear head to a 90-degree angle from its original position. The direction of rotation depends on your dominant hand: to the left for right-handed individuals and to the right for those who are left-handed. This repositioning is crucial for vertical string alignment, which is optimal for edging.
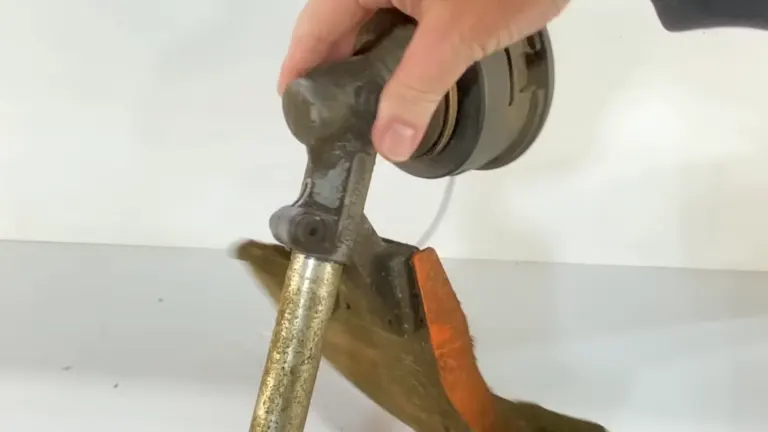
Step 4: Retighten the Bolt(s)
After adjusting the gear head to the desired angle, it’s important to retighten the bolt(s) firmly to secure everything in place. Your trimmer is now magically transformed and ready for more efficient edging.
Pro Tip: Quick-Release Mechanism
For those looking for an even smoother transition between trimming and edging, consider adding a quick-release mechanism to your trimmer. This can be achieved by installing a bolt, wing nut, and lock washer on the head, similar to a bicycle seat clamp’s toggle bolt. This modification allows for tool-free adjustments, saving time and hassle.
By following these simple steps, you can significantly enhance your lawn care routine, making edging a breeze. Whether you’re a seasoned gardener or a weekend lawn warrior, this trick could be the secret weapon you’ve been looking for. Try it out and enjoy the satisfaction of a beautifully edged lawn with minimal effort.
Troubleshooting Section
- If you find the bolt difficult to loosen, applying a penetrating oil, such as WD-40, can help. Allow it to soak in for a few minutes before attempting to loosen it again. For particularly stubborn bolts, use a pair of pliers for extra leverage, but exercise caution to avoid stripping the head of the bolt.
- It’s possible that not all trimmers have an adjustable gearhead. If you find that your model doesn’t support this adjustment, you might need to look into alternative edging tools or methods that are specifically designed for this purpose. Consulting the manufacturer’s manual or official website for model-specific guidance can also be beneficial.
- If the gear head tends to rotate back to its original position during use, it’s likely that it wasn’t tightened sufficiently. Make sure the bolt is fastened securely. Should the problem persist, inspect the bolt and the gear head for worn threads, which may necessitate replacement.
Maintenance Advice
- Make it a habit to check the tightness of the bolts periodically to ensure the gear head remains securely adjusted. The operational vibrations from the trimmer can cause bolts to loosen over time, so regular checks are crucial.
- Clean any grass clippings, dirt, or debris from your trimmer after each use, paying special attention to the area around the gear head and adjustment mechanism. Store your trimmer in a dry, sheltered location to prevent rust and other damage.
- Follow the manufacturer’s recommendations for lubricating the moving parts of your trimmer regularly. Proper lubrication keeps the trimmer running smoothly and extends its overall lifespan.
Testimonials Knowing This Trick
John Doe
“After adjusting my trimmer like suggested, edging has never been easier. I was skeptical at first, but the difference is night and day. Plus, no more wrist pain!”
Emma Smith
“I tried this trick on my old trimmer, and it works like a charm. I used to dread edging the lawn, but now it’s a quick and painless task. Highly recommend giving it a go!”
Alex Rodriguez
“This adjustment has been a game-changer for my landscaping business. Our team can now edge much more efficiently, saving time and reducing fatigue. Clients have noticed the improvement too!”
This trick not only enhances the functionality of your string trimmer but also promotes better ergonomics and comfort, allowing for extended edging tasks without the usual strain and discomfort. With this knowledge in hand, you’re now among the elite few who can edge like a professional, making your lawn the envy of the neighborhood. Remember, the best-kept secrets in gardening are those that elevate simplicity to an art form, and this trimmer trick does exactly that.
FAQs
- Why is this trimmer trick considered a secret?
It’s labeled a “secret” because, despite its simplicity and effectiveness, very few people are aware of it or utilize it. This technique, known by only 1 in 5000 people, allows for easier and more efficient edging without the physical strain typically associated with traditional methods. - Can this trick be applied to any string trimmer?
While this trick is applicable to a wide range of string trimmers, it’s essential to check if your trimmer’s gear head is adjustable. Most trimmers with a bolt mechanism securing the gear head to the shaft can be adjusted. However, the design might vary, so examining your tool before proceeding is recommended. - Is it safe to adjust the gear head of the trimmer myself?
Yes, it’s safe as long as you follow the instructions carefully and ensure the gearhead is securely retightened after adjustment. If you’re uncertain or uncomfortable making the adjustment, consult the trimmer’s manual or a professional. - How does this trick benefit my edging work?
By aligning the string vertically in a more natural and comfortable position, you can achieve precise edges with less effort and strain on your body. This method allows for extended edging sessions without the discomfort typically associated with unconventional trimmer handling techniques. - Will adjusting the gear head affect the trimmer’s performance?
No, the adjustment doesn’t impact the trimmer’s overall performance. It merely changes the orientation of the cutting line to suit edging tasks better. Ensure the gear head is securely fastened after adjustment to maintain optimal performance. - What if my trimmer only has one bolt? Is the trick still applicable?
Absolutely! The trick can be applied whether your trimmer has one or two bolts securing the gear head. The key is to loosen the bolt(s) enough to allow rotation and then retighten securely after adjusting the head’s position. - Are there any modifications I can make to switch between trimming and edging more easily?
Yes, for an even more convenient switch between modes, you can modify your trimmer with a quick-release mechanism, such as a toggle bolt from a bicycle seat clamp. This allows you to adjust the head’s position without tools, making the process quicker and more efficient. - How can I ensure that I’ve rotated the gear head to the correct angle for edging?
The ideal angle for edging is 90 degrees from the trimmer’s standard operating position. This places the string vertically for optimal edging performance. Adjusting to this angle should make the transition to edging feel natural and significantly improve the ease of creating clean lines. - What should I do if my trimmer does not have an adjustable gear head?
If your trimmer’s gear head isn’t adjustable, you might need to rely on traditional methods for edging or consider investing in a trimmer with an adjustable head for future convenience. There are also specialized edging tools designed specifically for this task that might be a worthy addition to your toolset. - Can adjusting the gear head void my trimmer’s warranty?
It’s important to check your trimmer’s warranty terms before making any adjustments. While this simple modification is unlikely to void a warranty, it’s best to consult your manual or contact the manufacturer to ensure compliance with their policies.
We’ve just shared a trimmer trick that could revolutionize the way you edge your lawn, and we’re eager to hear what you think! Have you tried this method before, or do you have any other game-changing gardening tips? Drop your thoughts and experiences in the comments below. Sharing is caring, so if you find this trick as neat as we do, please pass it on to your fellow gardening friends. Let’s keep those edges sharp and our community even sharper! Happy trimming!

David Murray
Forestry AuthorI'm David Murry, a forestry equipment specialist with a focus on chainsaw operation. With over 13 years of experience, I've honed my skills in operating and maintaining a wide range of machinery, from chainsaws to log splitters. My passion for the outdoors and commitment to sustainable forestry drive my work, which emphasizes safety, efficiency, and staying updated with industry advancements. Additionally, I'm dedicated to sharing my expertise and promoting environmental awareness within the forestry community.
4 comments
That's old ,us Boyz being doin edgings that way for year's
Sean
February 18, 2024 1:14 pmI've known this trick for 20 years and a few grass cutting crew worker's know it too, at least in Michigan we know the "Trick". Where you from??
Michael
February 17, 2024 5:47 pmOr you could just buy a trimmer with a rotating head to start with.


Don't do this. Simply turn\rotate your trimmer sideways. Its that simple. No need to take the head off and move it to a different position. Those of us who do this for a living know there is no need to move the head.
MARK LANE REAGAN
February 18, 2024 3:35 pm