How to Plant Okra Seeds: A Step-by-Step Growing Guide
- February 20, 2024
- 2 comment
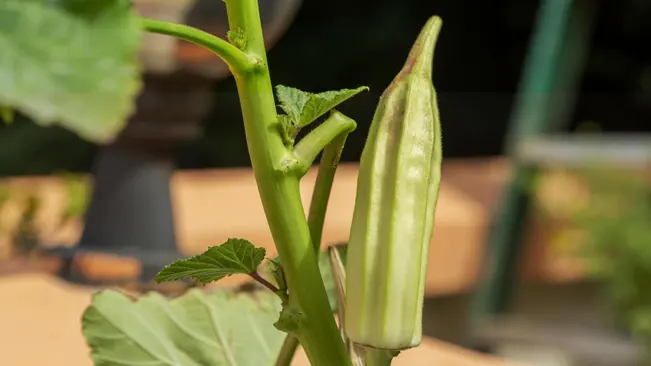
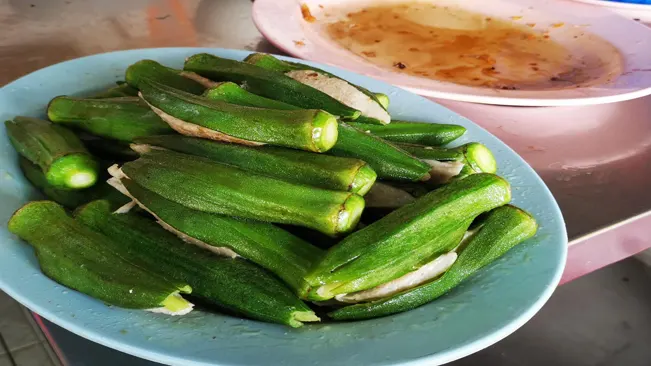
Okra, also known as “lady’s finger,” is a warm-season vegetable popular in many cuisines around the world. Known for its edible green seed pods, okra can be a delightful addition to your garden. This article will guide you through the process of planting okra seeds for a bountiful harvest.
Nutritional Benefits of Okra
| Benefit | Description |
|---|---|
| Rich in Nutrients | Okra is a low-calorie vegetable rich in vitamins A, C, and K, and contains significant amounts of magnesium, folate, and fiber. |
| Dietary Fiber | High in dietary fiber, okra helps with digestion and maintains gut health. It’s particularly beneficial for improving bowel movements and reducing the risk of gastrointestinal issues. |
| Heart Health | Okra contains antioxidants and fiber, which can help lower cholesterol levels, thus reducing the risk of heart diseases. |
| Blood Sugar Control | The fiber content in okra aids in regulating blood sugar levels, making it beneficial for managing diabetes. |
| Vision Health | With a good amount of Vitamin A and beta carotenes, okra contributes to better eye health and may help prevent eye-related diseases. |
| Immune Booster | The high Vitamin C content in okra strengthens the immune system, helping the body fend off various infections and illnesses. |
| Pregnancy Aid | Okra is a good source of folate, a crucial nutrient for pregnant women to help in the development of the fetus and reduce the risk of neural tube defects. |
| Bone Strength | The Vitamin K and calcium present in okra are essential for bone health, aiding in bone formation and strengthening. |
| Skin Health | Okra’s antioxidants and vitamins contribute to healthier skin, potentially aiding in reducing acne and other skin conditions. |
| Anti-Cancer Properties | Some studies suggest that the antioxidants and fiber in okra may have cancer-fighting properties, although more research is needed in this area. |
Choosing the Right Time
Best Season: Late Spring or Early Summer
- Soil Temperature: The key factor for planting okra is soil temperature. The seeds require warm soil to germinate effectively. Ideally, the soil temperature should be at least 65°F (18°C), but some varieties may prefer even warmer soil, around 70°F (21°C).
- Air Temperature: Along with soil warmth, the air temperature should also be consistently warm, with both day and night temperatures ideally staying above 60°F (15°C).
Frost-Free Days: Avoiding Cold Damage
- Frost Sensitivity: Okra plants are extremely sensitive to frost and cold temperatures. Frost can damage or kill young okra plants.
- Last Frost Date: It’s crucial to know the last frost date in your area. Planting should be scheduled a few weeks after this date to ensure that the risk of frost has passed. This date varies depending on your geographical location.
- Microclimate Considerations: Even within a single garden, microclimates can exist. Avoid planting okra in low-lying areas where cold air settles.
Selecting a Suitable Location
Sunlight Requirements
Okra thrives in environments that offer abundant sunlight. This heat-loving plant needs full sun exposure to grow properly and produce a healthy yield. Here’s what you need to know:
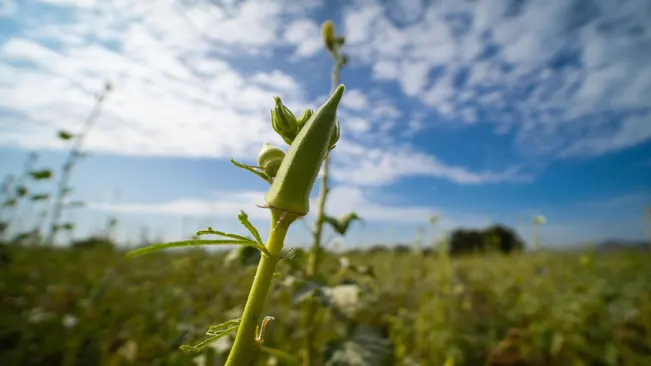
- Duration of Sunlight: Ensure that the chosen location receives at least 6-8 hours of direct sunlight every day. More sunlight correlates with better growth and more bountiful harvests.
- Intensity of Sunlight: In regions with extremely hot climates, some afternoon shade can be beneficial to prevent overheating.
- Monitoring Sunlight: Observe the chosen area over a few days to ensure consistent sun exposure, especially during the peak growing season.
Soil Requirements
The quality and composition of the soil are crucial for successful okra cultivation. Here are the key soil factors to consider:
- Soil Type: Okra prefers well-drained soil as it does not tolerate waterlogged conditions. Sandy loam or loamy sand soils are ideal.
- Soil pH: The optimal pH range for okra is between 6.0 and 7.5, which is slightly acidic to neutral. Testing your soil’s pH can help you adjust it accordingly.
- Improving Soil Fertility: To enhance the fertility of your soil:
- Organic Matter: Incorporate compost or well-rotted manure into the soil. This not only adds essential nutrients but also improves soil structure and drainage.
- Compost Benefits: Adding compost helps in retaining moisture during dry conditions and provides a slow-release source of nutrients.
- Mulching: Applying a layer of organic mulch can conserve moisture, regulate soil temperature, and reduce weed growth.
- Soil Preparation: Before planting, loosen the soil to a depth of at least 12 inches to allow for proper root growth. Remove any rocks, roots, or debris that could obstruct the growth of okra roots.
Preparing the Soil
Tilling the Soil
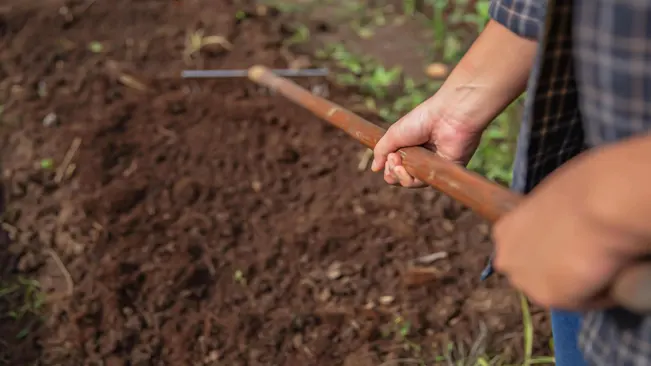
- Objective: The primary purpose of tilling is to loosen the soil. This helps in improving soil aeration and drainage, which are crucial for the healthy growth of okra roots.
- Depth: Aim for a depth of 10-12 inches. This depth is ideal for allowing okra roots to penetrate deeply and easily, which is vital for their growth and stability.
- Tools: You can use a garden fork or a rototiller, depending on the size of your garden. For smaller gardens, a garden fork might suffice, while a rototiller can make the job easier in larger areas.
- Timing: Till the soil when it is moist but not wet. Tilling wet soil can lead to compaction, and dry soil can be hard to work with.
- Weed Removal: While tilling, remove any weeds, stones, or debris that can hinder the growth of okra plants.
Nutrient Addition
- Soil Testing: Before adding any fertilizers, it’s advisable to conduct a soil test. This test will reveal the nutrient content and pH of your soil, allowing you to understand what amendments are needed.
- Fertilizers: Based on the soil test results, you might need to add fertilizers. Okra plants typically benefit from a balanced fertilizer (like a 10-10-10 NPK formula) that provides equal parts nitrogen, phosphorus, and potassium.
- Organic Matter: Adding organic matter, such as compost or well-rotted manure, can significantly improve soil fertility. Organic matter improves soil structure, nutrient content, and water retention capabilities.
- pH Level: Okra prefers a neutral pH (around 6.5 to 7.0). If your soil is too acidic or alkaline, you may need to adjust it. Lime can be used to raise the pH of acidic soils, while sulfur can lower the pH of alkaline soils.
- Incorporating Nutrients: Mix the fertilizers and organic matter evenly into the soil. This can be done during the tilling process or by raking the soil surface.
- Consistency: Aim for a uniform, crumbly, and fine soil texture. Large clods or compacted soil can hinder seed germination and root growth.
Planting the Seeds
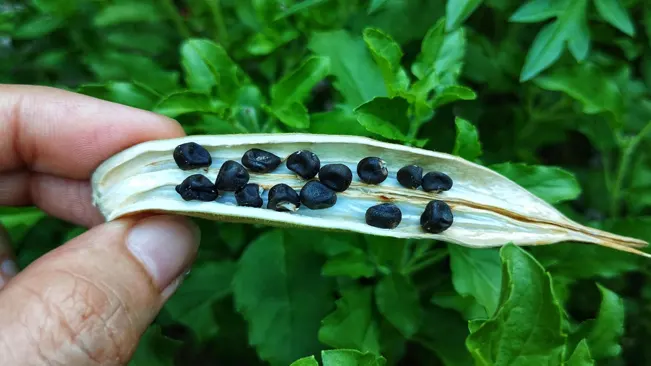
Seed Depth
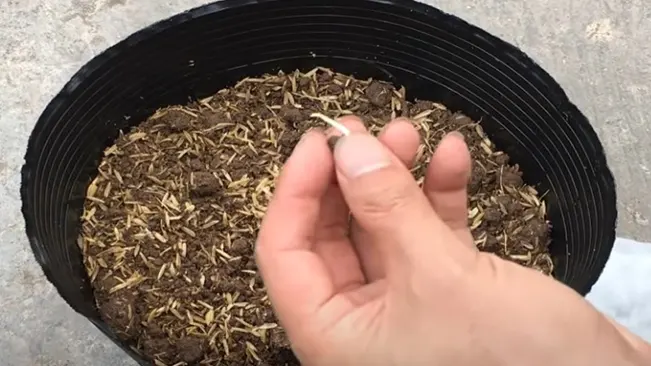
- Why Depth Matters: Planting seeds at the correct depth is crucial for optimal germination. Okra seeds should be planted ½ to 1 inch deep. This depth ensures that the seeds have enough soil cover to retain moisture, but are not so deep that they struggle to emerge.
- Technique: Make a small hole or furrow with your finger or a tool, place the seed, and then gently cover it with soil.
Spacing
- Individual Spacing: Space the okra seeds 2-3 inches apart. This initial close spacing helps in case some seeds do not germinate.
- Row Spacing: Keep the rows approximately 3 feet apart. This wider spacing between rows allows for better air circulation, reduces competition for nutrients, and provides room for you to walk between rows for maintenance and harvesting.
- Why Spacing is Important: Proper spacing helps in reducing the risk of disease, improves sun exposure, and aids in the healthy growth of plants.
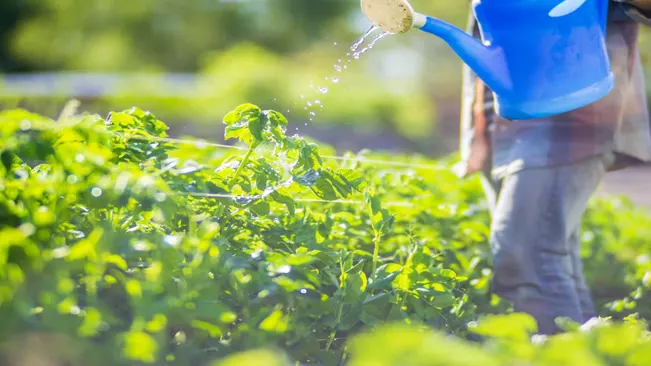
Watering After Planting
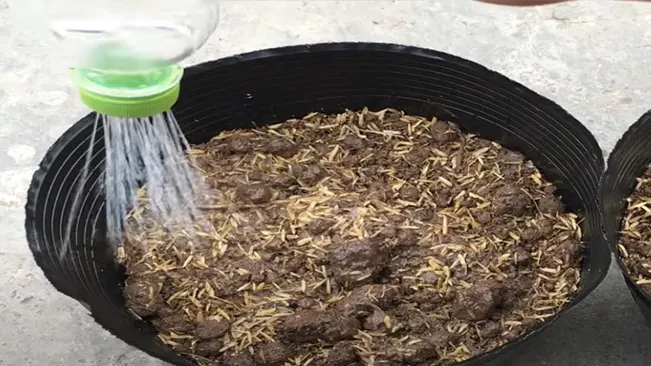
- Initial Watering: After planting the seeds, water the soil gently but thoroughly. The goal is to moisten the soil without disturbing the seeds.
- Watering Technique: Use a fine spray or a watering can with a rose attachment to avoid displacing the seeds or creating a crust on the soil surface.
- Maintaining Moisture: Keep the soil consistently moist but not waterlogged until germination occurs. This may require watering once or twice a day, depending on the weather conditions.
- Signs of Germination: You should see sprouts in 5-10 days. Once the seedlings appear, you can reduce watering slightly, allowing the surface of the soil to dry out slightly between waterings.
Caring for the Okra Plants
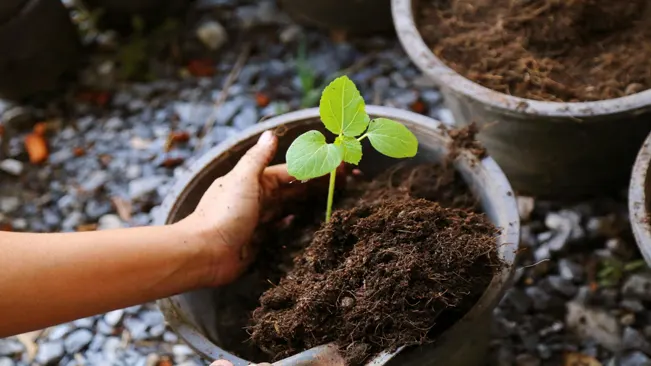
Thinning
- When to Thin: Start thinning when the okra seedlings are about 3 to 4 inches tall.
- How to Thin: Carefully pull out the smaller or weaker seedlings, leaving the strongest ones in place. Aim for a spacing of about 12 to 18 inches between each plant. This spacing allows for adequate air circulation and sunlight exposure, reducing the risk of diseases and promoting healthy growth.
- Disposing of Seedlings: The removed seedlings can be composted or, if they are healthy, transplanted to another area of your garden.
Watering
- Frequency and Amount: Water the plants deeply once a week, providing enough water to soak the soil around the roots. The goal is to maintain a consistent moisture level in the soil.
- Signs of Water Stress: Keep an eye out for signs of water stress. If the leaves wilt or the soil feels dry at a depth of an inch, it’s time to water.
- Watering Technique: Water at the base of the plants to avoid wetting the foliage, which can lead to fungal diseases. Drip irrigation or a soaker hose is ideal for this.
Weeding
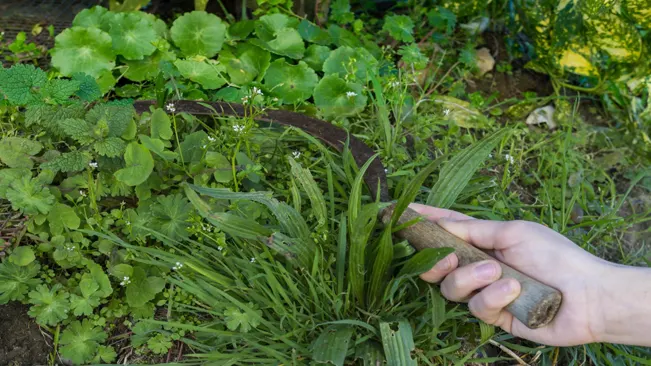
- Competition for Resources: Weeds compete with okra plants for water, nutrients, and light. Removing them ensures that your okra gets the resources it needs.
- Pest and Disease Control: Weeds can harbor pests and diseases that may transfer to your okra plants.
- How to Weed: Regularly check for and manually remove weeds. Be gentle around the okra plants to avoid disturbing their roots. Mulching around the plants can help suppress weed growth and retain soil moisture.
Fertilizing
Importance of Balanced Fertilizer
- Nutrient Needs: Okra requires nitrogen (N), phosphorus (P), and potassium (K) in balanced proportions, often found in fertilizers labeled as 10-10-10 or 20-20-20.
- Role of Each Nutrient:
- Nitrogen: For leaf and stem growth; too much leads to more leaves, fewer pods.
- Phosphorus: Crucial for root development and flowering, enhancing pod production.
- Potassium: Boosts overall plant health and disease resistance.
Fertilization Schedule
- Initial Application: Apply balanced fertilizer when planting to boost seedling growth.
- Ongoing Care: Fertilize once a month after planting, adjusting as needed based on plant health.
- Soil Testing: Conduct soil tests for tailored fertilization.
Application Method
- Side-Dressing: Spread fertilizer about 6 inches from okra stems to avoid root burn.
- Watering Post-Fertilization: Water plants after fertilizing to help nutrient absorption.
Organic Options
- Compost and Manure: Great alternatives or supplements, improving soil health.
- Organic Fertilizers: Commercially available, suitable for vegetable gardens.
Signs of Over-Fertilization
- Excessive Leaf Growth: Indicates too much nitrogen.
- Salt Buildup: Can damage plant roots, visible in the soil.
Adjusting Fertilization
- Monitoring Plant Health: Look for signs like yellowing leaves or poor pod development to adjust fertilization practices.
Dealing with Pests and Diseases
Common Pests in Okra
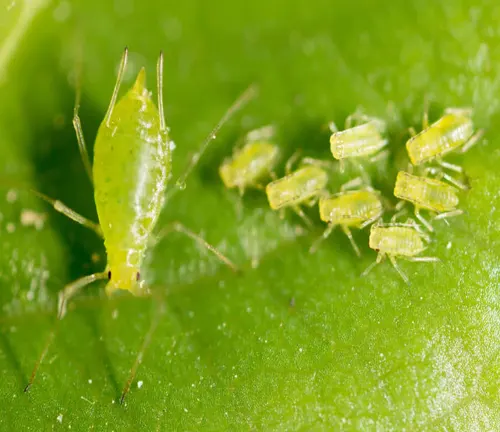
Aphids
These small, soft-bodied insects cluster on the undersides of leaves, sucking the sap and weakening the plant. They can also spread diseases.
- Control Measures:
Use a strong water spray to dislodge aphids from plants. Apply insecticidal soap or neem oil to control severe infestations. Encourage natural predators like ladybugs and lacewings in your garden.
Flea Beetles
These tiny beetles jump like fleas and chew small holes in the leaves, which can stunt the growth of young okra plants.
- Control Measures:
Use floating row covers to protect young plants. Apply diatomaceous earth around the base of plants. Use pyrethrin-based insecticides as a last resort.

Disease Prevention in Okra
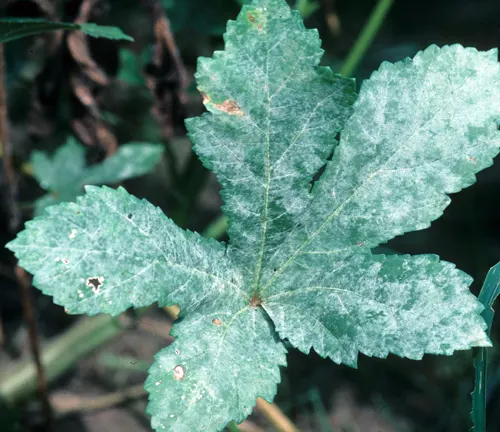
Powdery Mildew
A common fungal disease that appears as white powdery spots on leaves and stems.
Preventive Measures:
- Ensure good air circulation by spacing plants properly.
- Avoid overhead watering to keep foliage dry.
- Apply sulfur or potassium bicarbonate sprays at the first sign of infection.
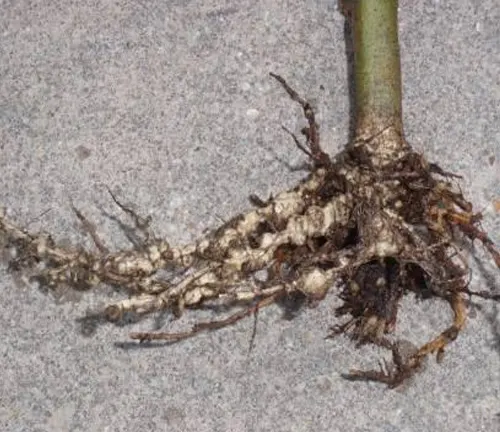
Root Rot
Caused by overly wet soil conditions, leading to decay of the roots.
Preventive Measures:
- Ensure well-drained soil.
- Water plants at the base, avoiding excess moisture around the stem.
- Rotate crops each year to prevent soil-borne diseases.
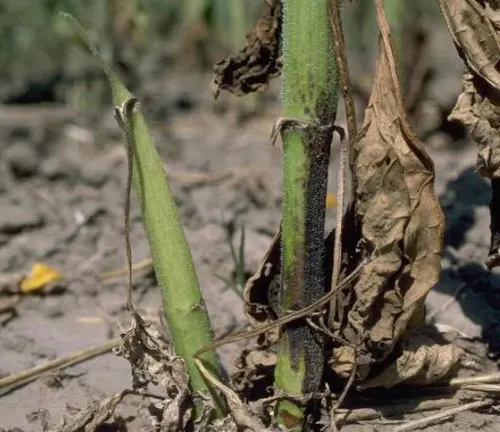
Verticillium Wilt
A soil-borne fungal disease that causes yellowing and wilting of leaves.
Preventive Measures:
- Choose resistant varieties of okra if available.
- Maintain a balanced soil pH and nutrient levels.
- Remove and destroy affected plants to prevent spread.
Harvesting
Knowing When to Harvest Okra
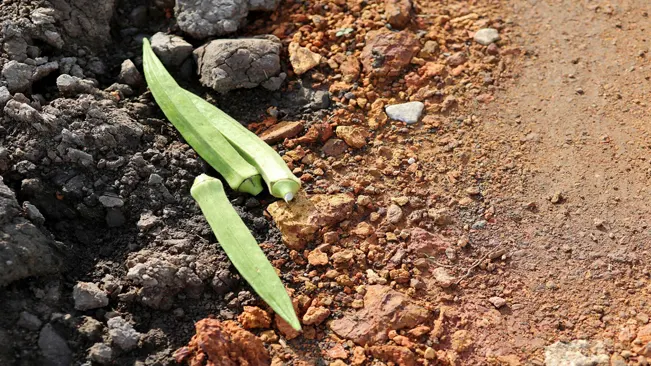
Harvesting okra at the right time is crucial for both the taste and texture of the pods. Here are key indicators for the ideal harvest time:
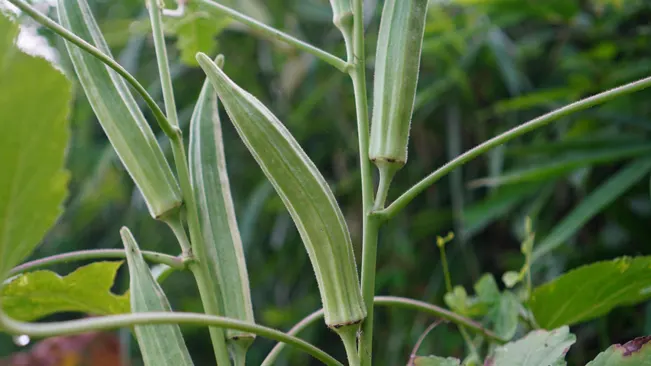
- Size of Pods: The optimal length for okra pods is typically between 2-3 inches. At this size, the pods are tender and not too fibrous or woody.
- Feel of the Pods: The pods should feel soft and easy to snap or cut. If they are hard or tough, they have likely matured too much and won’t be as palatable.
- Appearance: Look for bright green, smooth pods. Avoid those that have started to brown or have significant blemishes.
Frequent Harvesting for Increased Production
Okra plants are prolific producers under the right conditions. Regular harvesting plays a significant role in this:
- Harvesting Frequency: Okra grows quickly in warm conditions, so check your plants every day or every other day. Pods can go from the perfect size to too large in just a day or two.
- Encouraging More Growth: Each time you harvest a pod, it stimulates the plant to produce more. Regular harvesting thus results in a more abundant yield over the season.
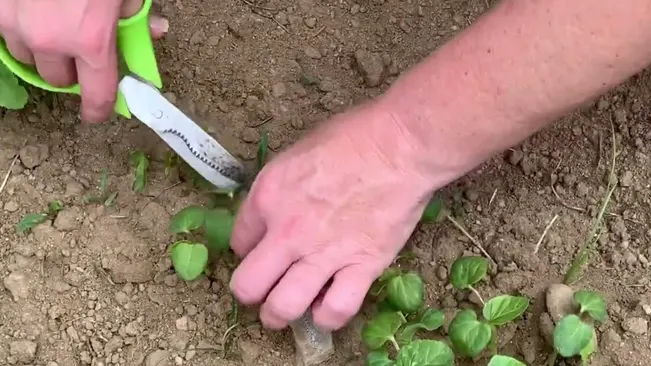
Harvesting Techniques
Proper technique when harvesting okra can make a significant difference:
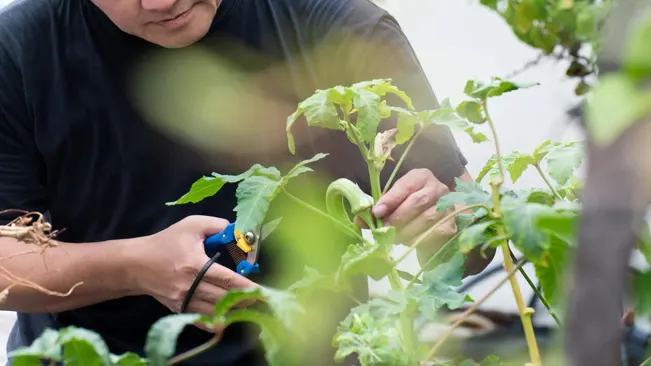
- Cutting vs. Pulling: Use a sharp knife or scissors to cut the stem just above the cap of the pod. Avoid pulling the pods off, as this can damage the plant.
- Handling with Care: Okra pods can be bruised easily, so handle them gently. Bruising can lead to quicker spoilage.
Safety and Comfort
Okra plants can be a bit prickly and some people have a skin reaction to them:
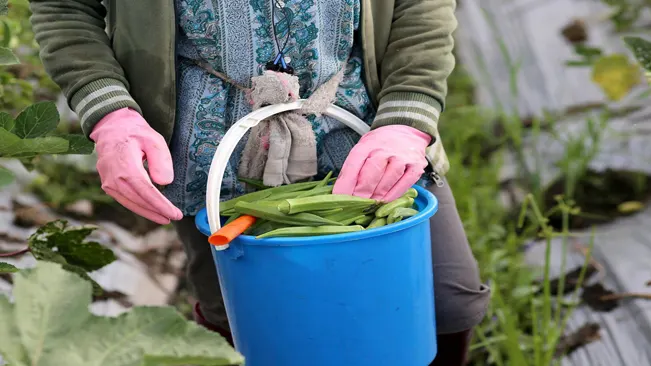
- Wear Gloves and Long Sleeves: To avoid irritation, it’s a good idea to wear gloves and long sleeves when harvesting okra.
- Harvesting in Cooler Parts of the Day: Early morning or late evening is often the best time to harvest, especially in very hot climates.
Post-Harvest Handling
Once harvested, proper handling is key to preserving the quality of okra:
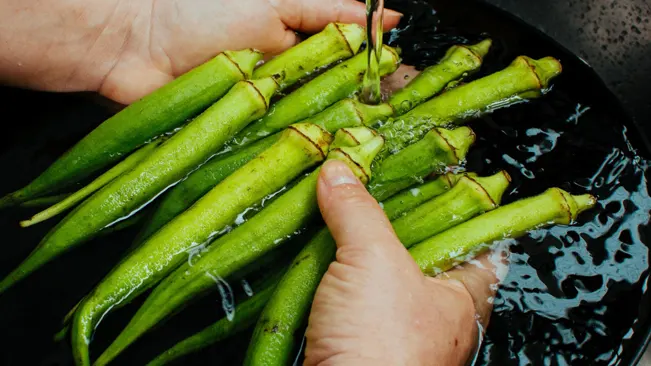
- Cooling Down: Okra is best kept cool after harvesting to preserve its freshness. If you’re not using it right away, store it in the refrigerator.
- Gentle Washing: Wash okra gently under cool water and dry it before storing or using.
Utilization and Preservation
- Cooking Fresh: Fresh okra can be used in a variety of dishes, from stews to stir-fries, or can be breaded and fried.
- Preservation: If you have more okra than you can use, it can be pickled, canned, or frozen for later use.
Conclusion
Planting okra seeds is a rewarding endeavor for any gardener looking to add this versatile and heat-loving vegetable to their garden. Key to success includes planting in warm soil, ensuring ample sunlight, and providing consistent moisture. Regular harvesting when pods are young and tender encourages continued production and ensures the best flavor. With proper care, okra plants can yield an abundant and delicious harvest throughout the growing season.
FAQs (Frequently Asked Questions)
- What is the best time to plant okra seeds?
Plant okra seeds in late spring or early summer when the soil temperature has warmed up to at least 65°F (18°C). - How deep should I plant okra seeds?
Plant okra seeds about ½ to 1 inch deep in the soil. - What kind of soil is best for okra?
Okra thrives in well-drained, fertile soil with a neutral pH. Enrich the soil with compost or well-rotted manure for best results. - How much sunlight does okra need?
Okra needs full sunlight, ideally 6-8 hours of direct sunlight each day. - How far apart should I space okra seeds?
Space the seeds 2-3 inches apart in rows, with rows spaced about 3 feet apart. - Do I need to water okra regularly?
Yes, okra plants need consistent moisture, especially during flowering and pod development. However, avoid overwatering, as this can lead to root rot. - When should I thin okra seedlings?
Thin okra seedlings when they are a few inches tall, spacing them about 12-18 inches apart. - What are common pests and diseases that affect okra?
Common pests include aphids and flea beetles, while diseases like powdery mildew and root rot can occur, especially in overly moist conditions. - How do I fertilize okra plants?
Use a balanced fertilizer once a month or according to the soil test recommendations. Avoid over-fertilizing, as too much nitrogen can reduce pod production. - When is okra ready to be harvested?
Okra is ready to harvest when the pods are 2-3 inches long and feel tender. It’s important to harvest regularly, as pods quickly become tough and woody if left on the plant too long.

Kristine Moore
Forestry AuthorI'm Kristine Moore, a seasoned garden landscaping professional with over 30 years of experience. My extensive career has been dedicated to transforming outdoor spaces into stunning, sustainable landscapes. With a deep understanding of horticulture, design principles, and environmental stewardship, I have become a respected figure in the field, known for creating harmonious, visually appealing, and eco-friendly gardens. My commitment to excellence and continuous learning in landscaping trends and techniques has solidified my reputation as an expert in garden design and implementation.
2 comments
Thankyou good artical


Excellent comprehensive guide
Nokuzola Tetani
February 28, 2024 11:03 am