How to Build Bunk Beds 2024
- September 25, 2023
- 0 comment
Space-saving, practical, and a beloved childhood memory for many – bunk beds are an excellent addition to any child’s room or guest bedroom. While you might be tempted to buy a ready-made one, building your own can be both fulfilling and tailored to your precise needs and aesthetics. Let’s delve into the art and craft of constructing bunk beds.
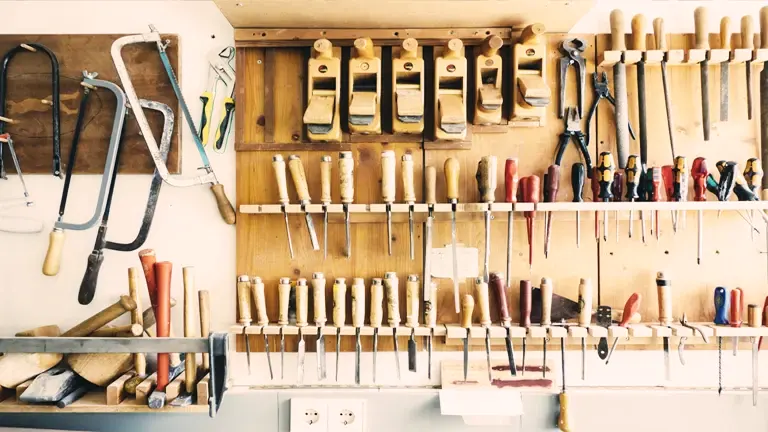
1. Materials and Tools You’ll Need
Before embarking on your DIY journey to construct a bunk bed, it’s essential to gather all the necessary materials and tools. Having everything at hand not only streamlines the process but also ensures safety and efficiency. Here’s a comprehensive list to get you started:
Materials:
- Two Twin Mattresses: These are the foundation of your bunk bed project, determining the size and fit of your structure.
- High-Quality Wood: Pine is an affordable and versatile option, while oak offers greater strength and durability. You’ll use this for the bed frames, ladder, and support slats.
- Screws and Bolts: Ensure these are robust and rust-proof, as they will bear the weight and provide stability. Different lengths might be required for various parts of the bunk bed.
- Wood Glue: For reinforcing joints and ensuring a sturdier build.
- Sandpaper: Coarse grit is perfect for initial sanding and removing rough patches, while fine grit will give the wood a smooth finish.
- Paint or Wood Stain (Optional): To add a touch of color or enhance the wood’s natural grain.
- Wood Sealant: To protect your creation from moisture and wear, and to make it easier to clean.
Tools:
- Measuring Tape: Precision is key. Every inch and centimeter matters when it comes to ensuring a snug fit and stability.
- Saw: A circular saw is great for straight cuts, while a miter saw can handle angles with precision, ideal for ladder steps and frame corners.
- Drill with Drill Bits: Vital for creating holes for your screws and bolts. Different sizes will be needed based on your fasteners.
- Carpenter’s Square: This ensures your corners are true 90-degree angles, crucial for stability and a professional finish.
- Wood Clamps: Helpful to hold pieces together, especially when gluing or drilling.
- Level: To make sure every part of your bunk bed is perfectly horizontal. This is crucial for both safety and aesthetics.
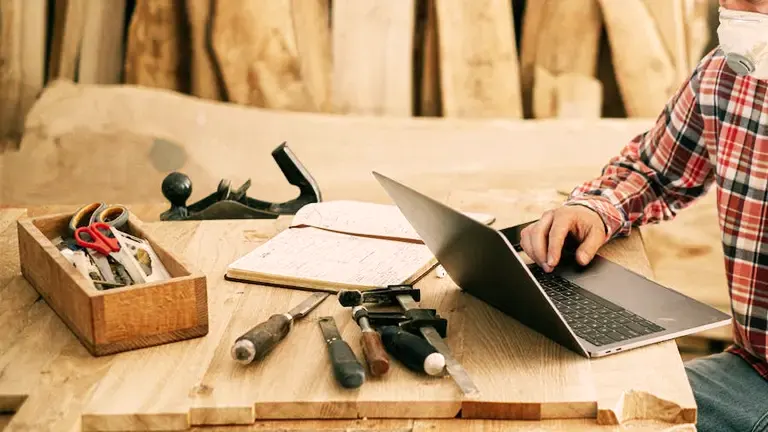
2. Plan and Measure
Building a bunk bed is much like building a story. The foundation has to be robust, and the narrative should be clear. The ‘Plan and Measure’ stage is where you chalk out the blueprint of your bunk bed’s story.
Understanding Dimensions
- Mattress Size: While the standard twin mattresses measure 75” x 39”, don’t forget about the thickness. Depending on the type of mattress – foam, innerspring, hybrid – the thickness can vary.
- Room Size: Account for the entire room’s dimensions. Ensure there’s enough headroom for the top bunk dweller. Check for ceiling fans, light fixtures, and other potential hazards.
- Safety Space: The top bunk should have a significant gap from the ceiling to prevent any potential head bumps. A minimum of 30-36 inches between the top mattress and the ceiling is generally recommended.
Incorporating Extras
- Frame Space: Your bed frame will add both length and width to the bunk. Depending on the thickness of the wood or material you’re using, allow an extra 2-4 inches on each side.
- Ladder Width: Ladders can be built-in or detachable. A good rule of thumb is to allocate 15-18 inches of width for the ladder.
- Guardrails: Vital for safety on the top bunk, these should rise at least 5 inches above the mattress, but more is always better. They can be continuous or segmented, but ensure they’re sturdy.
Drafting the Blueprint
Once you’ve decided on the overall dimensions, draw a sketch of the bunk bed from multiple angles. This doesn’t just help in visualizing the end product, but it’s also a reference point if you’re unsure during the construction phase.
- Annotations: Mark the precise measurements on your sketch. This will act as a quick reference during cuts and assembly.
- Modifications: As you’re custom-building this, you have the freedom to add storage spaces like drawers beneath the bottom bunk or shelves integrated into the headboards.
The saying “measure twice, cut once” holds particularly true here. Time invested in meticulous planning will save you hours of potential rework later and ensure a safe, snug bunk bed. Embrace this phase; it’s where your bunk bed starts taking shape on paper before it does in wood.
3. Start with the Frames
The frames are the skeletal structure of your bunk bed, offering both support and aesthetics. Properly building them is pivotal to ensure durability and safety.
Headboard and Footboard Assembly
Materials and Measurements:
- Wooden Posts: These will form the pillars of your bunk bed. You’ll need four sturdy pieces for each bunk.
- Height Considerations: For the bottom bunk, a common height range is between 12-15 inches. For the top bunk, considering ladder placement and safety railings, aim for a height of 60-70 inches, or whatever feels comfortable based on your room’s ceiling height.
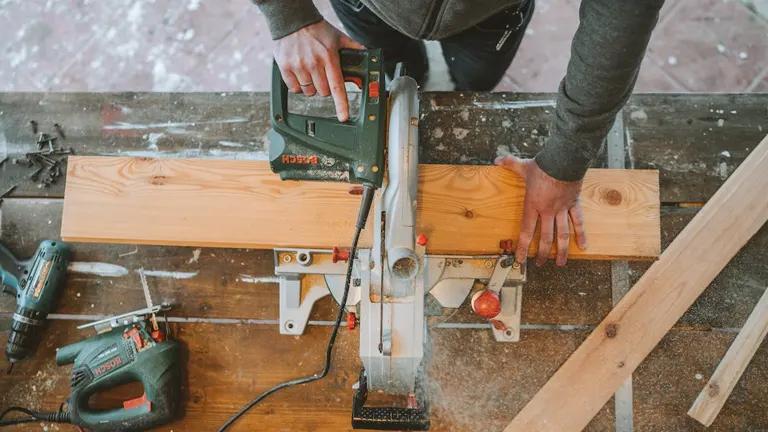
Assembly Process:
- Cutting: Once you’ve decided on the heights, cut the four posts accurately.
- Positioning: The headboard and footboard posts will be connected by horizontal boards at the top and bottom, forming rectangles. Ensure they are squared off perfectly to prevent any skewing.
Side Rails and Slats: Creating a Sturdy Base
Materials and Measurements:
- Side Rails: These are long horizontal pieces running the length of the mattress. Their primary purpose is to hold the mattress and the individual sleeping on it. Given their role, they need to be robust.
- Slats: These are the horizontal pieces that span the width of the bed, offering support to the mattress. Depending on the width of your bunk, you’ll need a certain number of these, spaced evenly.
Assembly Process:
- Cutting Side Rails: Based on the width of your mattress and the thickness of your posts, measure and cut two side rails for each bunk. Ensure they are equal in length.
- Positioning Side Rails: These will connect the headboard and footboard on each side. Make sure they are level, parallel to the floor, and at the correct height to support the mattress.
- Slats Installation: Once the side rails are in place, it’s time for the slats. Space them out evenly along the width of the bed. For added support, aim for a spacing of 2-3 inches between each slat.
Pro Tip: Before finalizing the slats, lay the mattress on the frame to see how it fits. Too much space between slats can cause the mattress to sag or wear unevenly over time.
Starting with the frames is crucial. It’s like laying the foundation for a house. Any errors here can impact the entire structure’s stability and safety. Take your time, measure meticulously, and ensure everything is squared off and level. Your bunks will not only be safe but will also stand the test of time.
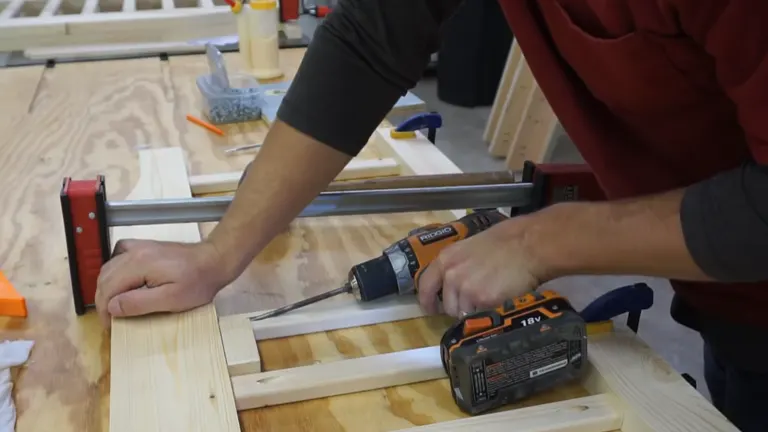
4. Assemble the Frames
Assembling the frames is a critical step. Proper alignment and secure attachments will determine the durability and safety of your bunk beds. Here’s a step-by-step breakdown to guide you through the process:
Connecting the Headboard and Footboard to the Side Rails
- Pre-drilling Holes: To avoid splitting the wood, always pre-drill holes where you plan to insert screws. This prepares the wood for the screws and ensures a snug fit.
- Alignment: Lay the headboard and footboard on a flat surface. Position the side rails between them at the desired height. Make sure they are parallel to the ground and that the headboard and footboard are perpendicular.
- Squaring the Corners: Use a carpenter’s square to ensure each corner forms a 90-degree angle. This step is crucial for the bed’s stability and aesthetic appeal.
- Screwing in Place: Once everything is aligned, screw the side rails to the headboard and footboard. Use sturdy wood screws, and for added strength, consider adding wood glue at the joints.
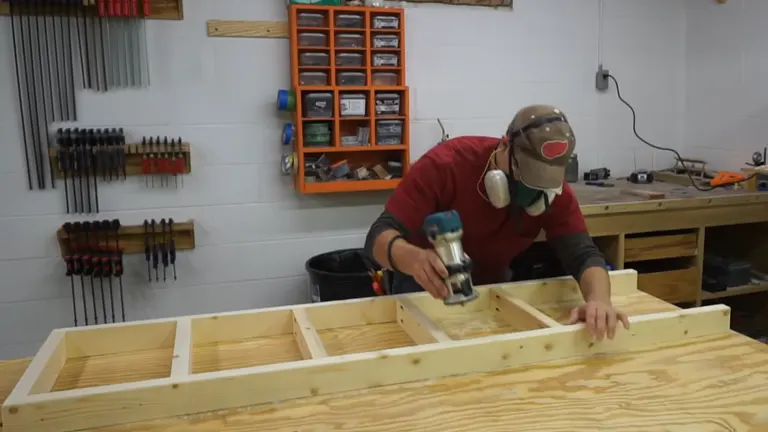
Securing the Slats
- Spacing the Slats: Before screwing them in, lay out the slats across the side rails. Make sure they’re evenly spaced. Remember, too much space between slats can cause the mattress to sag, so aim for a gap of 2-3 inches.
- Pre-drilling for the Slats: Just as with the side rails, pre-drill holes in the slats where they meet the side rails. This ensures a clean attachment without damaging the wood.
- Attachment: Place the slats one by one, ensuring they’re flush with the side rails. Screw them in from the side, making sure each slat is securely fastened.
- Reinforcement: For added strength, especially in the middle where most of the weight will be concentrated, you might consider adding a central support beam along the length of the bunk. This would mean additional slats attached to this central beam for maximum mattress support.
Pro Tip: When assembling, it’s always beneficial to have a helper. This ensures stability and precision, especially when aligning larger pieces of wood.
Assembling the frame is where your bunk bed begins to come alive. Each screw and joint brings you closer to completing your project. Take your time, double-check your work, and soon you’ll have a sturdy, safe, and reliable bunk bed ready for use.
5. Building the Ladder
The ladder is an essential feature of bunk beds, especially for the top bunk. It should be sturdy, safe, and easy to climb. Building it requires a keen eye for angles and precise measurements. Here’s a guide to help you construct the perfect ladder for your bunk bed:
Materials and Measurements:
- Side Rails (Stringers): These are the long pieces that will run vertically, providing the main structure of the ladder.
- Steps (Rungs): Typically, a ladder for a bunk bed will need 3-5 rungs, depending on the height of your bunk bed and the spacing between rungs.
Constructing the Ladder:
- Cutting the Side Rails (Stringers): Measure the length based on the height of your top bunk and where you’d like the ladder to start and end. Remember to consider the angle of the ladder—it shouldn’t be too steep or too flat.
- Determining the Angle: Decide on the angle at which the ladder will lean against the bunk bed. A good range is between 65-75 degrees. The angle you choose will affect the comfort and safety of climbing.
- Positioning: Decide whether you want the ladder to be on the side or the end of the bed. Side placement can be space-saving, while end placement may offer easier access.
- Cutting the Rungs: These should be about 15-18 inches long, depending on the width of the ladder and bed frame. Ensure they’re cut uniformly.
- Spacing the Rungs: Start by marking where the top and bottom rungs will go. Then, space the middle rungs evenly between them. Typically, a gap of 10-12 inches between rungs works well for children and adults.
- Attaching the Rungs: Pre-drill holes to prevent splitting. Attach each rung to the side rails using wood screws. For added durability, apply wood glue before screwing.
- Sanding: Sand down the edges of the rungs and the side rails. This prevents splinters and ensures a smoother finish.
Safety Tips:
- Ensure the ladder is securely attached to the bed. If necessary, use hooks or brackets to fasten it.
- Consider adding anti-slip pads or rubber ends at the base of the ladder to prevent any movement.
- Test the ladder’s sturdiness by applying weight before allowing anyone to use it.
Building a ladder might seem like a straightforward task, but given its role in ensuring safety, it requires careful attention to detail. A well-crafted ladder not only provides access to the top bunk but also peace of mind, knowing that every climb is secure.
6. Safety First
Guardrails are non-negotiable when it comes to bunk beds. They act as barriers, ensuring that sleepers, especially restless ones, remain safe throughout the night. Crafting them requires a balance of aesthetics and functionality. Let’s dive into the process of ensuring a good night’s sleep without any worries.

Materials and Measurements:
- Wood Planks: Opt for sturdy, high-quality wood planks that match the rest of your bunk bed design. These will form the primary structure of the guardrails.
- Height Consideration: Your guardrail should ideally rise at least 5-7 inches above the mattress. This ensures enough height to prevent anyone from rolling off, even with bulky bedding.
Building and Installing the Guardrails:
- Cutting the Wood: Measure and cut the wood planks according to the length of the bed. If you’re creating segmented guardrails, you’ll need to cut multiple shorter pieces.
- Positioning the Guardrails: Hold the planks against the side rails and posts where you plan to install them. Ensure that there’s a minimal gap between the mattress and the bottom of the guardrail to prevent any entrapment hazards.
- Attaching the Guardrails: Pre-drill holes to prevent splitting the wood, then use sturdy screws to attach the guardrails to the bed’s side rails and posts. Ensure the guardrails are firmly secured.
- Corner Reinforcements: If your bunk bed has square corners, consider using corner brackets for added strength. These can be easily screwed into place and offer an extra layer of stability.
- Ensuring Continuity: For the long side of the bunk that faces the wall, a guardrail is equally important. While it might seem like the wall offers enough protection, there’s still a risk of slipping between the bed and the wall. Install a guardrail here to eliminate this risk.
Safety Tips:
- No Gaps: Ensure that there are no wide gaps in or between the guardrails where a child could get stuck.
- Secure Attachments: Regularly inspect the guardrails to ensure they’re securely attached. The screws and brackets should be tight, and there should be no wobbling.
- Smooth Surfaces: Sand down the guardrails thoroughly. The last thing you want is to exchange fall hazards for splinter hazards.
The installation of guardrails is a testament to the adage, “Better safe than sorry.” While they serve a protective function, they can also be aesthetic additions, giving the bunk bed a finished, cohesive look. With sturdy guardrails in place, you’re ensuring not just peaceful sleep but also peace of mind.
7. Connect the Bunks
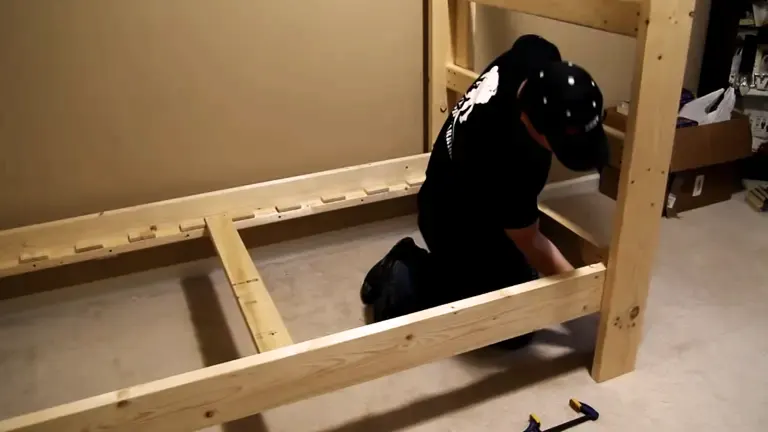
Connecting the bunks is a pivotal moment in your bunk bed construction journey. This is when two separate beds transform into one cohesive structure. While it’s exciting, this step requires attention to detail and precision to guarantee both stability and safety.
Steps to Connect the Bunks
Alignment Check:
- Position the top bunk above the bottom bunk. Ensure the posts of both bunks align perfectly. If there’s any misalignment, it could compromise the bed’s stability.
- Use a level to ensure that the top bunk sits perfectly horizontal when placed over the bottom one.
Pre-drilling Holes:
Mark points on the posts where you’ll be joining the bunks. Pre-drilling is essential to prevent the wood from splitting and ensures an easier insertion of the bolts.
Using the Right Fasteners:
- Opt for long, sturdy bolts that can penetrate deep into the posts, ensuring a firm grip.
- Insert the bolts through the pre-drilled holes, connecting the top and bottom bunk posts. If your bunks have side rails that overlap, ensure they’re connected as well.
Tightening the Connection:
- Once the bolts are in place, secure them with nuts from the other end. Tighten using a wrench until there’s no wobble or movement between the two bunks.
- For added security, you might consider using lock washers, which can help prevent the nuts from loosening over time.
Safety Inspection:
Give the bunks a good shake to ensure there’s no wobbling or creaking. This will help identify any weak points that need reinforcement.
Double-check all connection points to ensure every bolt and screw is tightened adequately.
Additional Tips:
- Reinforcement: For an added layer of stability, consider adding metal brackets or braces at the corners where the bunks connect.
- Vertical Support: In some designs, especially for larger bunks, an extra vertical support post in the middle can provide additional strength.
Connecting the bunks is a crucial phase, culminating in a transformation from two individual beds to a singular, functional unit. Properly merged bunks will not only stand the test of time but will also ensure safety for all who climb into bed, whether it’s for a night’s sleep or a midday nap. Remember, it’s always safety first, aesthetics second.
8. Sand, Paint, and Seal
After all the cutting, drilling, and assembling, you’re at the finishing stage. Sanding, painting, and sealing are crucial not only for aesthetics but also for the durability and longevity of your bunk bed. This process will transform the raw, freshly built structure into a polished, ready-to-use piece of furniture.
1. Sanding
- Why Sand? Sanding removes splinters, evens out surfaces, and prepares the wood to better absorb paint or stain.
- Coarse Before Fine: Start with coarse-grit sandpaper (around 60-80 grit) to tackle any uneven areas or visible imperfections. Once the major roughness is addressed, switch to a finer grit (150-220 grit) to give the wood a smooth finish.
- Technique: Always sand in the direction of the wood grain. This reduces the chances of scratches and ensures uniform smoothness.
- Safety First: Wear a mask and safety goggles to protect yourself from wood dust. Work in a well-ventilated area.
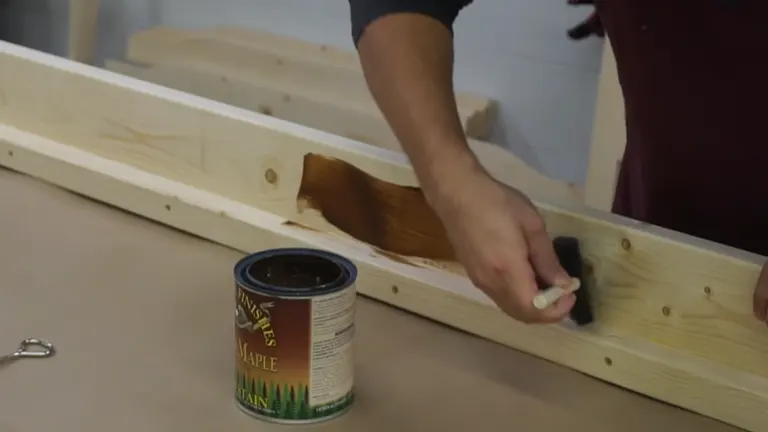
2. Painting or Staining
- Preparation: Before applying paint or stain, wipe down the entire bunk bed with a tack cloth or a damp rag to remove any residual sawdust.
- Choosing the Right Finish: Decide whether you want a paint or stain. While paint covers the wood and provides a solid color, stain penetrates the wood and accentuates its natural grain.
- Application: Using a quality brush or roller, apply the paint or stain evenly across all surfaces. If staining, always go in the direction of the wood grain.
- Drying Time: Allow ample time for the paint or stain to dry. This can range from a few hours to overnight, depending on the product and environmental conditions.
- Multiple Coats: For a richer color and better protection, consider applying multiple thin coats, ensuring adequate drying time between each.
3. Sealing
- Why Seal? A sealant adds a protective layer to the wood, safeguarding it against moisture, stains, and everyday wear and tear. It also makes cleaning easier and maintains the bed’s fresh look for longer.
- Choosing a Sealant: There are various sealants available, including polyurethane, polycrylic, and wax. Choose one based on the finish you want (matte, satin, glossy) and the product’s durability.
- Application: Follow the manufacturer’s instructions closely. Typically, sealants are applied using a brush or cloth. Like with paint and stain, apply thin, even coats.
- Drying and Curing: While a sealant might feel dry to touch within hours, it can take days to fully cure. Ensure the bunk bed remains untouched during this time.
The final touches of sanding, painting, and sealing are transformative. They elevate your handcrafted bunk bed from a functional structure to a work of art. With patience and attention to detail, you’ll have a finished product that’s as beautiful as it is durable.
9. Mattresses and Beddings
The physical construction might be over, but the final touch – the mattresses and beddings – is what makes a bunk bed truly inviting. This stage is where comfort meets aesthetics, turning a wooden structure into a cozy haven for restful slumber.
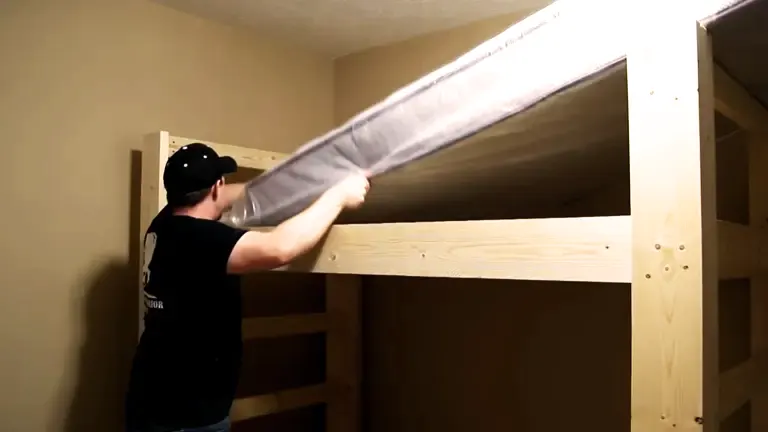
Selecting the Right Mattress:
- Fit is Key: Ensure the mattress size corresponds with the bunk bed’s dimensions. For standard twin bunk beds, the mattress should snugly fit within the frame, ensuring no gaps exist where a child might get stuck.
- Thickness Matters: Remember the guardrails? Ensure that even with the mattress in place, the guardrails rise at least 5 inches above the mattress surface for safety.
- Comfort and Support: Whether you prefer memory foam, innerspring, or hybrid mattresses, prioritize comfort and support. The mattress should provide adequate spinal support, especially for growing kids.
Dressing with Beddings:
- Fitted Sheets: Start with a fitted sheet that wraps securely around the mattress. This keeps the mattress clean and provides a smooth sleeping surface.
- Comforters and Blankets: Based on your room’s temperature and personal preference, select a suitable blanket or comforter. For bunk beds, it’s often easier to manage comforters or duvets that sit neatly atop the mattress without much overhang.
- Pillows: Choose pillows that complement the comfort of the mattress. Remember, for kids, excessively thick pillows can strain the neck. Opt for something medium-thin with good support.
- Personal Touch: Add throw pillows, stuffed animals, or even a soft blanket to infuse personality into the bed space. This can make the bunk bed feel more personalized, especially if shared by siblings.
- Safety Tip: For the top bunk, especially with younger children, be mindful not to have too many loose toys or pillows. These can become fall hazards if they’re carelessly thrown or pushed off the edge.
The mattresses and beddings transform the bunk bed from a piece of furniture to a sanctuary of relaxation. While the aesthetics of bedding bring the bed to life, the comfort of a good mattress ensures sweet dreams. Now, with everything in place, your bunk bed project reaches its culmination – ready to offer rest, comfort, and countless bedtime stories.
Conclusion
Building your own bunk bed is more than just a DIY project; it’s an opportunity to create lasting memories and a functional space. Whether for your kids, grandkids, or guests, the personal touch will surely be appreciated.
FAQs
- Why would someone opt to build a bunk bed instead of buying one?
Building a bunk bed allows for customization in design, materials, and dimensions. Plus, it can be a rewarding DIY project that may save money in the long run! - Are there any age restrictions for who should sleep on the top bunk?
Yes, due to safety concerns, it’s generally recommended that children under the age of 6 should not sleep on the top bunk. - Can bunk beds be converted into twin beds later?
Absolutely! With foresight in design, many bunk beds can be constructed to be separable into two individual beds in the future. - Do I need special tools to build a bunk bed?
While standard tools like saws, drills, and hammers are essential, some specific joinery might require special tools. Research and planning will provide a clearer picture. - How can I add storage solutions to my bunk bed design?
Consider adding under-bed drawers, shelving on the headboards, or even constructing the bottom bunk at a loft height to allow space for a desk or storage beneath. - Is there an ideal wood type for building bunk beds?
Hardwoods like oak, maple, or cherry are durable and can bear more weight, making them ideal. However, pine is a more affordable option and is often used for its light weight and versatility. - Can I build a bunk bed that’s not the standard twin size?
Of course! With a custom build, you can create bunk beds for larger mattress sizes like full or queen, though it will require more space. - How do I ensure the ladder is safe and easy to climb?
Angling the ladder slightly and providing wide, flat rungs can make it more foot-friendly and secure. - Is it possible to make a themed bunk bed for my kids?
Definitely! With creativity, bunk beds can be turned into castles, ships, treehouses, and more. Just ensure that any added elements don’t compromise safety. - How often should I inspect the bunk bed for wear and tear?
A bi-annual inspection is a good rule of thumb. Regularly check for loose screws, wobbly parts, or signs of wear in the wood, especially in high-stress areas.
There you have it – your comprehensive guide to building bunk beds. Whether you’re crafting a childhood dreamscape, optimizing a guest room, or simply looking for a DIY challenge, bunk beds are a testament to both functionality and imagination.
But, as with all journeys, the real magic lies in shared experiences. So, whether you’re a seasoned carpenter with insights to offer, a beginner seeking advice, or someone who’s just built their very first bunk bed, we’d love to hear from you. Every tip, every hurdle, every story adds to the collective wisdom of our community.
Drop a comment below. Share your bunk bed tales, your proud moments, and even those tricky challenges. Let’s turn ‘Building Bunk Beds’ from an article into a conversation. And if you found this guide helpful, consider sharing it with fellow DIY enthusiasts. After all, there’s a certain joy in building, but there’s an even greater joy in building together.

David Murray
Forestry AuthorI'm David Murry, a forestry equipment specialist with a focus on chainsaw operation. With over 13 years of experience, I've honed my skills in operating and maintaining a wide range of machinery, from chainsaws to log splitters. My passion for the outdoors and commitment to sustainable forestry drive my work, which emphasizes safety, efficiency, and staying updated with industry advancements. Additionally, I'm dedicated to sharing my expertise and promoting environmental awareness within the forestry community.


Leave your comment