How To Use a Table Saw: Easy 8 Steps
- December 12, 2023
- 0 comment
The table saw stands as the cornerstone of any woodworking shop, offering unmatched versatility and precision. Whether you’re a seasoned woodworker or a DIY enthusiast, mastering the table saw is crucial for tackling a wide array of projects, from slicing sheet goods to crafting intricate joinery. This comprehensive guide delves into the nuances of using a table saw, ensuring you harness its full potential safely and effectively.
Understanding Table Saw Types
Table saws come in various forms: benchtop, job site, contractor, and cabinet models, each with unique features. A notable mention is the sliding table saw, a larger, industrial-grade option ideal for handling full plywood sheets with exceptional accuracy. Despite their hefty price tag, sliding table saws, like the Ryobi model I’ve used for over two decades, are a dream for serious woodworkers due to their precision and efficiency.
8 Essential Safety Rules Using Table Saw
1. Hand Safety
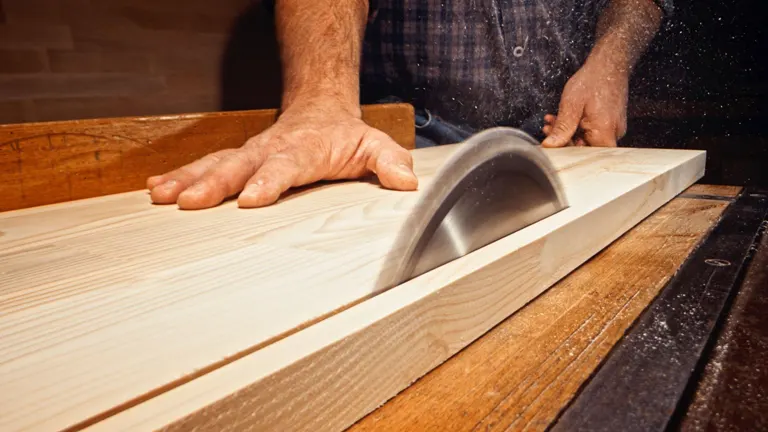
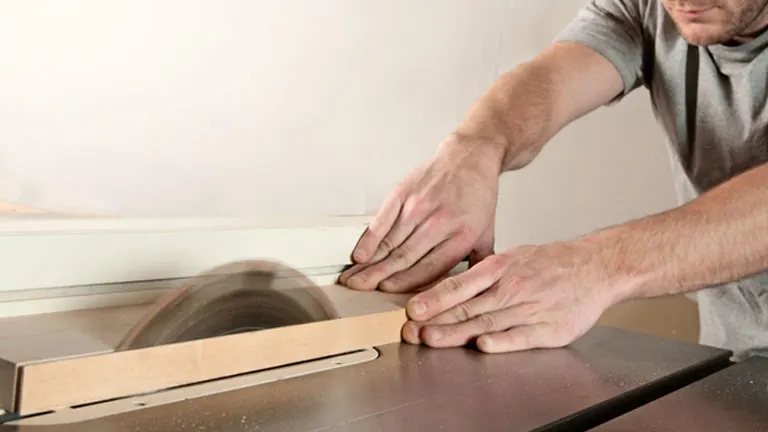
Awareness of hand placement is crucial. Keep your hands away from the blade’s path, focusing instead on the wood’s contact with the fence and the table. This practice helps in maintaining control and avoiding accidents.
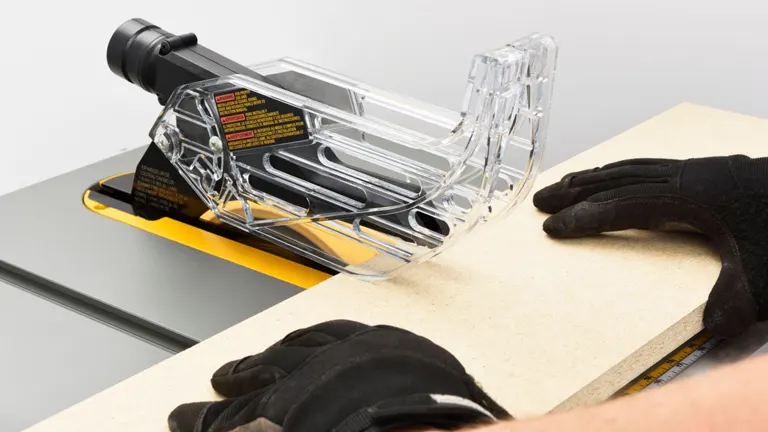
2. Employ Push Sticks
For operations where your hands would be close to the blade, such as making narrow cuts, use push sticks. These tools allow you to safely feed the wood through the saw while keeping your hands at a safe distance.
3. Avoid Rough Lumber
It’s crucial to use only dressed lumber, which has at least one smooth face and one smooth edge. Rough, cupped, or warped wood can pinch the saw blade, leading to dangerous kickbacks. Always ensure your lumber is in good condition before cutting.
4. Prevent Kickback
Kickback is a common and dangerous occurrence. To prevent it, never use the miter gauge and rip the fence together. Doing so can trap the cut-off piece between the blade and fence, causing kickback. Instead, use a stop block for controlled, safe cuts.
5. Never Freehand
Freehand cutting, where you cut without a fence, miter gauge, or jig for guidance, is extremely risky. Always use the appropriate guiding tools to ensure your cuts are safe and precise.
6. Secure Wood Handling

Firmly hold the wood against the table and the fence during the cutting process. This ensures stability, accuracy, and safety, reducing the likelihood of the wood moving unexpectedly.
7. Appropriate Use of Rip Fence
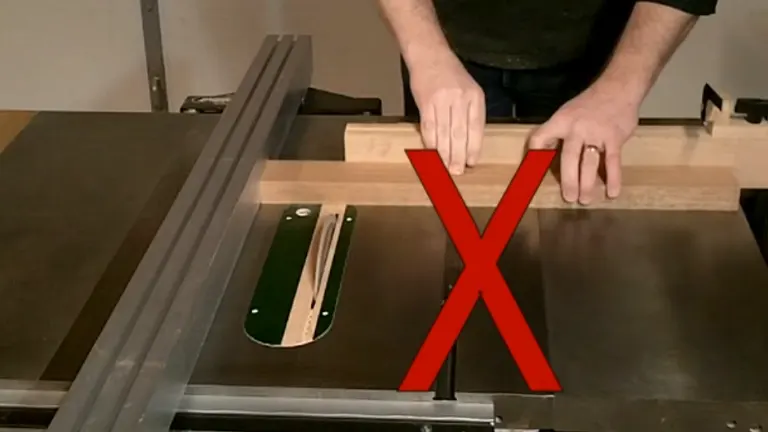
Use the rip fence solely for rip cuts and the miter gauge exclusively for crosscuts. Combining these two for the same cut can lead to kickbacks and inaccurate cuts.
8. Use Safety Gear
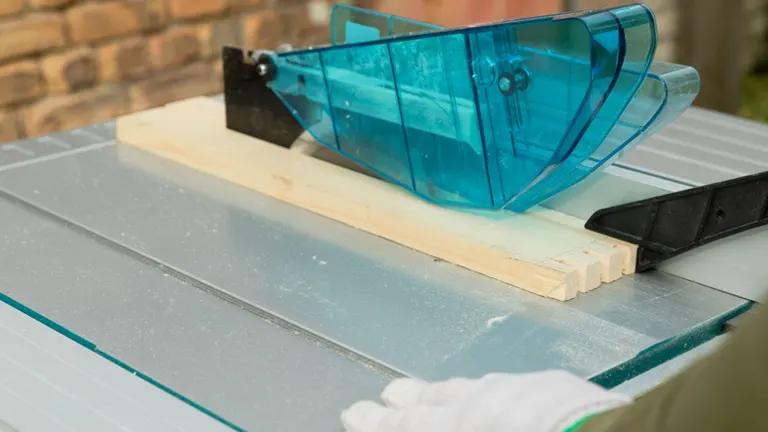
The riving knife and blade guard are your primary defenses against kickback and accidental contact with the blade. Always ensure these safety features are in place and functioning correctly when operating the table saw.
Using Table Saw Controls
Effectively using a table saw involves familiarizing yourself with its basic controls. Key components include handwheels for adjusting the blade’s height and angle, tilt controls for bevel cuts, and safety switches for emergency stops. While these features are standard across most table saw models, their placement and design may differ slightly. It’s essential to understand and comfortably operate these controls, as they play a significant role in the precision and safety of your cuts. Regular practice and adherence to the manufacturer’s instructions will help you master these controls, enabling you to make the most of your table saw’s capabilities.
Cutting Techniques with a Table Saw
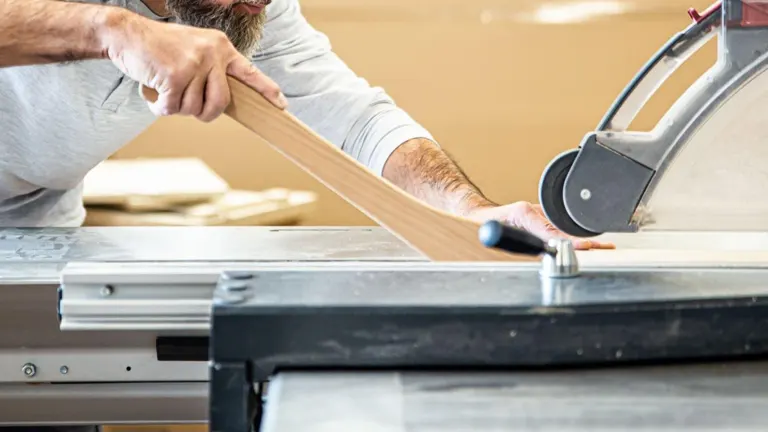
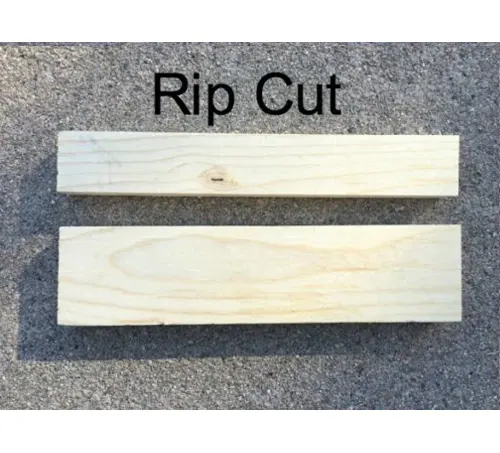
Rip Cuts
Rip cuts are essential for cutting along the wood grain and are particularly crucial in many woodworking projects. When performing rip cuts, it’s important to pay close attention to how the wood interacts with both the fence and the table, especially when working with longboards. A firm grip and steady handling are key, and for narrower pieces, using push sticks or feather boards can enhance safety and precision. This technique requires careful coordination to ensure clean, straight cuts along the length of the wood.
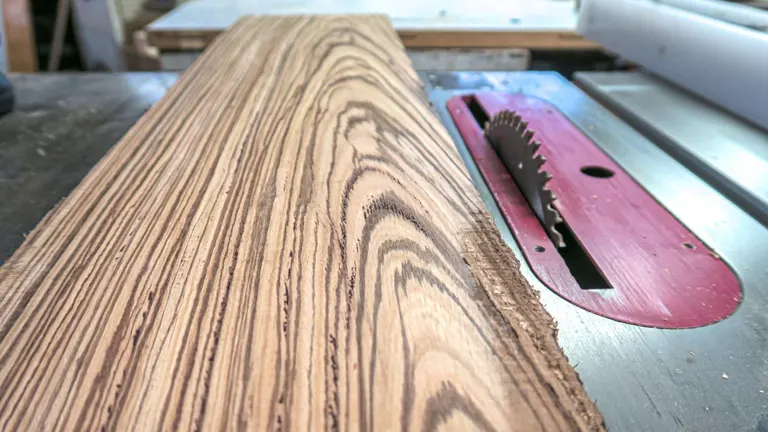
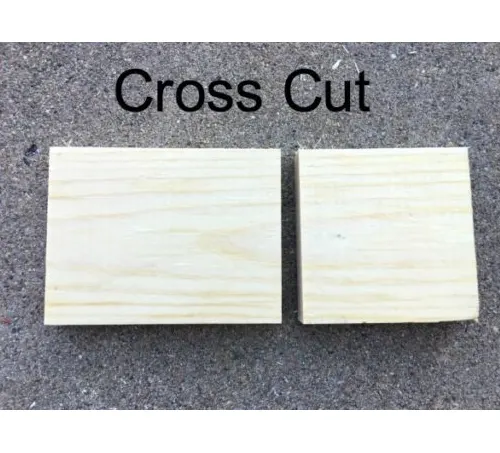
Cross Cuts
Crosscuts are performed perpendicular to the wood grain and are best achieved using a crosscut sled, which provides greater stability and precision, especially for shorter pieces. Before making a crosscut, it’s important to inspect the wood for any foreign objects like nails or screws that could damage the blade or cause injury. Additionally, it’s advisable to avoid wearing gloves during this process, as they can get snagged by the blade, posing a safety hazard.
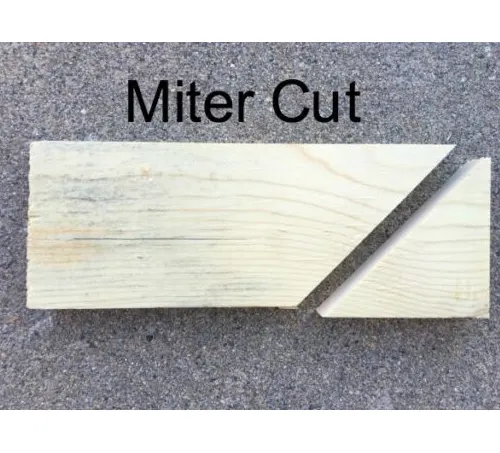
Miter Cuts
Miter cuts are angled cuts necessary for creating frames and various types of joinery. For these cuts, the miter gauge is an indispensable tool. It should be properly adjusted and move smoothly in its slot for accuracy. Attaching a larger board to the miter gauge can enhance stability and provide a broader support surface, which is crucial for preventing the wood from shifting during the cut. Adding sandpaper to the face of this board can also improve grip, ensuring that the wood stays firmly in place, resulting in cleaner and more precise cuts.
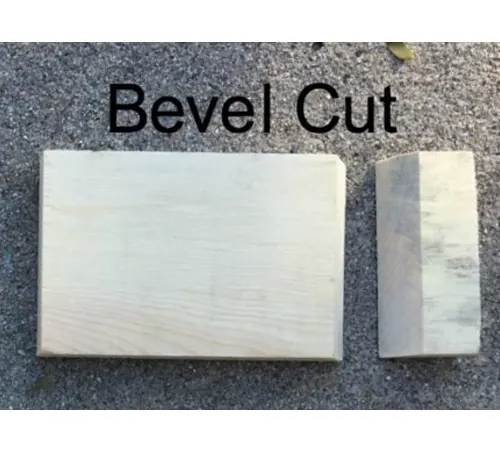
Bevel Cuts
Bevel cuts involve angling the blade of the table saw to cut at an angle other than 90 degrees relative to the top surface of the wood. These cuts are essential for creating angled edges and joins, like those required in picture frames, boxes, or complex joinery. The key to successful bevel cuts is accurately setting the angle of the blade and maintaining a steady feed of the wood through the saw. It’s important to ensure that the wood is firmly against the fence and table to avoid any shift during the cut, which can result in inaccuracies or kickbacks. Due to the angled nature of these cuts, special attention to safety and proper hand placement is crucial.
Sheet Goods and Dado & Rabbet Joints
When working with large sheets of material, such as plywood or MDF, beginning the cutting process with a track saw can greatly enhance accuracy and manageability. The track saw allows for precise, straight cuts, especially useful for breaking down large sheets into more manageable sizes. Once the sheets are cut down to a smaller size, transitioning to a table saw for further cutting and detailing is advisable. Table saws excel in creating specialized cuts like dado and rabbet joints. However, it’s important to use the correct blades and settings specific to these joint types. Dado blades, for instance, are designed for cutting wider slots and grooves necessary for dado joints, while standard blades can be adjusted for rabbet cuts.
Dust Collection and Outfeed Table
Maintaining a clean and safe working environment around your table saw is crucial, with effective dust collection being a key component. Connecting dust ports to a shop vacuum or a dedicated dust collection system helps in controlling sawdust and wood particles, keeping the work area clean and reducing health hazards. Moreover, incorporating an outfeed table is highly beneficial, especially when working with large or long pieces of wood. An outfeed table supports the material as it passes through the blade, preventing it from tipping or causing inaccurate cuts. This not only enhances safety by reducing the risk of kickback but also ensures better control and precision in your cuts. It’s important to ensure that the outfeed table is level with the table saw’s surface for seamless operation.
How much is a Table Saw Worth?
When it comes to determining the value of a table saw, the price can vary significantly based on the type, brand, features, and place of purchase. Portable or tabletop saws, which are more basic and compact, are typically priced between $100 to $500, making them ideal for DIY enthusiasts and light-duty tasks. Jobsite saws, known for their durability and portability, are favored by contractors who need to move their equipment frequently; these are usually in the $300 to $800 range. For those looking for something more powerful, contractor saws offer increased capacity and are suitable for serious woodworking, with prices ranging from $600 to $1,200. On the higher end of the spectrum are cabinet saws, designed for professional woodworkers and serious hobbyists, offering superior power and precision. These heavy-duty saws start at around $1,200 and can exceed $3,000, depending on their specifications. Hybrid saws, which blend features of contractor and cabinet saws, fall in the middle in terms of pricing, ranging from about $700 to $2,000. For specialty saws, such as sliding table saws or those equipped with advanced safety features like SawStop technology, the prices can be significantly higher, often reaching several thousand dollars. It’s important to note that these prices can fluctuate, and factors such as brand reputation, build quality, and additional features (like improved fences, dust collection systems, and safety enhancements) can also impact the overall cost. Additionally, when considering a table saw purchase, one should also factor in the cost of necessary accessories, including blades, jigs, and dado sets.
Conclusion
This guide serves as a foundation for effectively and safely using a table saw. With practice and adherence to safety protocols, your table saw can become the most versatile and invaluable tool in your workshop. For any further queries or shared experiences, feel free to comment below.
FAQs
- Can I make both rip and crosscuts with the same blade on a table saw?
Yes, you can make both rip and crosscuts with a standard blade on a table saw. However, for optimal results, specialized blades are recommended – a rip blade for rip cuts and a crosscut blade for crosscuts, as they are designed to handle the specific types of cuts more efficiently. - How do I prevent burn marks on wood when using a table saw?
Burn marks often occur due to blade dullness, slow feed rate, or incorrect blade height. To prevent this, ensure your blade is sharp, set the blade height correctly (just above the thickness of the wood), and maintain a consistent, moderate feed rate. - Is it possible to cut very small pieces of wood safely on a table saw?
Yes, but it requires careful setup. Use a crosscut sled or a zero-clearance insert to minimize the gap around the blade and employ push sticks or hold-down devices. Never attempt to cut tiny pieces without proper jigs and safety accessories. - How do I choose the right blade for different types of cuts on a table saw?
Select blades based on the number of teeth, tooth design, and kerf width. Fewer teeth (like 24) are better for rip cuts, while more teeth (like 60-80) are ideal for crosscuts. Thin-kerf blades reduce waste and require less power, suitable for less powerful saws. - Can I cut non-wood materials with a table saw?
Yes, but this requires specific types of blades designed for those materials, such as blades for cutting plastics, metals, or composites. Always check the material compatibility with the blade manufacturer’s recommendations. - How do I deal with dust collection effectively on a table saw?
Use a dust collection system or a shop vac connected to the dust port of the table saw. Additionally, use a blade guard with a dust collection feature and keep the work area clean to minimize airborne sawdust. - What’s the best way to maintain accuracy in cuts on a table saw?
Ensure your table saw is well-calibrated. Regularly check and adjust the alignment of the blade to the miter slots, the fence to the blade, and the accuracy of the miter gauge. Also, using quality, well-maintained blades is crucial for accurate cuts. - Is it necessary to use a push stick for every cut on a table saw?
While not every cut requires a push stick, it’s highly recommended for cuts where your hands would come within 6 inches of the blade. Push sticks provide safety by keeping your hands at a distance from the blade, especially when cutting narrow workpieces. - Can I make a dado cut with a standard table saw?
Yes, dado cuts can be made with a standard table saw by using a stacked dado blade set. However, ensure your table saw’s arbor is compatible with a dado blade and check local regulations, as dado blades are not allowed in some regions. - How can I improve the stability of my table saw for precise cuts?
Adding an outfeed table or extension wings can significantly improve the stability of your table saw. This ensures better support for larger workpieces and aids in achieving more precise cuts. Additionally, ensure your table saw is on a stable, level surface.

David Murray
Forestry AuthorI'm David Murry, a forestry equipment specialist with a focus on chainsaw operation. With over 13 years of experience, I've honed my skills in operating and maintaining a wide range of machinery, from chainsaws to log splitters. My passion for the outdoors and commitment to sustainable forestry drive my work, which emphasizes safety, efficiency, and staying updated with industry advancements. Additionally, I'm dedicated to sharing my expertise and promoting environmental awareness within the forestry community.


Leave your comment