Mastering the Miter Saw: An In-Depth Guide for Beginners
- December 6, 2023
- 0 comment
Welcome to the world of woodworking, where creativity meets craftsmanship, and a handy tool can open up a ton of possibilities. If you’re new to woodworking or thinking about giving it a try, you’ve probably come across the essential miter saw. Whether you’re into creating picture frames, nailing flawless crown molding, or putting together custom furniture, the miter saw is your go-to tool. But like any tool worth its salt, becoming a pro with the miter saw takes more than just a casual introduction. In this beginner-friendly guide, we dive into the ins and outs of using a miter saw effectively. From getting to know the tool inside out to refining your cutting techniques, we’re here to simplify the process and encourage you to make the most out of your miter saw. So, wipe off that sawdust, and let’s take a journey together to master the miter saw. Your woodworking journey is about to get even more exciting!
What You Need To Know About Miter Saws
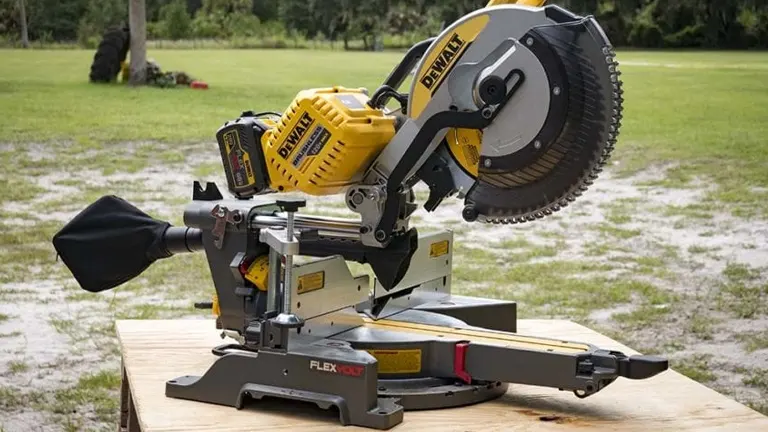
Miter saws, often hailed as the cornerstone of precision in woodworking, are versatile cutting tools designed to make accurate crosscuts and miters in various materials. Consisting of a circular blade mounted on a swing arm, these saws excel in creating angled cuts, bevels, and compound angles with remarkable ease. The primary strength of a miter saw lies in its ability to swiftly and precisely cut through wood, metal, or plastic, making it an indispensable asset for carpenters, DIY enthusiasts, and craftsmen alike. The most common types include the basic miter saw, compound miter saw, and sliding compound miter saw, each offering distinct features catering to different cutting needs. Miter saws are celebrated for their user-friendly controls, allowing even beginners to achieve professional-grade results. Whether you’re framing a house, crafting intricate moldings, or assembling furniture, understanding the nuances of miter saws is key to unlocking their full potential. From adjusting angles to selecting the right blade, this overview will unravel the essentials, empowering you to make the most of this essential tool in your woodworking arsenal.
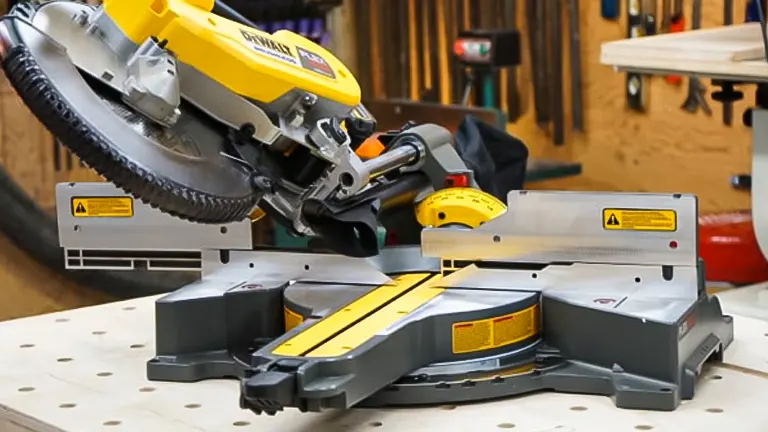
Different Parts of a Miter Saw
1. Base
The base is the foundation of the miter saw, providing stability during operation. It often includes pre-drilled holes for securing the saw to a workbench or other surfaces.
2. Table
The flat surface where you place your workpiece for cutting. Some miter saws come with extendable tables to support longer materials.
3. Fence
The fence is a vertical barrier that helps keep the workpiece stable and aligned during cutting. It ensures accuracy in your cuts, especially when making straight cuts or mitered angles.
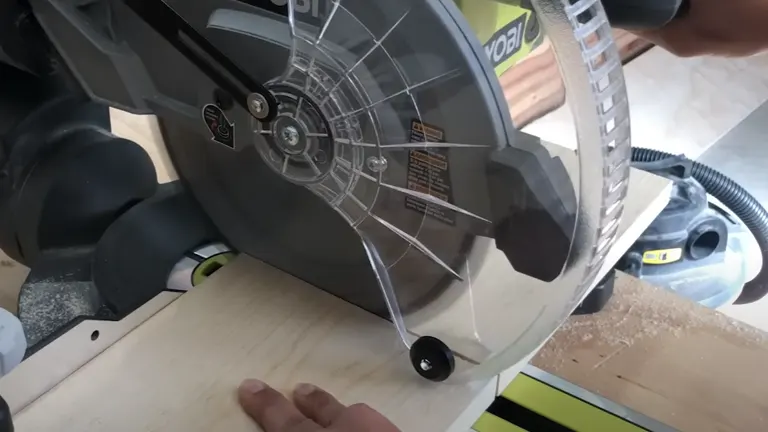
4. Blade Guard

This safety feature covers the saw blade when it’s not in use and automatically retracts during cutting. It protects the user from accidental contact with the sharp blade.
5. Blade

The circular saw blade is the business end of the miter saw. Blades come in various sizes and tooth configurations, each suitable for specific materials and cutting applications.
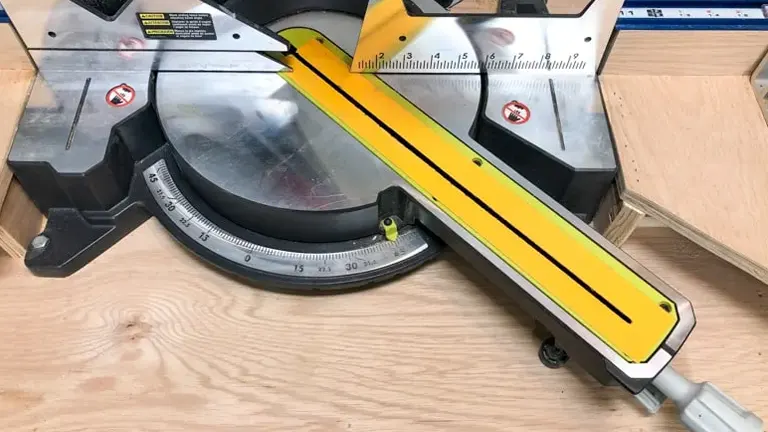
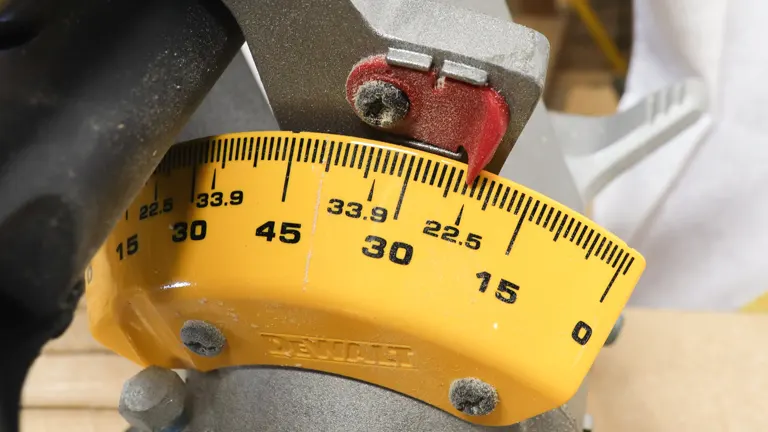
6. Miter Scale

This scale is usually located on the base and allows you to set the angle for a miter cut. It helps you achieve precise angles for accurate cuts.
7. Miter Lock Handle
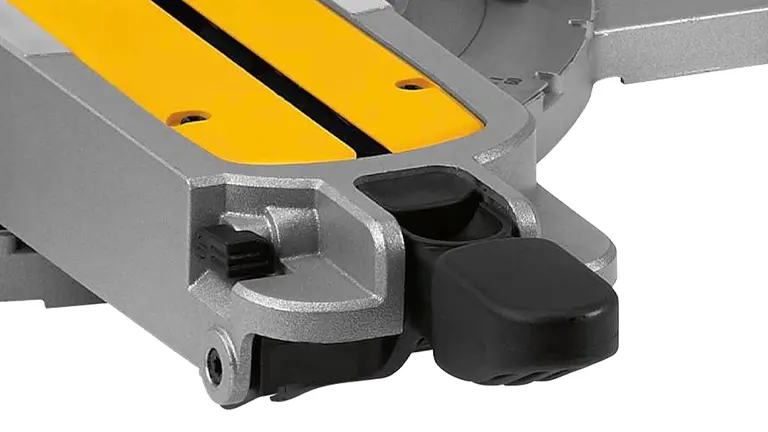
Found on the front of the saw, the miter lock handle secures the saw at the desired miter angle. Loosening it allows you to adjust the angle, and tightening it ensures stability during cutting.
8. Bevel Scale
The bevel scale is located near the base and allows you to set the bevel angle for making beveled cuts. It’s crucial for creating angled edges on your workpiece.
9. Bevel Lock Lever
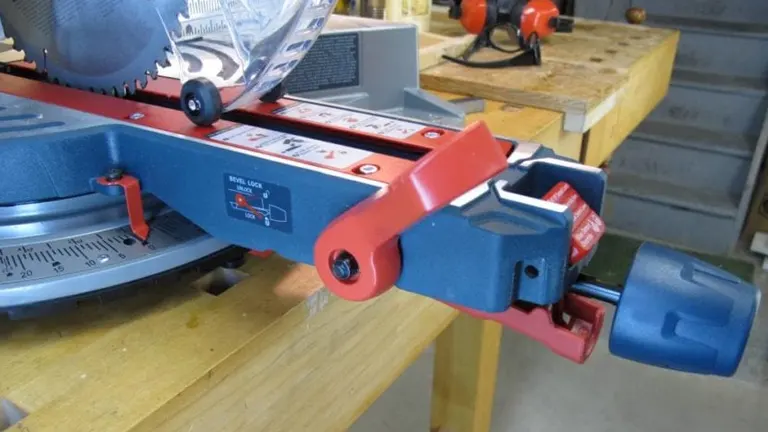
Similar to the miter lock handle, the bevel lock lever secures the saw at the chosen bevel angle. Adjusting this lever allows you to tilt the saw for beveled cuts.
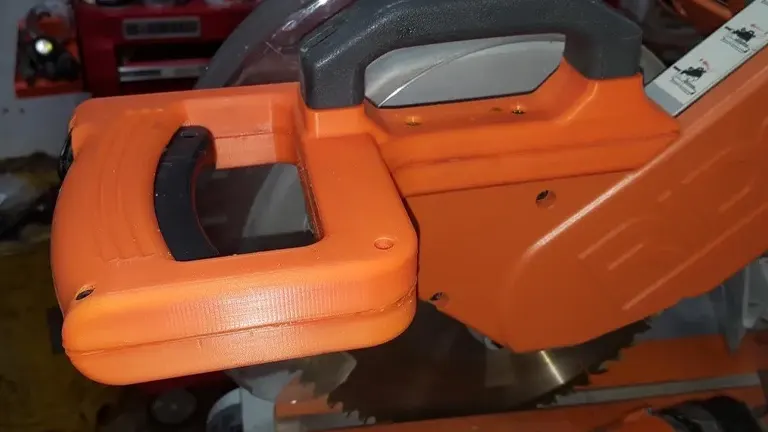
10. Handle
The handle is the grip you use to maneuver the saw during cutting. It’s designed for comfort and control, allowing you to make precise adjustments while keeping a firm grip on the tool.
11. Trigger Switch
The trigger switch is the on/off control for the saw. Squeezing the trigger activates the blade, and releasing it turns the saw off.
12. Dust Collection System
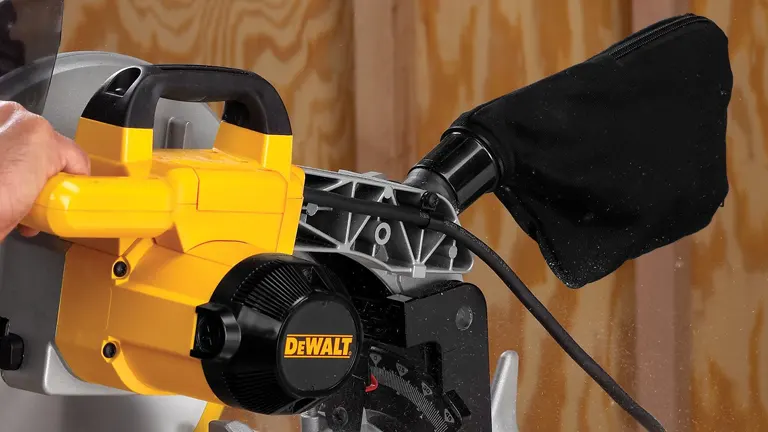
Some miter saws come equipped with a dust collection system to minimize sawdust, providing a cleaner and safer workspace. This system typically includes a dust port to which you can attach a vacuum or dust collector.
Different Types of Miter Saw Cuts
1. Crosscut
- Description: A crosscut is a straight cut made across the width of the workpiece, perpendicular to its grain. It is one of the most basic and common types of cuts in woodworking.
- Execution: Place the workpiece against the fence, secure it, and then lower the blade onto the material to make a straight and clean crosscut.
2. Miter Cut
- Description: A miter cut is an angled cut made along the width of the workpiece, creating an angle other than 90 degrees. Miter cuts are often used for creating joints, such as when forming corners or angles in a frame.
- Execution: Adjust the miter scale on the miter saw to the desired angle, secure the workpiece against the fence, and make the cut.
3. Bevel Cut
- Description: A bevel cut is an angled cut made along the thickness of the workpiece, tilting the blade to create an angle other than 90 degrees. Bevel cuts are commonly used for creating edges with a slope.
- Execution: Adjust the bevel scale and bevel lock lever on the miter saw to the desired angle, secure the workpiece, and make the cut.
4. Compound Cut
- Description: A compound cut combines both miter and bevel angles in a single cut. This type of cut is often used for complex joints, such as those found in crown molding or other intricate woodworking projects.
- Execution: Adjust both the miter and bevel angles on the miter saw to achieve the desired compound angle, secure the workpiece against the fence, and make the cut.
Mastering these types of cuts on a miter saw opens up a world of possibilities in woodworking, allowing you to create intricate designs, precise joints, and customized shapes. Always follow safety guidelines and practice on scrap material before working on your actual project to ensure accuracy and confidence in your cutting skills.
How To Use a Miter Saw
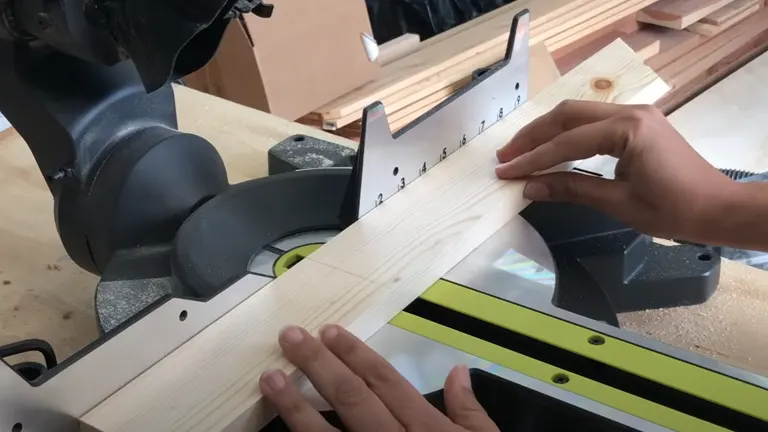
1. Measure and Mark
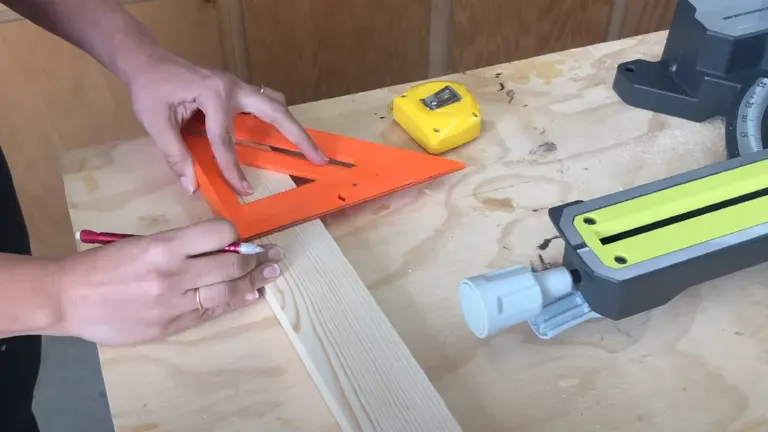
Before you start cutting, make sure to measure and mark your board accurately. Use a speed square to draw a straight line where you intend to make the cut. This step is crucial for ensuring the accuracy needed in your woodworking project. Taking the time to measure and mark your board diligently provides a strong foundation for the later stages of the cutting process, contributing to the overall success and quality of your craftsmanship.
2. Blade Selection

When determining the ideal blade for your specific project, it’s essential to consider various factors that contribute to its performance. Blades exhibit variations in tooth count, tooth design, and material compatibility, making it crucial to select the most suitable one for your woodworking needs. For example, a fine-tooth blade proves highly effective when aiming for smooth and precise cuts in wood, ensuring a polished finish. Conversely, a coarse-tooth blade becomes the preferred choice when tackling rougher cuts, providing the necessary aggressiveness to handle diverse materials with ease. By understanding the nuances of blade selection, you can enhance the overall efficiency and quality of your cutting tasks, achieving optimal results tailored to the demands of your woodworking project.
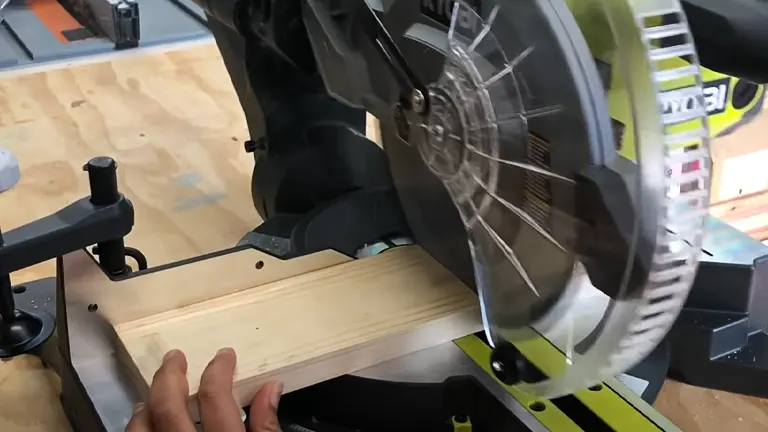
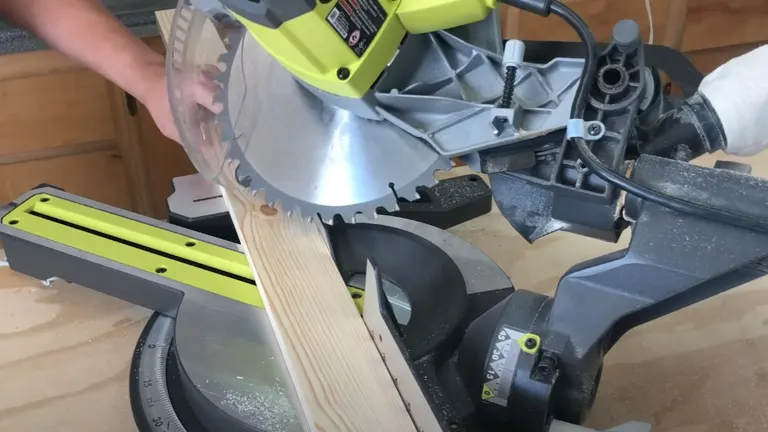
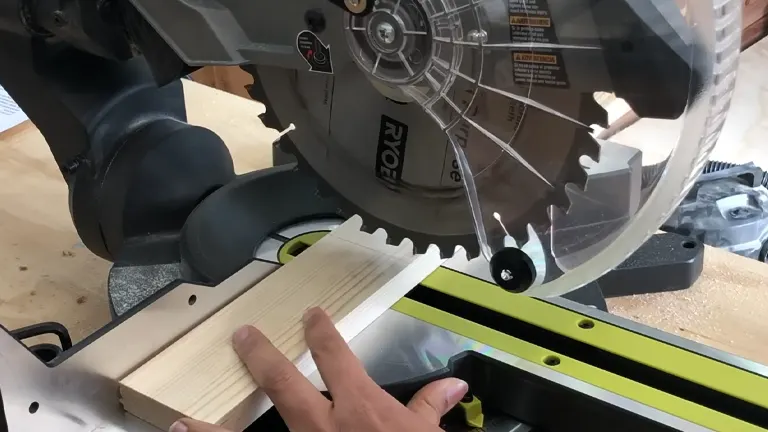
3. Positioning the Workpiece
Position your marked workpiece securely against the fence of the miter saw, ensuring it sits flush against the guiding surface. Using one hand, firmly grip the workpiece, holding it steadfastly away from the rotating blade. This deliberate act not only guarantees stability throughout the cutting process but also serves as a precautionary measure, effectively minimizing the risk of kickback – a phenomenon where the workpiece unexpectedly propels backward. By adopting this technique, you not only prioritize your safety but also lay the foundation for a controlled and secure cutting experience with the miter saw, allowing you to execute precise cuts while maintaining a reassuring level of stability.
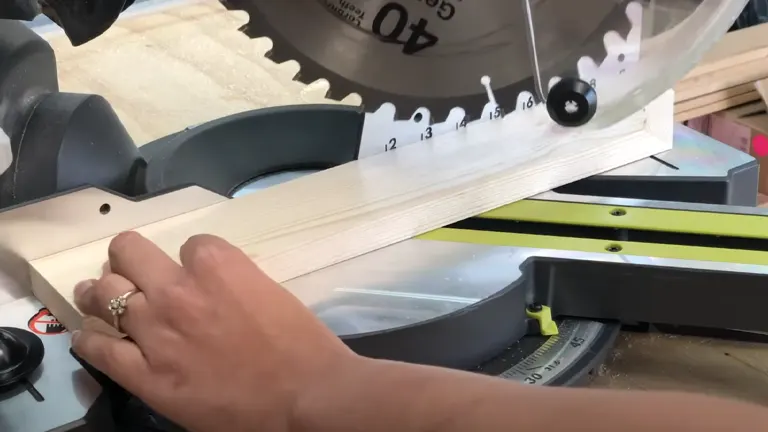
4. Eye on the Line

Maintain a vigilant focus on the designated cut line from the beginning to the conclusion of the cutting process. Specifically, concentrate your attention on the segment of the line closest to your position, ensuring precise alignment with the trajectory of the saw blade. This intentional focus on the visual guide not only amplifies the accuracy of your cuts but also acts as a steadfast compass, aiding in staying on course throughout the entirety of the cut. By consistently adhering to this visual reference point, you not only enhance the precision of your miter saw operation but also cultivate a keen eye for detail and alignment, fundamental skills that contribute to the overall success of your woodworking projects.
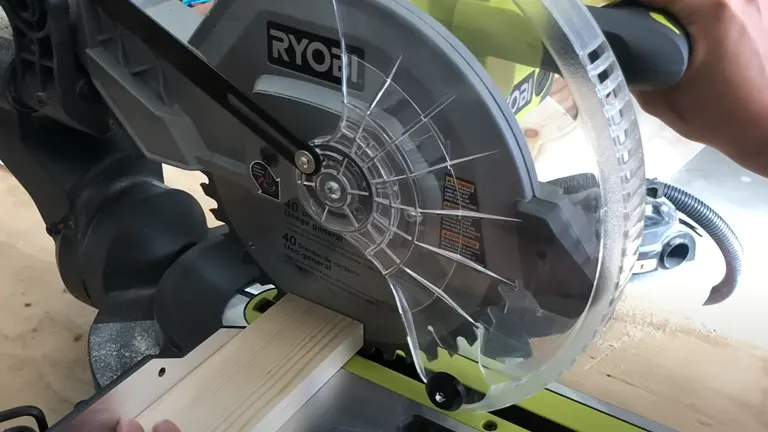
5. Lowering the Blade
Gently lower the saw blade without activating the trigger, strategically positioning it to ensure that the kerf, representing the width of the saw blade, aligns with the side of the material you intend to retain. This meticulous approach to blade positioning serves a dual purpose: firstly, it mitigates the risk of splintering, which can be particularly common in woodworking projects, and secondly, it guarantees the attainment of a cut that is not only precise but also maintains a clean and polished finish. By exercising caution in this initial phase of the cutting process, you set the stage for subsequent steps, emphasizing the importance of a thoughtful and strategic approach to wielding the miter saw for optimal results in your woodworking endeavors.
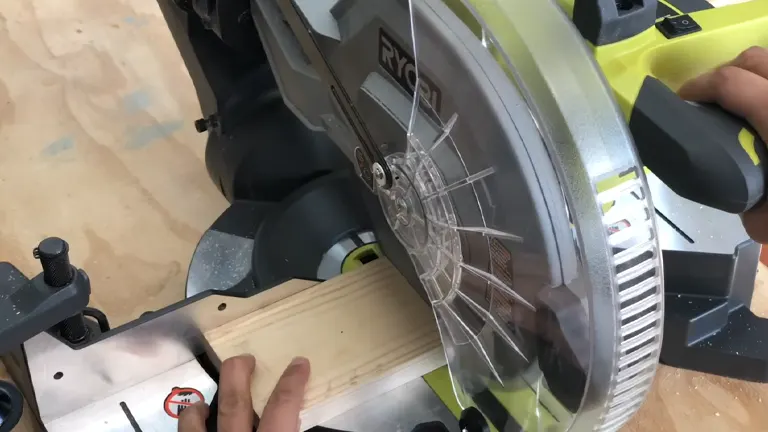
6. Evaluation and Adjustment
Evaluate the alignment of the miter saw blade with the marked line on your workpiece, ensuring a harmonious match between the two. Once content with the blade’s positioning, gently lift it back to its original position. This deliberate action not only signifies attention to detail but also underscores the importance of precision in the woodworking process. To further enhance the accuracy of your cuts, invest time in a thorough double-check of your measurements and adjustments before progressing to the subsequent steps. This meticulous approach ensures that your miter saw is primed for optimal performance, laying the groundwork for successful woodworking endeavors characterized by precision and refined craftsmanship.
7. Test Cuts on Scrap Material
Prior to executing the ultimate cut on your designated project material, it is highly advisable to conduct a preliminary test cut on a scrap piece. This preliminary step serves a dual purpose: firstly, it provides a practical opportunity to fine-tune and optimize your miter saw settings, ensuring they align precisely with the specific requirements of your project. Secondly, by undertaking this test cut, you gain valuable insights into the behavior of the saw, enabling you to preemptively address any potential challenges that may arise during the actual cutting process. Embracing this strategic approach not only cultivates a sense of preparedness but also guarantees that the eventual cut on your project material aligns seamlessly with your expectations, resulting in a finished product that meets the desired standards of precision and quality.
8. Engaging the Trigger

Elevate the miter saw blade to its starting position, and then engage the trigger to set the saw in motion. It is imperative to exercise patience during this phase, allowing the saw to attain its full operational speed before commencing with the actual cut. This deliberate approach not only ensures the seamless initiation of the cutting process but also contributes significantly to the overall efficiency and effectiveness of the saw. Allowing the blade to reach its maximum speed before making contact with the material promotes a smoother cutting experience, reducing the likelihood of blade resistance and enhancing the precision of each cut. Therefore, by incorporating this methodical step into your miter saw usage, you are not only prioritizing the longevity of the tool but also optimizing its performance for a more refined woodworking experience.
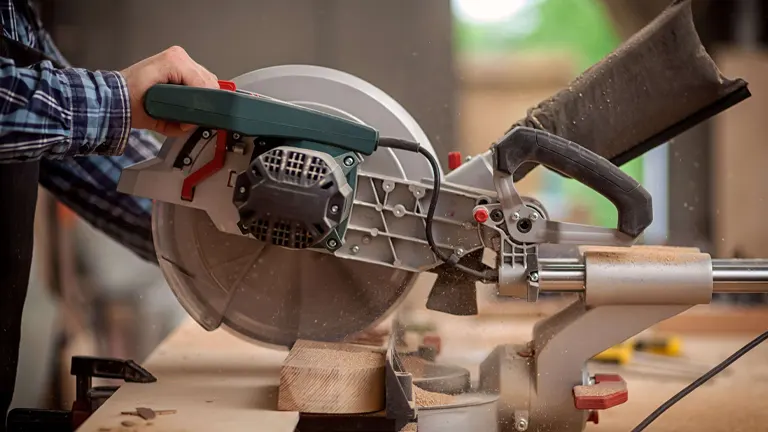
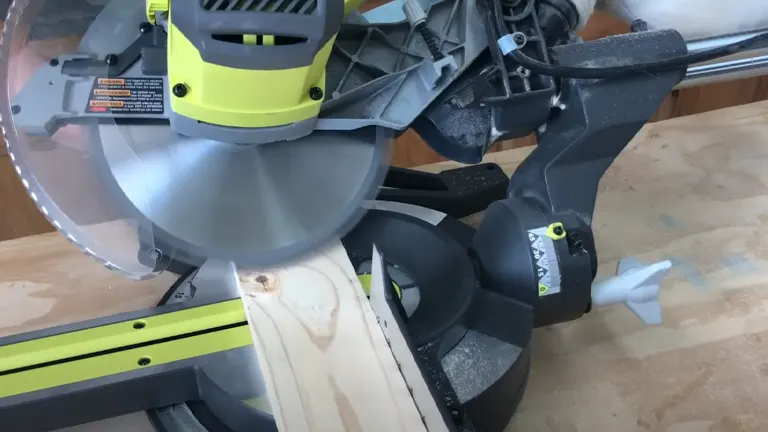
9. Making the Cut
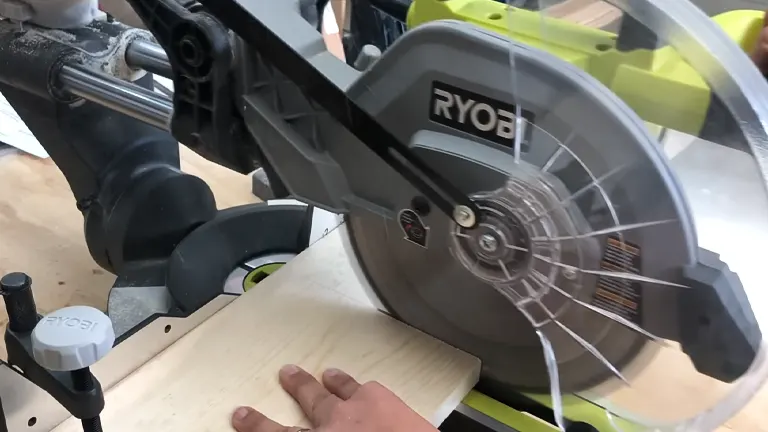
Gradually lower the miter saw blade through the board, meticulously adhering to the previously marked line with unwavering attention. Employ a deliberate and controlled motion throughout this descent, aiming for a methodical approach that prioritizes precision in each passing moment of the cut. The emphasis here lies in cultivating a steady hand, ensuring that the blade moves through the material in a controlled manner, contributing to the attainment of an accurate and refined outcome. In the context of a sliding miter saw, it is particularly crucial to adopt a strategic approach: always extend the saw out before executing the cut, and then guide it toward the fence. This specific technique not only enhances the stability of the cutting process but also ensures a smoother and more controlled operation, underscoring the significance of the technique in achieving optimal results with your miter saw.
10. Completing the Cut
Upon completing the cut, release the trigger to disengage the miter saw, and allow the blade to come to a complete stop before initiating any further action, such as raising it back up. This precautionary practice is not only a safety measure but also a crucial step in preventing any unintended movements that could potentially compromise the overall quality of the cut and, more importantly, pose safety hazards. By adhering to this deliberate pause, you are instilling a habit that underscores the importance of careful consideration and attention to detail, fostering a workspace environment that prioritizes the well-being of the operator and the integrity of the woodworking project at hand.
Safety Guides and Tips on Using a Miter Saw
- Wear Personal Protective Equipment (PPE): Start with safety glasses to protect your eyes from flying debris. Consider using hearing protection and a dust mask for added safety and comfort.
- Dress Appropriately: Wear snug-fitting clothing to avoid any loose ends getting caught in the saw. Tie back long hair or wear a cap to prevent interference with the machine.
- Read the User Manual: Take the time to read and understand the user manual provided by the manufacturer. This will familiarize you with the specific features and safety guidelines for your miter saw.
- Clear Workspace: Keep your work area tidy and free of unnecessary items. A clutter-free space reduces the risk of accidents and allows for better control while operating the saw.
- Secure Your Workpiece: Always use clamps to secure your workpiece to the miter saw’s table. This prevents the material from shifting during cutting, ensuring a safer and more accurate operation.
- Wait for Full Speed: Allow the miter saw’s blade to reach full speed before making a cut. This ensures a smoother and more controlled cutting process.
- Hands Away from the Blade: Keep your hands away from the cutting path of the blade. Use tools like push sticks to guide the material through the cut, maintaining a safe distance from the sharp edges.
- Use the Blade Guard: Keep the blade guard in place during operation. The guard is a crucial safety feature designed to protect your hands from accidental contact with the rotating blade.
- Wait for the Blade to Stop: After completing a cut, release the trigger and wait for the blade to come to a complete stop before lifting it. This prevents any accidental movements that could lead to injuries.
- Disconnect Power for Adjustments: Before making any adjustments to the miter saw, disconnect it from the power source. This adds an extra layer of safety, preventing accidental starts during adjustments.
- Mind the Power Cord: Ensure the power cord is positioned away from the cutting path and is not tangled. This prevents any interference or tripping hazards during operation.
- Emergency Stop Awareness: Familiarize yourself with the location of the emergency stop button or switch on your miter saw. Be ready to use it in case of unexpected situations.
- Keep a Safe Distance: Maintain a safe distance from the cutting area, and ensure that children and bystanders are kept away to avoid accidental injuries.
- Regular Inspection: Periodically inspect your miter saw for any loose parts, blade condition, and proper functioning of safety features. Address any issues promptly to maintain a safe working tool.
By following these safety guides and tips, beginners can enjoy a secure and confident experience with a miter saw. Always prioritize safety, and take the time to familiarize yourself with the tool before starting any project.
Related Post
- How To Build A Miter Saw Station
- 7 DIY Miter Saw Station Plans For Your Workshop
- How to Adjust a Miter Saw for Accurate Cuts
- Miter Saw Guide: Single VS Dual Bevel
Final Verdict
Embarking on the journey of using a miter saw as a beginner, the guides offered here serve as your go-to manual, providing a comprehensive and beginner-friendly approach. Step-by-step instructions demystify the process, making it accessible for newcomers. The emphasis on safety, from the necessity of personal protective equipment to grasping emergency stop procedures, reflects a dedication to fostering a secure workspace. In addition to these fundamentals, practical tips, such as proper workpiece securing and patiently waiting for the blade to reach full speed, offer hands-on insights that beginners can easily incorporate. Acknowledging the significance of blade selection and regular maintenance contributes to a holistic understanding, ensuring not only safe operation but also optimal performance from your miter saw. In essence, these guides establish a well-rounded foundation, instilling the technical knowledge and safety-conscious approach vital for any novice woodworker stepping into the realm of mastering the miter saw.
FAQs
- Why is mastering the miter saw essential for beginners in woodworking?
Mastering the miter saw is crucial as it is a versatile tool that allows precise cuts, enabling beginners to create intricate designs and achieve professional-grade craftsmanship. - What safety precautions should beginners prioritize when using a miter saw?
Safety is paramount. Beginners should wear personal protective equipment, secure workpieces properly, and familiarize themselves with emergency stop procedures. Always prioritize a clutter-free workspace. - How do I choose the right blade for my miter saw?
Consider factors like tooth count, tooth design, and material compatibility. For smooth cuts in wood, opt for a fine-tooth blade, while a coarse-tooth blade is suitable for rougher cuts. - What are some common mistakes to avoid when using a miter saw for the first time?
Common mistakes include not securing the workpiece adequately, neglecting safety gear, and failing to wait for the blade to reach full speed before making a cut. Always follow the recommended procedures. - Can a miter saw be used for bevel cuts?
Yes, a miter saw is versatile and can be used for bevel cuts. Adjust the bevel scale and lock lever to achieve the desired angle for creating beveled edges. - How often should I perform maintenance on my miter saw?
Regular maintenance is key. Check for loose parts, ensure proper blade alignment, and lubricate moving components. Regular inspections contribute to a safer and more efficient tool. - Is it necessary to practice on scrap material before starting a project with a miter saw?
Yes, practicing on scrap material allows beginners to familiarize themselves with the tool, refine their technique, and make necessary adjustments before working on their actual project. - Can a miter saw be used for cutting materials other than wood?
Absolutely. Miter saws can cut various materials, including metal and plastic. Ensure you use the appropriate blade for the specific material you are working with to achieve the best results.
As we wrap up this guide designed for beginners diving into the world of mastering the miter saw, keep in mind that woodworking requires both precision and creativity. With the knowledge from these pages, you’re ready to skillfully use this important tool, whether you’re making custom furniture or refining your trim work. The miter saw is your companion in turning raw materials into polished pieces. The journey to mastery involves ongoing practice, patience, and a commitment to safety. As you start your woodworking projects, use the insights gained here as a solid foundation for a rewarding and successful experience with the miter saw. Happy woodworking!

Benjamin Brooks
Forestry AuthorGreetings! I'm Benjamin Brooks, and my journey over the past 15 years has revolved around the fascinating realms of content creation, expertise in snow clearing, and the intricate world of lumberjacking and landscaping. What began as a simple curiosity about the natural world and heavy machinery has evolved into a passionate profession where my love for crafting words intertwines seamlessly with my lumberjacking and garden skills.


Leave your comment