How to Cut Down a Tree Safely: Guide to Tree Felling
- December 4, 2023
- 0 comment
Tree felling, while essential in forestry, landscaping, and even personal yard maintenance, is a task that intertwines skill with a deep understanding of arboricultural principles and stringent safety practices. This guide provides an exhaustive overview of how to safely and effectively bring down a tree, ensuring the safety of both the individual performing the task and the surrounding environment.
The Three Essential Components of Tree Felling
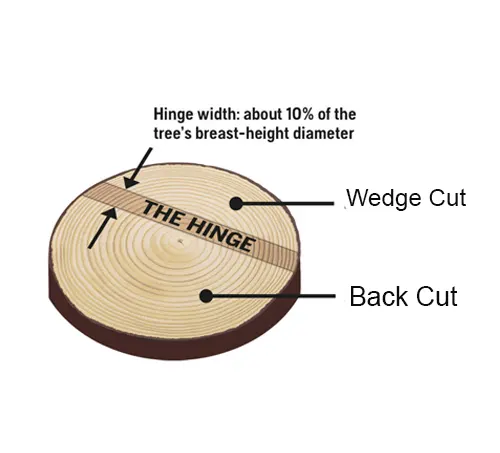
Tree felling is an intricate process requiring a blend of precision, an understanding of tree mechanics, and adherence to safety protocols. Central to this process are three critical components: the Wedge, the Hinge, and the Back Cut. Each plays a vital role in ensuring the controlled and safe fall of a tree.
1. The Wedge Cut: Setting the Direction
Starting with the Wedge Cut, this initial incision is fundamental in determining the direction of the tree’s fall. It involves cutting approximately one-third into the trunk, setting the stage for the steps that follow. The precision of this cut is crucial, as it not only dictates the fall direction but also plays a pivotal role in ensuring the tree does not fall in an uncontrolled manner.

2. The Hinge: The Control Mechanism
Following the wedge is the Hinge. This is a strategically left intact section of wood after the wedge cut. Functioning as a pivot or hinge, it controls the tree’s descent. Typically, this hinge should be about one to one and a half inches thick, varying based on the tree’s size and species. This width strikes a balance, offering enough strength to control the direction of the fall while still allowing the tree to bend and topple in the desired direction. The hinge’s role is critical in guiding the tree and preventing it from falling erratically.
3. The Back Cut: Initiating the Fall
Lastly, the Back Cut made slightly above the wedge cut, is what ultimately initiates the tree’s fall. Its positioning is critical to maintaining the integrity of the hinge. This cut is parallel to the wedge cut to ensure a consistent hinge width, allowing the tree to fall in a controlled manner. The back cut is a delicate step, crucial for the final direction and manner in which the tree falls. Precise execution of this cut is paramount to prevent the tree from splitting or losing control as it descends.

Understanding and accurately executing the wedge, hinge, and back cut is essential for safe and effective tree felling. Each component has a specific function and requires careful attention to detail.
Step-by-Step Process of Felling a Tree
Step 1: Starting with the Wedge Cut

The first step in tree felling is making the wedge cut. This is done by cutting horizontally into the tree, typically at about waist height. This height is chosen for ease of control and effectiveness in guiding the tree’s fall. While making this cut, it’s important to use the markings on your chainsaw as a guide to ensure the cut is in the correct direction. The precision of this cut cannot be overstated – the top and bottom of the wedge must meet perfectly. Overcutting can lead to loss of control over the direction in which the tree falls, so take care to cut just the right amount.
Step 2: Establishing the Hinge

Once the wedge cut is complete, the next step is to establish the hinge. This is a section of wood that is intentionally left uncut, located between the wedge cut and the back cut. The hinge’s primary role is to control the direction of the tree’s fall, acting as a pivot point. The thickness of the hinge is critical – it should not exceed one and a half inches. This thickness ensures that the tree is guided effectively during its fall but also allows it to fall without unnecessary resistance. Uniformity in the hinge’s width is vital for the tree to fall as planned.
Step 3: Executing the Back Cut
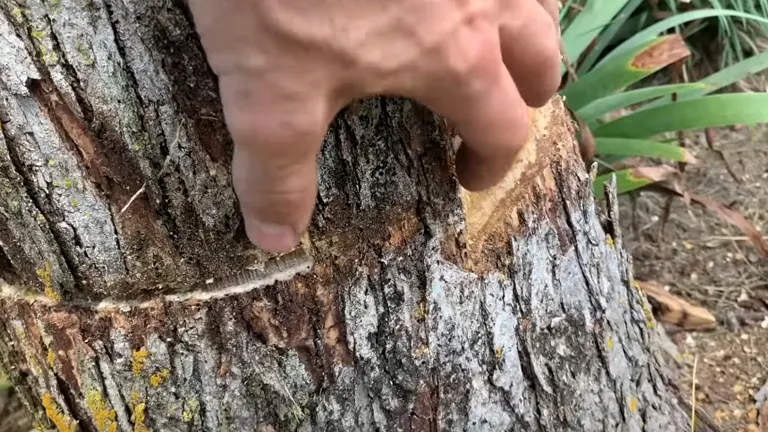
The final major step in felling a tree is the backcut. This cut is made parallel to the wedge cut and should be positioned just slightly above it. The backcut releases the tree, allowing it to fall. Maintaining the correct hinge width during this cut is essential for control over the fall. Special attention is needed when dealing with large trees or trees with significant lean, as these factors can affect the tree’s stability and the direction in which it falls. The backcut should be done carefully and methodically to ensure the tree falls in the desired direction and minimizes the risk of unexpected movement or splitting.
Common Mistakes and How to Avoid Them
When felling a tree, certain common mistakes can significantly increase the risk of injury or property damage. Understanding these mistakes and knowing how to avoid them is crucial for safe and effective tree felling:
Overcutting the Wedge
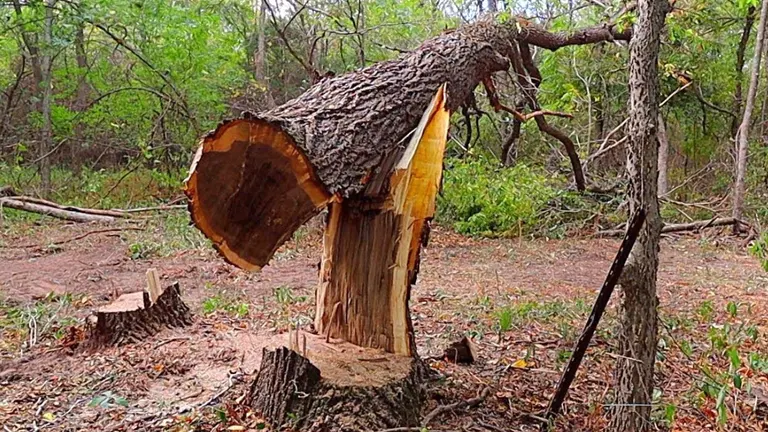
A critical error occurs when the wedge cut is made too deep or extends beyond its intended point. This overcutting can transform the tree into a lever, exerting an upward force on the hinge. This force can lead to a dangerous phenomenon known as a “barber chair,” where the tree splits vertically and falls unpredictably. To avoid this, it’s essential to measure and execute the wedge cut precisely, ensuring it is no deeper than necessary and that the top and bottom cuts of the wedge meet perfectly without extending beyond their meeting point.
Inconsistent Hinge Width

The hinge is vital for controlling the direction of the tree’s fall. An uneven or inconsistent hinge can lead to the tree falling in an unintended direction, posing a serious risk to the feller and the surrounding area. This can happen if the hinge is cut too thin on one side or left too thick on the other. To prevent this, careful attention should be paid to the hinge’s width throughout its length, ensuring it remains uniform. Using the chainsaw’s guide bar can help maintain consistency in the hinge thickness.
Improper Back Cut Position
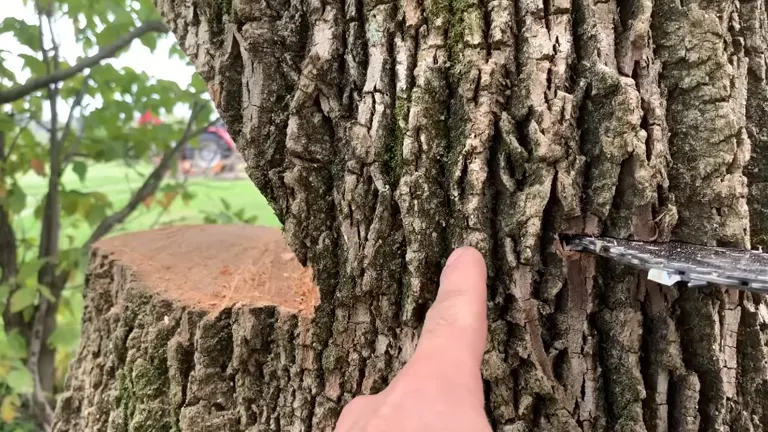
The position of the back cut relative to the wedge cut is another area where mistakes commonly occur. If the back cut is too high, it can compromise the hinge’s effectiveness, whereas a cut too low can prevent the tree from falling as intended. The back cut should be parallel to and slightly above the wedge cut, ensuring that the hinge functions correctly. It’s crucial to line up the back cut properly and to monitor its progress, stopping when the tree begins to lean or crack, indicating the commencement of the fall.
In all these steps, the key to avoiding mistakes is a combination of careful planning, precise execution, and constant awareness of the tree’s response to each cut. Regular practice, learning from experienced tree fellers, and never rushing the process are also important factors in minimizing these common tree-felling mistakes.
Advanced Techniques and Safety Measures
Advanced techniques and safety measures are crucial in tree felling, especially in challenging situations. These practices not only enhance control over the tree’s fall but also significantly increase the safety of the operation:
Using Ropes for Control
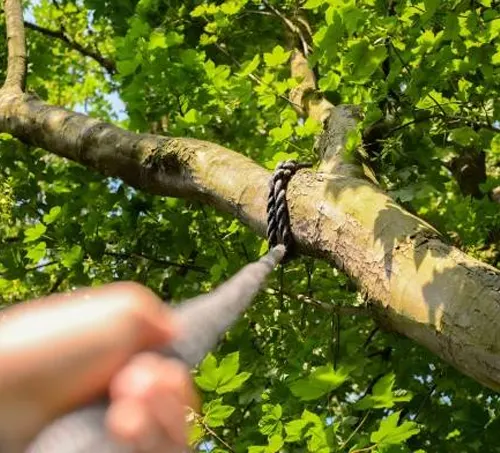
In scenarios where the tree presents a higher risk due to factors like an unnatural lean or proximity to structures, using ropes can drastically improve control. By attaching ropes to the higher parts of the tree, you can guide its fall more accurately. A rope puller is a valuable tool in this context, as it allows for the application of controlled tension in a specific direction. This method is particularly useful for preventing trees from falling onto buildings, power lines, or other sensitive areas. It’s important, however, to ensure that the ropes are strong enough to handle the weight and forces involved and that they are anchored securely.
Safety Gear
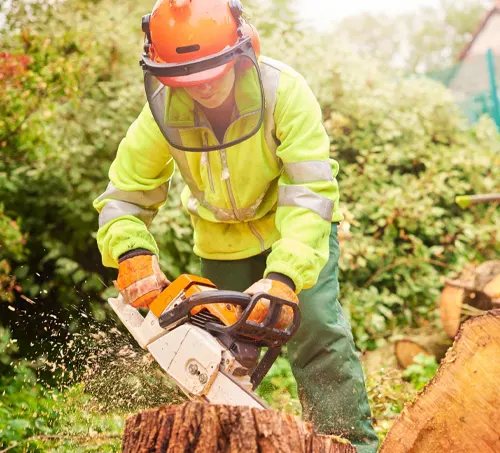
Personal protective equipment is non-negotiable in tree felling. This includes a hard hat to protect against falling branches and debris, safety glasses or a face shield to protect your eyes, hearing protection due to the loud noise of chainsaws, and cut-resistant clothing to protect against accidental chainsaw cuts. Gloves and sturdy boots with good grip are also essential. This gear is particularly important when dealing with trees that are dead or partially alive, as they can be unpredictable and may fall or drop limbs unexpectedly.
Planning and Observation
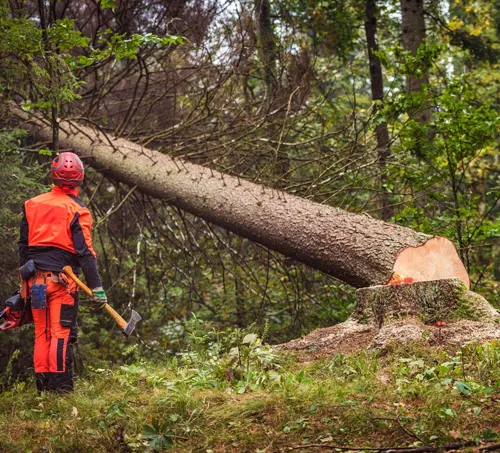
Proper planning and continuous observation are key to a safe tree-felling operation. Before making the first cut, plan your cuts, the tree’s fall direction, and your escape routes. As you cut, keep a keen eye on the tree’s response. Look for signs like cracking sounds or shifts in the tree’s lean, which can indicate that the tree is about to fall. Be prepared to adjust your technique if the tree reacts differently than expected. It’s also crucial to have a clear escape route planned out, ideally at a 45-degree angle from the direction of the fall, so you can quickly move to safety once the tree begins to fall.
Escape Routes in Tree Felling
Escape routes in tree felling are critical for ensuring the safety of the individual performing the felling. They are pre-planned paths that the feller uses to quickly and safely move away from the tree as it begins to fall. Here’s a closer look at their importance and how to plan them:
Importance of Escape Routes:
- The primary purpose of an escape route is to provide a clear and immediate path to safety once the tree starts to fall. Trees can behave unpredictably as they fall, and having a predetermined escape route reduces the risk of being caught in the fall path or by rebounding debris.
- Escape routes are a part of the overall preparedness for tree felling. They are considered as important as the cutting technique itself.
- scape routes help in avoiding injuries that can occur due to the tree kicking back or other unexpected movements during the fall.
Planning Escape Routes:
- Ideally, have at least two escape routes planned. This provides options in case one path becomes obstructed or unsafe due to the tree’s fall direction or other unforeseen circumstances.
- Escape routes should generally be planned at a 45-degree angle from the direction of the fall on either side of the tree. This angle tends to be the safest as it avoids both the direct fall line and the potential path of the tree kicking backward.
- Ensure that the escape routes are clear of obstacles. Remove any brush, branches, or equipment that might hinder a quick and unhindered exit.
- The escape route should extend a safe distance away from the base of the tree, ideally at least 20 feet or more, depending on the size of the tree.
- Throughout the felling process, remain aware of your escape routes. Keep in mind that as the tree begins to fall, conditions can change rapidly.
- Before making the first cut, physically walk your escape routes. This practice ensures familiarity with the path and can help you navigate it quickly during the actual felling.
- If working with a team, make sure everyone is aware of the escape routes and the plan of action once the tree begins to fall.
Escape routes are an integral part of the tree felling process, providing a crucial safety mechanism for the individual performing the work. Proper planning, clearing, and familiarity with these routes are essential for minimizing the risk of accidents and injuries during tree-felling operations.
Conclusion
In conclusion, the art of safely felling a tree is a skill that blends precise technique with a deep respect for nature and a stringent commitment to safety. From understanding the critical importance of the wedge, hinge, and back cut, to recognizing and avoiding common pitfalls, this guide has aimed to equip you with the knowledge necessary to approach tree felling with confidence and caution.
Moreover, the emphasis on advanced techniques, such as using ropes for added control, and the non-negotiable requirement of safety gear, underlines the complexities and inherent risks of the task. The role of careful planning, continuous observation, and the vital need for clear escape routes cannot be overstated.
Remember, each tree is unique, and as such, each felling scenario presents its own set of challenges. Whether you’re a professional arborist, a forestry worker, or a homeowner engaged in DIY yard care, the principles outlined in this guide should serve as your compass. The goal is not only to fell a tree effectively but to ensure that it is done with the utmost respect for personal safety and the integrity of the surrounding environment.
As you apply these techniques and insights, may you do so with a sense of responsibility and an unwavering commitment to safety. Happy felling, and may each tree you bring down be a testament to the skill and care with which you approach this demanding yet rewarding task.
Related Articles:
- How To Sharpen A Chainsaw Properly: Tips and Tricks
- Best Top Handle Chainsaw: Forestry Choice
- 10 Best STIHL Chainsaws of 2023: Forestry Choice
- 12 Best Pole Saws of 2023
- Chainsaw Length Guide
- 10 Best Husqvarna Chainsaws
FAQs
- Can I use a drone to assess a tree before felling it?
Absolutely! Using a drone can provide a unique aerial view and help assess the tree’s condition, lean, and the surrounding area for potential hazards. This is especially useful for large trees or those in complex environments. - Is there a way to predict how a dead or partially alive tree will fall?
Predicting the fall of a dead or partially alive tree is more challenging due to the unpredictable nature of the wood. However, using techniques like sounding (tapping the tree with an axe and listening to the sound) can give clues about the internal structure and stability. - How does weather affect tree felling?
Weather conditions play a significant role. High winds can make felling dangerous, while wet conditions can make the area slippery. It’s best to perform tree felling in calm, dry weather. - Can tree felling be a two-person job for larger trees?
Yes, for larger trees, it’s often safer to work in pairs. One person can make the cuts while the other assists with ropes and observes for safety, providing a different perspective and immediate assistance if needed. - How does the type of tree affect the felling process?
Different tree species have varying wood densities and branching patterns, which can influence how they fall. For instance, a pine tree may fall differently from an oak due to differences in weight distribution and wood flexibility. - Is there a technological tool to assist in determining the exact fall direction?
There are smartphone apps available that utilize augmented reality to help visualize the tree’s fall direction, aiding in more precise planning and cutting. - How important is the maintenance of the chainsaw in tree felling?
Extremely important. A well-maintained chainsaw ensures clean cuts and reduces the risk of accidents caused by equipment failure. Regularly check the sharpness of the chain, tension, and lubrication. - Can listening to the tree help during the felling process?
Yes, being attuned to the sounds a tree makes, such as cracking or popping, can provide early warning signs of how the tree is reacting, allowing for timely adjustments or retreat. - Is there an eco-friendly way to dispose of the tree after felling?
Absolutely. The wood can be used for lumber, firewood, or mulch, branches can be chipped for landscaping, and the stump can be left for habitat or ground down for safety. - What’s the role of escape routes in tree felling?
Having clearly planned and unobstructed escape routes is crucial for safety. It ensures that you can quickly and safely move away from the tree as it begins to fall, reducing the risk of injury.

David Murray
Forestry AuthorI'm David Murry, a forestry equipment specialist with a focus on chainsaw operation. With over 13 years of experience, I've honed my skills in operating and maintaining a wide range of machinery, from chainsaws to log splitters. My passion for the outdoors and commitment to sustainable forestry drive my work, which emphasizes safety, efficiency, and staying updated with industry advancements. Additionally, I'm dedicated to sharing my expertise and promoting environmental awareness within the forestry community.








Leave your comment