How To Cut Plywood Cleanly Without A Track Saw
- February 21, 2024
- 0 comment
Addressing the task of making a precise cut along the edge of a plywood sheet without access to a track saw led me to explore unconventional methods. The specific piece of plywood I needed to cut was slightly less than 36 inches in width and about five feet in length. My objective was to achieve a cut that was clean and smooth enough to be considered finished, eliminating the need for post-cut sanding or trimming.
Initially, I considered using straight-line rip jigs, which are typically reliable for such tasks. However, I encountered a significant issue: both of my jigs, including a Dewalt model, exhibited flexing and wobbling during use, compromising the cut’s quality. The alternative of building a large table saw sled was dismissed due to its impracticality, notably because of storage concerns and the potential for warping over time.
These challenges necessitated a departure from conventional methods, prompting me to devise a new approach that would ensure the precision and quality of the cut without relying on the standard tools and techniques that proved inadequate for the task at hand. This scenario underscored the necessity of adaptability and innovation in woodworking, especially when faced with limitations in tools and equipment.
List of How To Cut Plywood Cleanly Without A Track Saw:
- Reassessing Tools and Techniques
- Innovative Methodology
- Preparation and Measurement
- Setting Up the Fence
- Securing the Setup
- Making the Cut
- Reflecting on the Process
Many plywood projects necessitate trimming the material to specific dimensions. Homeowners often ponder the optimal method for slicing through plywood. Options include utilizing a handsaw, jigsaw, table saw, or circular saw.
Continue reading for guidance and advice on employing these instruments for plywood cutting tasks.
It’s crucial to don ear, eye, and hand protection while operating power saws. Given the significant dust generation during plywood cutting, performing this task in a garage or an outdoor space is advisable.
8 Step-By-Step Guidelines
Here’s an 8-step guide to achieving a clean cut on plywood without a track saw, based on my experience:
Step 1: Reassessing Tools and Techniques
Initially, the idea of using a straight edge with double-sided tape as a guide seemed promising for achieving a clean cut on the plywood. The plywood, however, presented a challenge with its slight warp, which complicated the use of tape for stabilization.
This realization led to the search for a method that could deliver precision without relying heavily on tape or requiring extensive adjustments, highlighting the need for a more reliable and straightforward approach to address the issue of warping and ensure accuracy in the cutting process.
Step 2: Innovative Methodology
The solution emerged from an unconventional use of the table saw’s edge, a strategy not commonly employed. This approach necessitated a preliminary check to confirm the parallel alignment of the table’s edge with the saw blade.
Upon verifying this condition with my equipment, it became clear that utilizing the table’s edge could offer a precise guide for the cut, bypassing the limitations and inaccuracies associated with the traditional tools and jigs at my disposal.
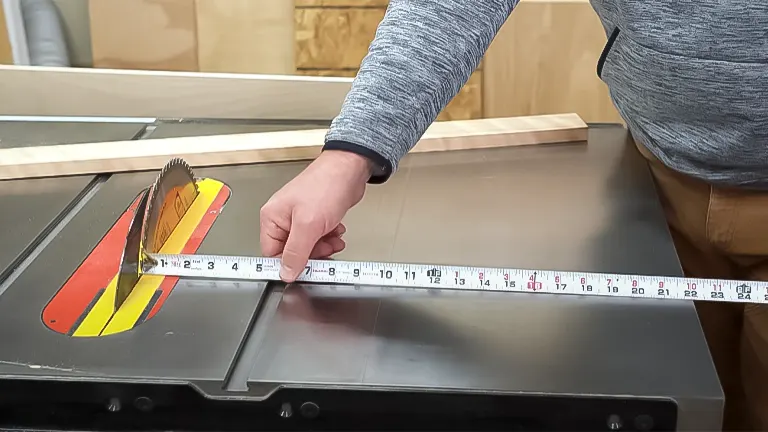
Step 3: Preparation and Measurement
The process began with marking the plywood at the specific point where the strip needed to be cut off, ensuring the mark was slightly off the edge to include only the unwanted strip.
To achieve the necessary precision, I measured the distance from the saw blade to the edge of the table, then transferred this measurement onto the plywood.
This step was critical in determining the exact placement for the fence, ensuring the cut would be accurate and aligned with the initial mark.
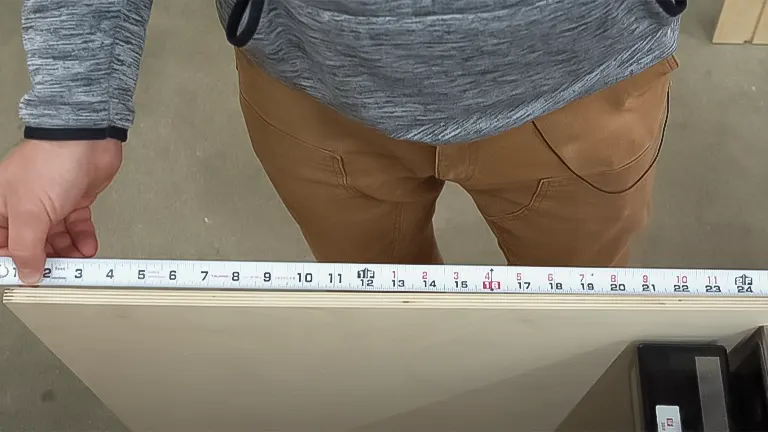
Step 4: Setting Up the Fence
Armed with accurate measurements, I used a square to align the fence perfectly with the mark on the plywood. This careful alignment was vital for the success of the cut, requiring meticulous attention to ensure the fence was positioned correctly.
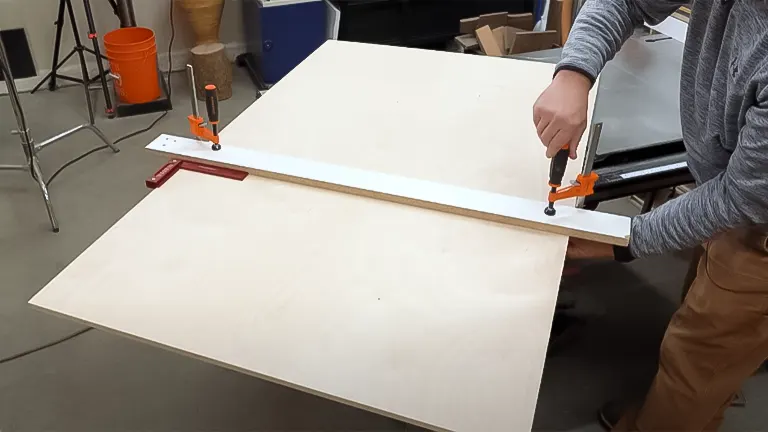
The precision in this step underscored the importance of accurate setup before proceeding with the cut, as any misalignment could affect the quality of the finished edge.
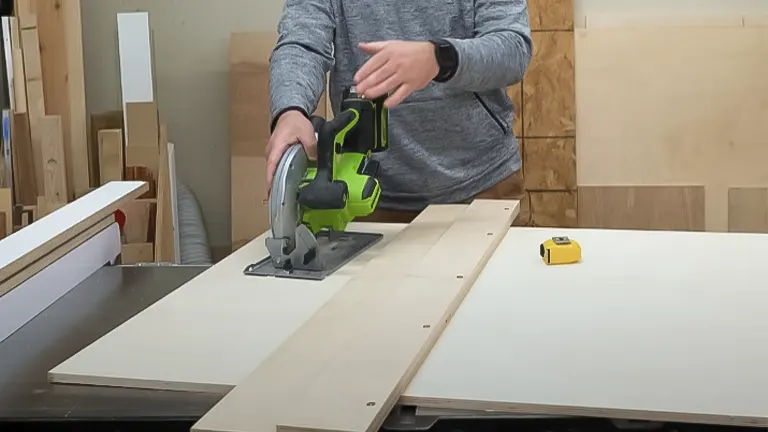
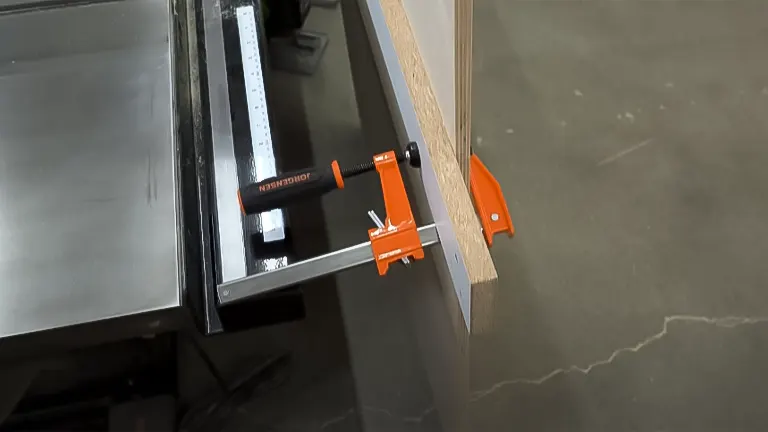
Step 5: Securing the Setup
With the fence aligned, it was essential to clamp it down securely, ensuring it was positioned on the side opposite the blade.
This precaution was taken to prevent any interference during the cut and to ensure the arrangement remained stable and immovable.
The secure clamping of the fence was crucial for a smooth cutting process, minimizing the risk of any movement that could compromise the cleanliness of the cut.
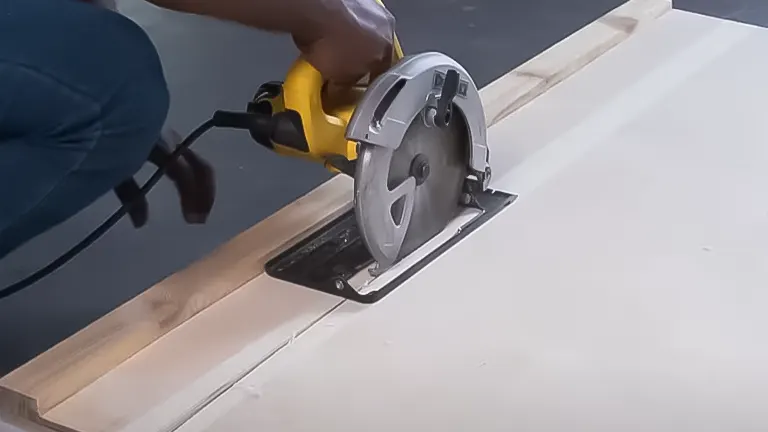
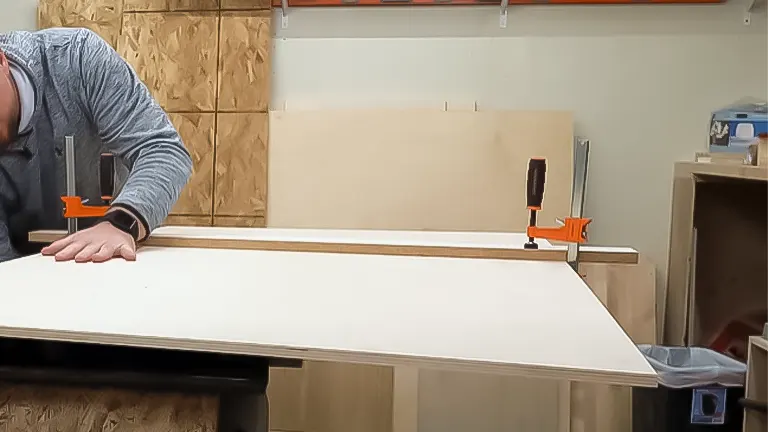
Step 6: Making the Cut
With the setup complete and the blade adjusted to the correct height, the plywood was flipped over, and the cut was initiated.

The anticipation of the setup’s performance was significant, but the thoroughness of the preparation provided confidence in the outcome.
This step marked the culmination of the setup efforts, with the expectation that the methodology would yield the desired precision.
Step 7: Evaluating the Outcome
The result of the cut exceeded expectations, delivering an astonishingly precise and smooth edge without any splintering or saw marks.
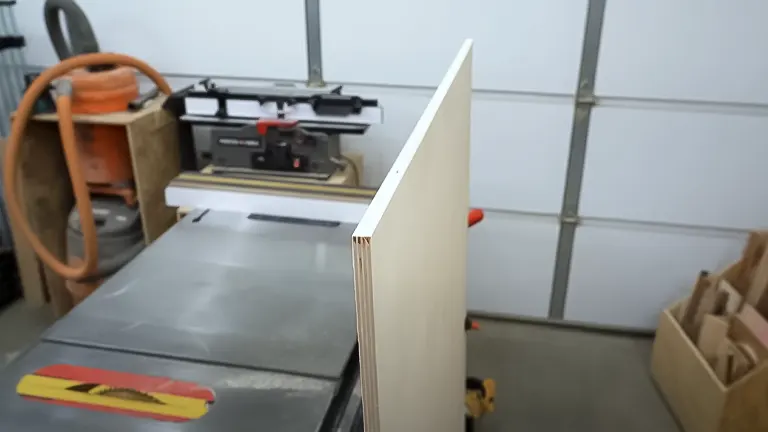
This outcome validated the effectiveness of the method, demonstrating that even with a bit of setup time, it is possible to achieve clean cuts without the need for a track saw.
The success of this approach offered a practical solution to the limitations posed by the available tools, emphasizing the method’s utility in achieving high-quality cuts.
Step 8: Reflecting on the Process
This experience underscored the value of creativity and adaptability in woodworking, showcasing the ability to overcome tool limitations through innovative approaches.
The necessity of finding an alternative to a track saw led to the development of a novel method that not only achieved the desired outcome but also expanded the possibilities for working with plywood.
This reflection highlights the importance of problem-solving and the willingness to explore unconventional techniques in the pursuit of precision and quality in woodworking projects.
Decision-Making Factors
In my experience, the key factors when choosing a method are the size of the plywood, the type of cut required (straight vs. intricate), and the tools at hand. For large, straight cuts, a circular saw with a DIY guide rail offers a good balance between precision and cost. For intricate shapes, a jigsaw may be your best bet, despite the potential for splintering.
The Best Overall Method
Considering the balance of precision, ease of use, and accessibility, using a circular saw with a DIY guide rail stands out as the best overall method for cutting plywood without a track saw. It offers a great mix of accessibility and quality of finish, suitable for most DIYers’ needs.
Concluding Thoughts
To wrap up, the essence of this experience transcended merely slicing through plywood; it was an exploration of inventive problem-solving. This adventure underscored how a sprinkle of creativity and an openness to trial and error can empower one to navigate around the constraints of their equipment, culminating in outcomes of a professional caliber. I aim for this narrative to serve as a beacon of inspiration for my woodworking peers confronted with analogous obstacles, encouraging an innovative mindset and bolstering confidence as you approach your woodworking endeavors.
Frequently Asked Questions
- What tools can I use to cut plywood cleanly without a track saw?
You can use a circular saw, table saw, jigsaw, or even a handsaw with the right technique and preparation. The key is to use sharp blades designed for plywood and to ensure your cutting guide is stable. - How do I prevent plywood from splintering when cutting?
To minimize splintering, apply painter’s tape along the cut line on both sides of the plywood, use a blade with more teeth specifically designed for cutting plywood, and make sure the blade is sharp. Also, supporting the plywood properly to reduce vibration can help. - Can I achieve a straight cut without a track saw?
Yes, you can achieve a straight cut by using a straight edge or clamped guide as a fence for your circular saw. Ensure the guide is perfectly straight and securely clamped to the plywood. - What blade should I use to cut plywood?
Use a blade with a high tooth count, such as a 40-tooth or higher blade for a circular saw or a fine-toothed blade for a jigsaw. These blades are designed to give cleaner cuts with less splintering. - How do I measure and mark plywood for cutting?
Measure your cut line carefully and use a straight edge or chalk line to mark it. Ensure your measurements are accurate and your marking tool provides a clear, straight line for guidance. - Is it necessary to support the plywood while cutting?
Yes, it’s essential to support the plywood across its length and width to prevent bending or vibration during the cut, which can lead to inaccuracies or splintering. Use sawhorses, a workbench, or foam insulation boards on the ground for support. - What safety gear should I wear when cutting plywood?
Always wear safety glasses to protect your eyes from dust and debris, hearing protection to safeguard your ears from the noise of power tools, and gloves to protect your hands. - How can I ensure the plywood doesn’t move during cutting?
Secure the plywood to your work surface or ensure it is adequately supported and weighted down. If using a guide, make sure it’s clamped securely so neither the plywood nor the guide moves during the cut. - What is the best way to cut large sheets of plywood?
For large sheets, it’s often easier to cut them down to manageable sizes first. Use a circular saw with a straight edge guide for long, straight cuts. Plan your cuts to minimize waste and ensure accuracy. - How can I clean up edges after cutting plywood?
If the edges of your plywood are rough after cutting, you can clean them up with a bit of sanding. Use a fine-grit sandpaper and sand along the edge in the direction of the wood grain to smooth out any imperfections.
We’re eager to connect with you! Share your personal experiences and insights on cutting plywood cleanly without a track saw in the comments section below. Your tips, tricks, and stories could greatly assist fellow DIY enthusiasts and woodworkers in achieving precise cuts. Let’s help each other make more informed choices and master new techniques!

Edward Smith
Forestry AuthorWoodworking is about more than crafting; it's a harmonious connection with nature, mastering tools, and preserving our environment. I'm here to share my knowledge and experiences with you, forging a future where we can embrace wood's beauty and utility while safeguarding our forests' health and diversity.


Leave your comment