How to Build a Sawhorse: A Step-by-Step Guide
- March 18, 2024
- 0 comment
Learn How to Build a Sawhorse with our friendly guide, and never get stuck without a sturdy support again. These workshop wonders are not just for cutting they’re perfect for anything from makeshift tables to painting easels. Dive in and make your DIY tasks easier and more efficient.
List on How to Build a Sawhorse:
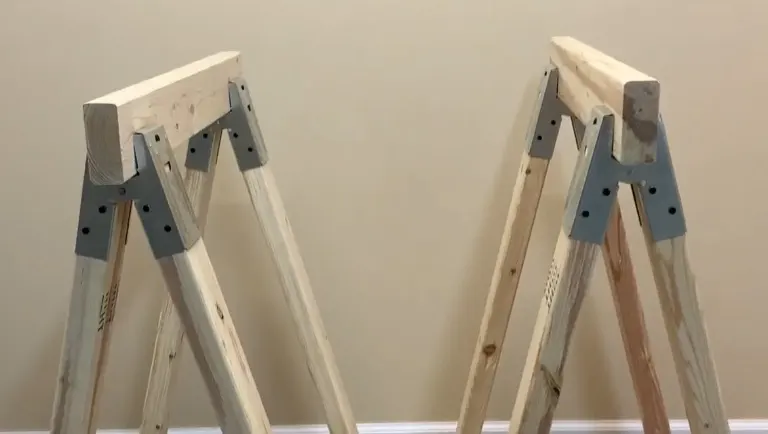
Types of Sawhorses
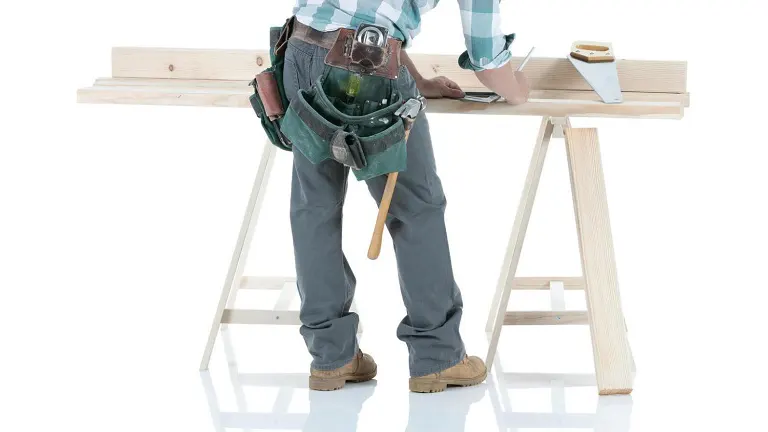
When you wander through the aisles of a hardware store, you’ll see sawhorses in all shapes and sizes, from collapsible metal ones to heavy-duty plastic. But there’s something undeniably appealing about a classic wooden sawhorse. It has a timeless look and, when made well, can withstand the rigors of heavy use. Plus, there’s something to be said for the warmth and natural feel of wood in a workshop setting.
Wooden Sawhorse
wooden sawhorse is a surprisingly old tool, dating back to the Egyptians! Originally made from various sturdy materials, it’s a symbol of craftsmanship and has multiple uses beyond just cutting wood. You can even build your own for a fun DIY project!

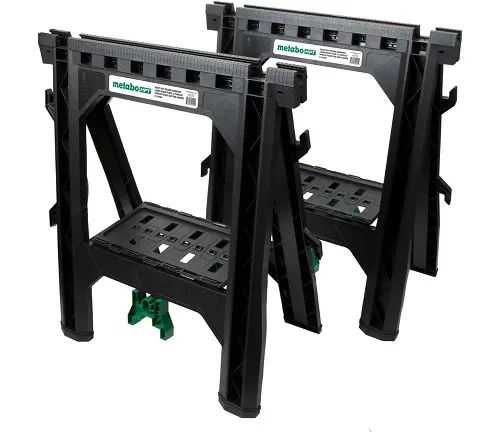
Metal Sawhorse
Metal sawhorses are the superheroes of the workshop. Made from steel or aluminum, they’re super strong (holding over 1000 pounds!), lightweight, and built to last. They fold for easy storage and some even have cool features like adjustable heights and clamps. While pricier than wood, they’re a great investment for heavy-duty projects.
Plastic Sawhorse
Plastic sawhorses are cheap, light, and weatherproof – perfect for light DIY projects or those on a budget. However, they can’t handle heavy loads and may not be the most durable choice for frequent use.
Why Opt for DIY Sawhorses
You might be wondering, “Why should I make my own sawhorses when I can just buy them?” Well, crafting your own sawhorses means you can tailor them to your exact specifications. Need a wider top for stability? Done. Prefer a certain height to save your back during long projects? You got it. Plus, the process of building them is not only rewarding but also an excellent way to hone your woodworking skills.
Materials Needed
Before we dive into the construction process, let’s talk materials. You’ll be pleased to know that this project doesn’t require a long list of fancy supplies. A few sturdy 2x4s, some screws, and perhaps a dab of wood glue are essentially all you need. These materials are readily available at any local hardware store, making this project both accessible and affordable.
Step-by-Step Guide
Ready to get started? The beauty of building sawhorses is in its simplicity. We’ll guide you through each step, from measuring and cutting the wood to assembling the pieces. Whether you’re a beginner or have years of woodworking experience, you’ll find this guide easy to follow, ensuring a smooth and enjoyable building process.
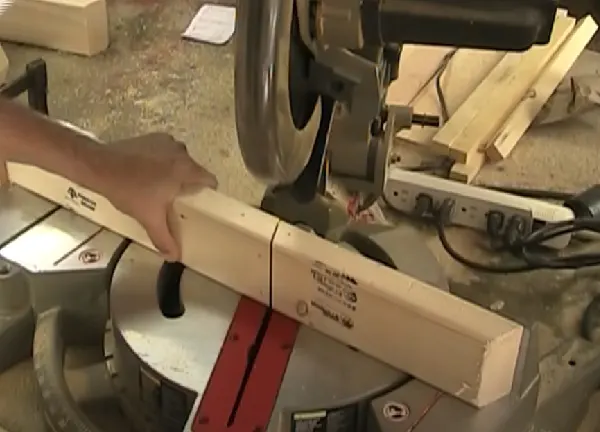
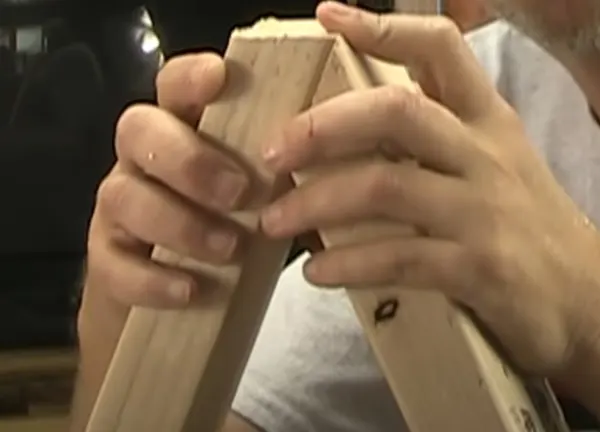
Step 1: Cutting the Legs
- Materials Preparation:
- Start with selecting straight, knot-free 2x4s to ensure the strength and integrity of your sawhorses.
- Ensure your work area is safe and well-lit.
- Measuring and Marking:
- Measure the length you want for the legs, keeping in mind the ideal working height for most tasks is between 28 to 32 inches.
- Use a carpenter’s square to mark the cutting lines on your 2x4s. Precision here is key to ensuring stability.
- Setting the Saw:
- Set your miter saw to a 22.5-degree angle. This angle provides a wide enough stance for stability while not being too splayed.
- If using a handsaw, mark the angle using a protractor for accuracy.
- The Cutting Process:
- Secure the 2×4 on the saw stand and align the saw blade with your marked line.
- Cut slowly and steadily to ensure a clean, straight cut. Repeat for all legs, ensuring they are of equal length for uniformity.
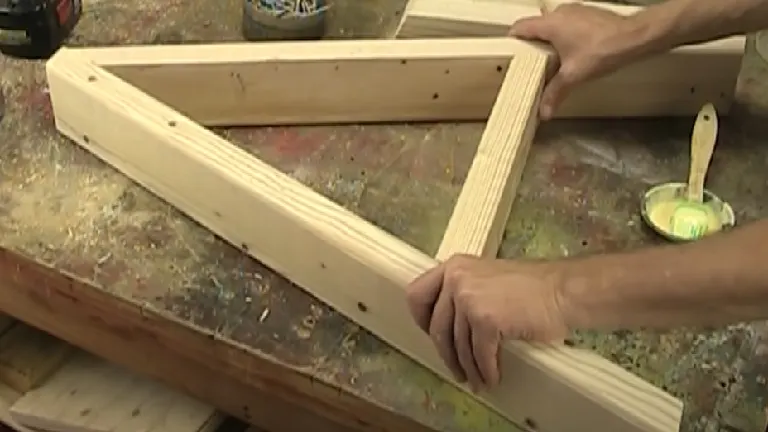
Step 2: Assembling the Frame
- Preparation:
- Lay out the cut legs and the top beam (usually another 2×4) on your work surface.
- Mark the positions where the legs will attach to the top beam, ensuring even spacing and alignment.
- Attaching the Legs:
- Apply Wood Glue Before drilling, apply a thin bead of wood glue along the top edge of each leg where it will connect with the top beam.
- Drill pilot holes to prevent the wood from splitting when inserting screws.
- Use at least two strong wood screws per leg, securing them tightly to the top beam. An L-bracket can add extra strength to this joint.
- Checking for Square:
- Use a carpenter’s square to check that each leg is properly aligned to the top beam.
- Adjust as necessary before the final tightening of the screws to ensure a perfectly square and stable frame.
Optional Bracket Kits for sturdiness and folding feature:

Sawhorse Bracket
- All steel riveted sawhorse bracket
- 4 flanged nail holes on top.
- Feature pre-drilled nail holes for easy assembly.
- Fitted on 2x4s
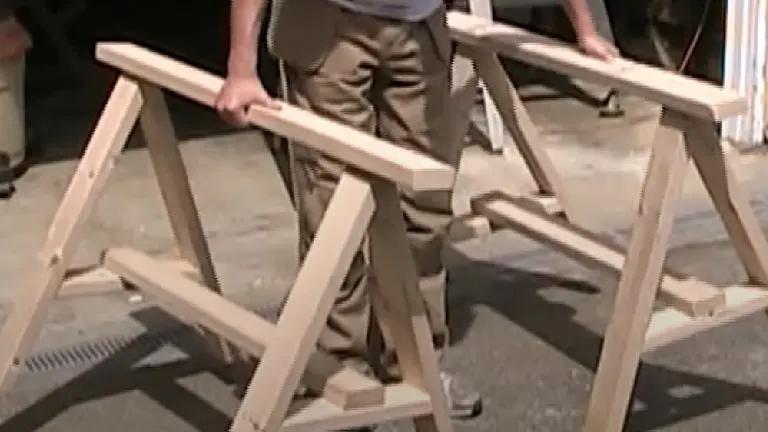
Step 3: Adding Stability with Cross Braces
- Measuring and Cutting Braces:
- Measure the distance between the legs where you’ll place the cross braces for stability.
- Cut 2x4s to this length, adding a 45-degree angle cut at each end so the braces will snugly fit between the legs.
- Attaching the Braces:
- Position the braces between the legs, ensuring they are level and evenly spaced.
- Secure the braces with screws, drilling pilot holes first to avoid splitting the wood.
- Reinforcement:
- For extra stability, consider adding diagonal braces that connect the top beam to the legs, creating a stronger, more rigid structure.
Step 4: Finishing Touches
- Sanding:
- Start with a coarse grit sandpaper to remove any rough spots or splinters, and then move to a finer grit for a smooth finish.
- Pay special attention to edges and corners to make them hand-friendly.
- Painting or Staining:
- Choose a durable outdoor paint or stain if your sawhorses will be used or stored outside.
- Apply with a brush or roller, following the wood grain for the best finish. Allow ample drying time as per the product instructions.
- Sealing:
- For added protection, especially for outdoor use, apply a clear sealant over the paint or stain. This step will help protect your sawhorses from moisture and sunlight.
- Non-slip Surface:
- Consider adding a non-slip pad or strip to the top beam to keep projects from sliding off while working.
Maintenance and Care
To ensure your sawhorses stand the test of time, proper maintenance and care are essential. We’ll share some tips on how to keep your sawhorses in top shape, ready for any project that comes their way.
- Regular Inspection: Before and after each use, take a moment to inspect your sawhorses for any signs of wear and tear. Look for loose screws, cracks in the wood, or any other damage that might compromise their stability.
- Tighten Loose Parts: The constant assembly and disassembly, along with the weight they bear, can loosen screws and joints over time. Periodically check and tighten any screws or bolts to ensure your sawhorses remain sturdy.
- Avoid Excessive Moisture: Wood, despite being treated, can warp, swell, or rot when exposed to excessive moisture. Store your sawhorses in a dry, covered area, especially if you work outdoors or in a damp environment.
- Apply a Protective Finish: If you haven’t already, consider applying a protective finish to your sawhorses. A good sealant, varnish, or paint can protect the wood from moisture and make it easier to clean off glue, paint, or other materials.
- Sanding Down Rough Spots: Over time, the surface of your sawhorses might become rough, splintered, or stained. Use sandpaper to smooth out any rough spots, splinters, or to refresh the surface. This not only prolongs their life but also protects your work materials from damage.
- Cleaning: Keep your sawhorses clean from sawdust, spills, and other debris. A clean sawhorse is not only safer to use but also less likely to suffer from material buildup that can lead to wood rot or rust in metal components.
- Lubricate Moving Parts: If your sawhorses have adjustable or moving parts, such as hinges or folding mechanisms, ensure these are lubricated regularly to prevent rust and ensure smooth operation.
- Store Properly: When not in use, store your sawhorses in a manner that doesn’t put unnecessary stress on any part of their structure. Avoid stacking heavy items on top of them if they’re not designed to bear weight in storage.
- Mind the Load Capacity: Be mindful of the weight your sawhorses are designed to support. Overloading them can not only lead to immediate damage but also weaken their structure over time.
- Address Damage Promptly: If you notice any damage, address it as soon as possible. Small repairs like tightening a screw, adding a support brace, or filling a crack can prevent bigger issues down the line.
- Protect From Extreme Temperatures: If possible, avoid exposing your sawhorses to extreme temperatures, as significant heat can warp wood and extreme cold can make it brittle.
- Replace When Necessary: Even with the best care, all sawhorses have a lifespan. When you notice that your sawhorses are beyond repair, it might be time to retire them and build new ones.
Conclusion
Building your own sawhorses is more than just a weekend project; it’s an opportunity to add a personal touch to your workshop while creating something both practical and durable. Follow this guide, and you’ll be on your way to crafting a pair of sawhorses that will not only serve as reliable workmates but also stand as a testament to your craftsmanship and ingenuity.
FAQs
- What materials do I need to build a sawhorse?
- Typically, you’ll need 2×4 lumber for the legs and top beam, wood screws or nails, wood glue, and optionally, metal L-brackets for additional support.
- What tools are required to construct a sawhorse?
- Essential tools include a saw (hand saw or power saw), drill with drill bits for pilot holes, screwdriver or power drill for driving screws, carpenter’s square for checking angles, and a measuring tape.
- How long does it take to build a set of sawhorses?
- For a beginner, building a pair of sawhorses might take a few hours, including measuring, cutting, and assembling. For those with more experience, the process could be quicker.
- What is the ideal height for a sawhorse?
- The ideal height can vary based on personal preference and usage, but a common height is between 28 to 32 inches, which accommodates a comfortable working height for most people.
- Can I make sawhorses that are foldable for easy storage?
- Yes, by designing the legs to fold and using hinges, you can create sawhorses that are collapsible and more portable, making them easier to store when not in use.
- How much weight can a DIY sawhorse typically support?
- The weight capacity of a DIY sawhorse depends on the materials used and the construction. A well-built wooden sawhorse can typically support several hundred pounds, but it’s essential to test them under controlled conditions before heavy use.
- Can I use plywood instead of 2x4s for the top beam?
- Yes, plywood can be used for the top beam for a wider working surface, but it’s essential to ensure the legs are strong enough to support the additional weight and that the plywood is adequately secured.
- Is it necessary to use wood glue in addition to screws?
- While not strictly necessary, using wood glue in addition to screws can significantly increase the strength and durability of the joints, making your sawhorses more robust.
- What kind of maintenance do sawhorses need?
- Regular inspections for loose screws, signs of wear, and occasional tightening of fasteners are essential. If used outdoors, they may need additional protection, like paint or a weather-resistant finish.
- Can sawhorses be used for tasks other than cutting wood?
- Absolutely, sawhorses can be used as makeshift tables, support for painting doors or large panels, and even as a base for a temporary workbench with the addition of a suitable work surface. Their versatility makes them invaluable tools in and out of the workshop.

Charles Hayes
Forestry AuthorI'm Charles Hayes, I bring over 15 years of specialized expertise in landscaping and woodworking, blending artistic design with sustainable environmental stewardship. My career, fueled by a profound passion for the natural world, encompasses extensive education and hands-on experience in creating harmonious, eco-friendly outdoor spaces and responsibly managing forest resources. Recognized for my professional standing, I am committed to continuous learning and certification in cutting-edge practices. My expertise is not only reflected in my work but also in my contributions to community projects, educational workshops, and collaborations with industry leaders. As an authoritative voice in my field, I strive to share knowledge and promote environmentally conscious approaches, making me a trusted resource in landscaping and forestry.


Leave your comment