How to Plant Corn Seeds: Simple Steps for First-Time Growers
- February 29, 2024
- 0 comment
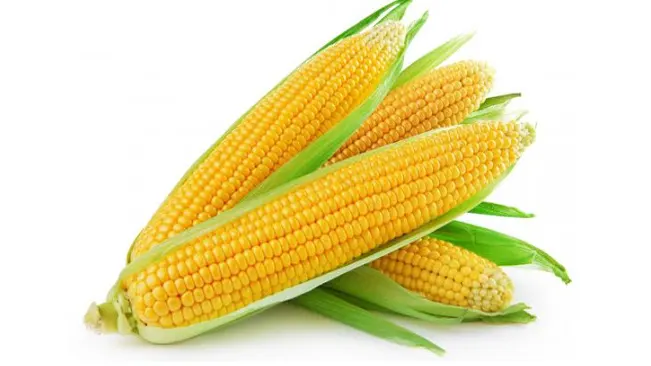
Corn, a staple in many diets worldwide, is a popular crop for home gardeners. Its ability to thrive in diverse climates makes it an excellent choice for many. This guide will take you through the steps of planting corn seeds, ensuring a bountiful harvest.

Nutritional Benefits of Corn
| Benefit | Description |
|---|---|
| Rich in Fiber | Corn is a good source of dietary fiber, which aids in digestion and helps prevent constipation. |
| Source of Antioxidants | Contains antioxidants like lutein and zeaxanthin, which support eye health and reduce the risk of chronic diseases. |
| Provides Essential Minerals | Offers essential minerals such as zinc, magnesium, copper, iron, and manganese, important for various bodily functions. |
| High in Vitamins | Corn is rich in B-vitamins, including thiamin (B1) and folate (B9), crucial for energy production and cell growth. |
| Energy-Boosting Carbohydrates | High in carbohydrates, providing energy, making it a good option for athletes and active individuals. |
| Gluten-Free | A great option for people with celiac disease or gluten intolerance, as it is naturally gluten-free. |
| Supports Heart Health | The fiber, vitamins, and minerals in corn may help lower the risk of heart disease when included in a balanced diet. |
| May Aid in Weight Management | Being fiber-rich, corn can promote fullness and help in weight management, though moderation is key due to its high carbohydrate content. |
| Improves Skin Health | Contains vitamin C and lycopene, which may contribute to skin health and protect against UV radiation. |
| Versatile Culinary Uses | Corn is incredibly versatile in cooking, used in a variety of dishes from soups to salads, main courses, and desserts. |
List on How To Plant Corn Seeds
- Choosing the Right Corn Variety
- Preparing the Soil
- Planting Time and Technique
- Watering and Maintenance
- Fertilizing
- Thinning
- Pollination
- Harvesting
- Pest and Weed Control
Materials Needed
- Corn seeds
- Well-draining soil
- Compost or fertilizer
- Watering can or hose
- Garden trowel
- Ruler or measuring tape
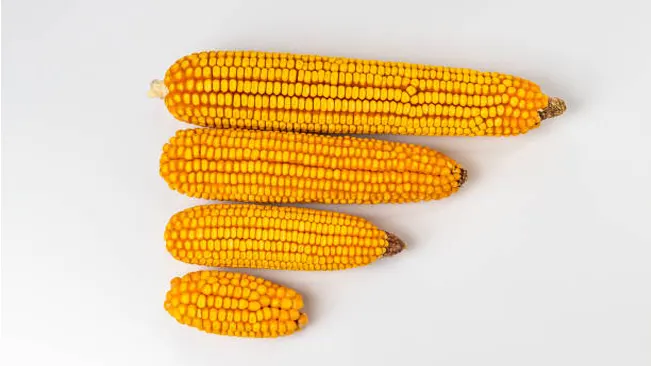
Choosing the Right Corn Variety
Before planting, decide on the corn variety. Sweet corn is popular for eating, while flint or dent corns are often used for animal feed and cornmeal. Consider your climate and soil type when selecting a variety.
Sweet Corn
- Characteristics: Sweet corn is known for its tender kernels and sweet flavor. It’s generally consumed as a vegetable and is a favorite for eating fresh, grilling, or cooking.
- Varieties: There are multiple varieties of sweet corn, including yellow, white, and bi-color. The sweetness levels also vary, with some newer varieties being extra-sweet.
- Growing Conditions: Sweet corn prefers well-draining soil and ample sunlight. It’s more sensitive to cold, so it’s important to plant it after the danger of frost has passed.
Flint Corn
- Characteristics: Flint corn, often recognized by its hard, glassy kernels, is used for making cornmeal and polenta. It’s also popular for decorative purposes.
- Uses: This type of corn is less sweet and starchier. It’s excellent for grinding into cornmeal or for animal feed.
- Climate Adaptability: Flint corn is typically more robust and can tolerate poorer soil and cooler temperatures better than sweet corn.
Dent Corn
- Characteristics: Dent corn, identified by the small indentation on the top of each kernel, is primarily used for animal feed, corn syrup, and industrial products.
- Uses: It’s not usually grown for fresh eating but is excellent for processing.
- Climate and Soil: Like flint corn, dent corn is hardier and can grow in a variety of soil types.
Considerations for Choosing Corn Variety:
- Purpose: Decide if you’re growing corn for personal consumption, animal feed, or other uses.
- Climate: Some varieties are more tolerant of cooler temperatures. Check the growing requirements of each variety.
- Soil Type: Although corn is adaptable, certain varieties may perform better in your soil conditions.
- Space: Ensure you have enough space, as corn does best when planted in multiple rows for pollination.
- Maturity Time: Consider how long each variety takes to mature, especially if you have a short growing season.
- Pest and Disease Resistance: Some varieties are bred to be more resistant to specific pests and diseases common in your area.
Preparing the Soil
Corn thrives in well-draining soil with a pH between 5.5 and 7.0. Prepare your garden bed by tilling the soil and adding compost or a balanced fertilizer. This step is crucial for nutrient-rich soil, aiding in the growth of strong corn plants.
Understanding Soil Requirements for Corn
- Well-Draining Soil: Corn does not thrive in waterlogged conditions. Well-draining soil ensures that water reaches the roots but doesn’t stagnate. Soil that drains well prevents root rot and other water-related diseases.
- Soil pH: Corn prefers a soil pH between 5.5 and 7.0. This range is slightly acidic to neutral. Soil pH affects nutrient availability; hence, it’s essential for the optimal growth of corn. You can test your soil’s pH with a home testing kit or have it tested professionally.
Steps for Preparing the Soil
- Testing the Soil: Before adding any amendments, test your soil to understand its current nutrient content and pH level. This information guides you on what type of compost or fertilizer is needed.
- Tilling the Soil: Start by tilling the soil to a depth of about 6 to 8 inches. Tilling helps aerate the soil, improving its structure and drainage capabilities. It also helps in mixing the organic matter and fertilizer evenly into the soil.
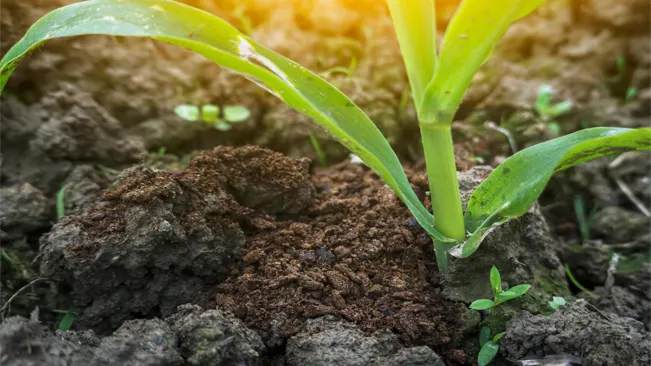
- Adding Organic Matter: Incorporate organic matter like compost into the soil. Compost improves soil structure, adds nutrients, and enhances its moisture-holding capacity. For corn, a nutrient-rich soil is vital because it’s a heavy feeder.
- Using Balanced Fertilizer: If your soil test indicates a deficiency in certain nutrients, use a balanced fertilizer to enrich the soil. A balanced fertilizer typically contains equal parts of nitrogen, phosphorus, and potassium (NPK). However, the specific needs might vary based on your soil test results.
- Maintaining Soil Moisture: After planting, it’s essential to maintain consistent soil moisture. While corn needs moist soil, avoid overwatering which can lead to poor root development and plant diseases.
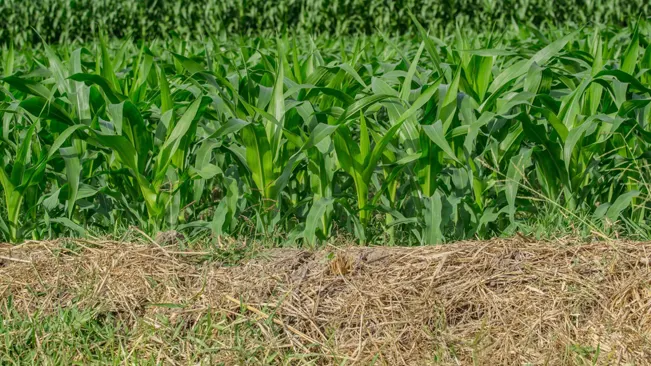
- Mulching: Applying mulch around the corn plants can help retain soil moisture, regulate soil temperature, and suppress weed growth. Organic mulches like straw or wood chips are commonly used.
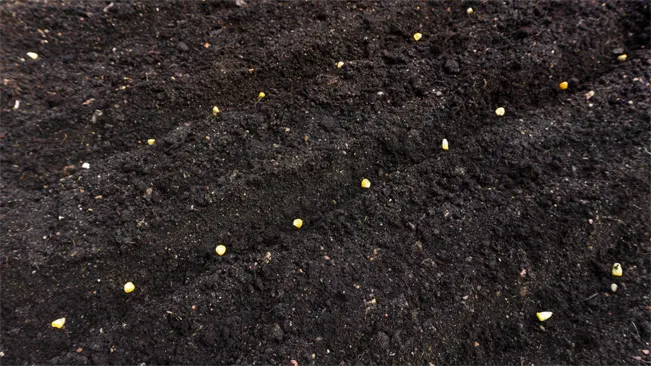
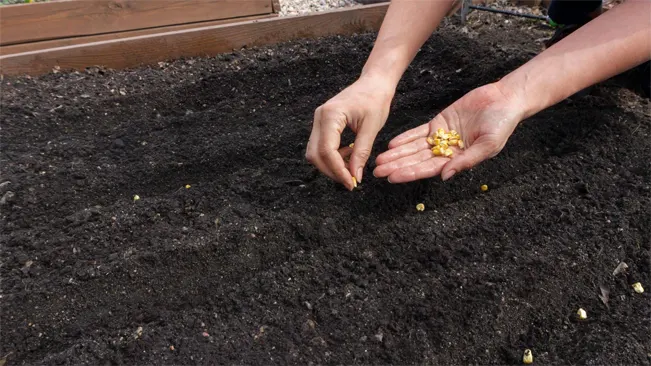
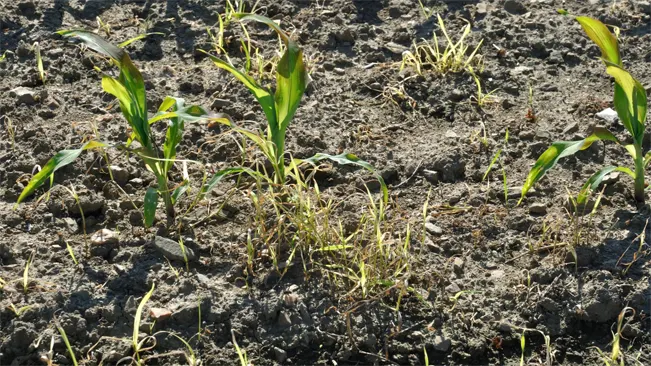
Planting Time and Technique
Corn should be planted after the last frost when the soil has warmed to at least 60°F. Plant seeds 1 to 2 inches deep, spacing them about 9 to 12 inches apart. Rows should be spaced 30 to 36 inches apart to allow for adequate growth.
Planting Time
- Why After the Last Frost?: Corn is sensitive to frost and cold soil temperatures. Planting after the last frost ensures that the seedlings will not be damaged or killed by cold weather. Frost can inhibit germination and harm young plants.
- Soil Temperature: Corn seeds need warm soil for optimal germination. A soil temperature of at least 60°F (15°C) is ideal. This warmth helps in quicker and more uniform germination.
- Regional Variations: The exact timing can vary based on your geographic location. In cooler climates, this might mean waiting until late spring or early summer. In warmer areas, planting might occur earlier. Using a soil thermometer can provide accurate readings.
Planting Technique
- Depth of Planting: Planting corn seeds 1 to 2 inches deep helps ensure they have enough soil coverage to maintain moisture and prevent them from being eaten by birds or other animals. However, planting too deep can make it hard for seedlings to emerge.
- Spacing Between Seeds: Spacing seeds 9 to 12 inches apart allows each plant enough room to grow and develop. This spacing avoids overcrowding, which can lead to competition for nutrients, water, and sunlight.
- Row Spacing: Rows should be spaced 30 to 36 inches apart. This spacing is crucial for several reasons:
- It allows for sufficient airflow between the plants, reducing the risk of fungal diseases.
- It provides enough space for the plants to receive adequate sunlight.
- It makes it easier for you to navigate between rows for maintenance, such as weeding and fertilizing.
- Planting in Blocks: For smaller gardens, consider planting corn in a block layout rather than in single rows. This aids in wind pollination, which is critical for corn. Corn is predominantly wind-pollinated, and closer proximity of plants in a block can lead to better pollination and, therefore, better yield.
Watering and Maintenance
After planting, water the soil thoroughly. Corn requires about 1 inch of water per week, either from rainfall or manual watering. Keep the soil moist but not waterlogged.
Watering Corn
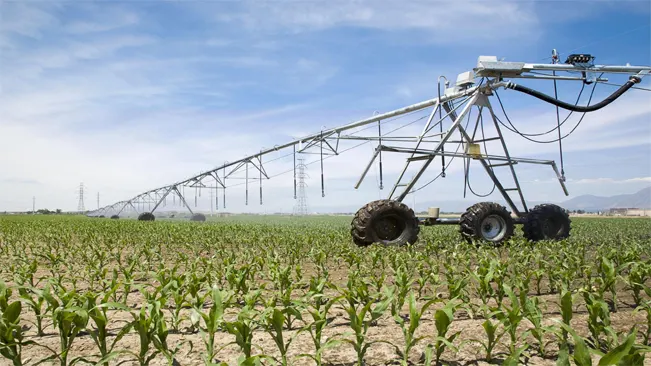
- Consistent Moisture is Key: Corn has shallow roots and needs consistent moisture throughout its growing season. Inconsistent watering can lead to problems like poor root development and stress on the plants.
- How to Measure Water: The “1 inch per week” guideline includes both rainfall and manual watering. You can measure this by placing a rain gauge in your garden. If the rainfall is less than 1 inch, supplement with watering.
- Best Time to Water: The best time to water corn is early in the morning. This allows the water to soak into the soil before the heat of the day and reduces evaporation losses.
- Watering Technique: Use a soaker hose or drip irrigation for the most efficient watering. These methods deliver water directly to the soil, reducing water loss due to evaporation and minimizing the risk of leaf diseases that can occur with overhead watering.
- Signs of Over-watering and Under-watering: Over-watered corn may have yellowing leaves and a general look of being waterlogged. Under-watered corn will have drooping leaves and may stop growing. In severe cases, the corn may wilt.
Maintenance of Corn
- Weeding: Keep the area around the corn free of weeds. Weeds compete with corn for nutrients and water. Hand weeding or shallow hoeing is effective, but be careful not to disturb the corn’s shallow root system.
- Mulching: Applying a layer of organic mulch around the corn plants can help retain soil moisture, suppress weeds, and regulate soil temperature.
- Fertilization: After the initial fertilization at planting, a side dressing of a nitrogen-rich fertilizer when the plants are about knee-high can be beneficial. This boosts growth as corn is a heavy feeder, especially of nitrogen.
- Monitoring for Pests and Diseases: Regularly inspect your corn for signs of pests and diseases. Early detection and treatment can prevent major problems.
- Staking or Supporting: In some cases, especially in windy areas, it might be necessary to provide support to corn stalks to prevent them from falling over.
- Succession Planting: For a continuous harvest, consider planting a new batch of corn every two weeks.
Fertilizing
When the corn is about 6 inches tall, add a nitrogen-rich fertilizer to support its rapid growth. Repeat this step when the plants are knee-high.
Understanding Corn’s Nutrient Needs
- High Nitrogen Demand: Corn is a heavy feeder, especially of nitrogen. Nitrogen is essential for the growth of green leafy vegetation, which is vital for photosynthesis and overall plant health.
- Other Nutrients: Besides nitrogen, corn also benefits from phosphorus and potassium, but to a lesser extent. A balanced fertilizer will typically provide these in appropriate ratios.
Fertilizing Strategy
- Initial Fertilization: Before planting, it’s often recommended to work in a balanced fertilizer into the soil. This sets the stage for healthy seedling growth.
- First Nitrogen Application:
- Timing: When the corn plants are about 6 inches tall, they enter a rapid growth phase. This is the ideal time for the first application of nitrogen-rich fertilizer.
- Reason: At this stage, the plants are establishing their vegetative structure, which is critical for supporting later fruit (corn ear) development.
- Method: Apply the fertilizer alongside the rows (side-dressing) to avoid direct contact with the plants, which can cause burning.
- Second Nitrogen Application:
- Timing: The next critical time for fertilization is when the plants are knee-high. This is usually a few weeks after the first application.
- Reason: This stage coincides with the beginning of the reproductive phase, where the plants start developing tassels and ears.
- Method: Again, side-dress the nitrogen fertilizer along the rows.
Thinning
If more than one seedling sprouts in the same spot, thin them out. This ensures that the remaining plants have enough space and nutrients to grow properly.
Why Thinning is Important in Corn Cultivation
- Space Optimization: Corn plants need adequate space to grow. Thinning ensures each plant has enough room to develop a strong root system and healthy stalks.
- Resource Allocation: It helps in the efficient distribution of water, nutrients, and sunlight among the plants, essential for optimal growth.
- Air Circulation: Proper spacing provided by thinning promotes better air circulation around each plant. This can reduce the likelihood of fungal diseases which often thrive in crowded, damp conditions.
- Improved Pollination: Well-spaced plants allow for better wind pollination, which is crucial for corn. Adequate pollination leads to fuller ears of corn.
- Higher Yield Quality: Thinning can lead to a more uniform crop with consistent plant size and maturity, which is important for both home gardening and commercial farming.
How to Thin Corn Seedlings
- Wait for True Leaves: Begin thinning when the seedlings have developed their first set of true leaves, usually when they’re about 3-4 inches tall.
- Choose the Strongest: Identify the strongest and healthiest-looking seedling in each group to keep.
- Gentle Removal: Gently pull out the weaker seedlings. You can also use scissors to snip them at the soil line to avoid disturbing the roots of the remaining seedling.
- Spacing: Ensure the remaining seedlings are spaced about 9 to 12 inches apart. This spacing can vary depending on the corn variety.
- Continuous Monitoring: Keep monitoring your corn plants as they grow. Sometimes additional thinning might be necessary if you notice overcrowding at a later stage.
Pollination
Corn relies on wind for pollination. Planting in blocks rather than single rows can aid in pollination, ensuring fuller ears of corn.
- Tassels and Silks: Each corn plant has both male and female parts. The tassel, at the top of the corn plant, is the male part that produces pollen. The silks, emerging from the ear, are the female part. Each silk corresponds to a potential kernel on the cob.
- Shedding of Pollen: The tassel releases pollen, which is light and designed to be carried by the wind. This usually occurs over a week to 10-day period, often in the morning when humidity is lower.
- Pollination: For kernels to form, pollen must land on the silks. Each silk needs to receive pollen to fertilize an ovule (which becomes a kernel). If a silk does not get pollinated, the corresponding kernel will not develop, leading to gaps or “missing kernels” on the cob.
- Importance of Block Planting: Planting corn in blocks of multiple rows rather than a single long row increases the chances of pollination. In a block formation, the pollen doesn’t have to travel as far to reach the silks, and there’s a greater likelihood that the wind will distribute pollen evenly among the plants. This is especially important in areas with variable wind patterns.
- Pollination Timeframe: Each silk can only be pollinated for a short period (about a week). If conditions are not favorable for pollen dispersal (like during rainy or very still weather), pollination can be poor.
- Environmental Influence: The success of pollination can be influenced by environmental conditions. Extreme heat, drought, or heavy rain can interfere with pollen viability and silk receptivity.
- Human Intervention: In some cases, particularly in small gardens or in the absence of adequate wind, gardeners might manually aid in pollination. This can be done by gently shaking the tassels over the silks or by collecting pollen in a bag and then dusting it over the silks.
Harvesting
Corn is ready to harvest when the silks turn brown, and the kernels are plump and milky. This typically occurs 18 to 24 days after the first silks appear.
Timing of Harvest

- Silk Color and Texture: The change in the color of the corn silks from green to brown is a primary indicator that the corn is nearing maturity. The drying and browning of the silks suggest that pollination has occurred and the kernels are developing.
- Days After Silk Appears: Typically, corn is ready to harvest about 18 to 24 days after the silks first appear. However, this can vary depending on the corn variety and environmental conditions.
- Kernel Development: The kernels should be plump and filled with a milky fluid. To test, gently press a kernel with your thumbnail. If a milky liquid squirts out, the corn is ready. If the liquid is clear, the corn needs more time to mature.
Harvesting Method
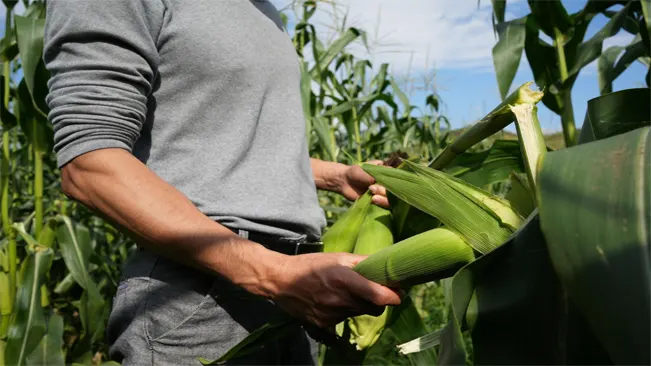
- Hand Picking: Grasp the ear firmly and twist downwards to snap the ear from the stalk. It’s important to be gentle to avoid damaging the plant, especially if other ears are still maturing on it.
- Using Tools: Some gardeners use garden shears or a sharp knife to cut the ear from the stalk. This can be a more controlled way to harvest, especially in larger plots.
Post-Harvest Handling
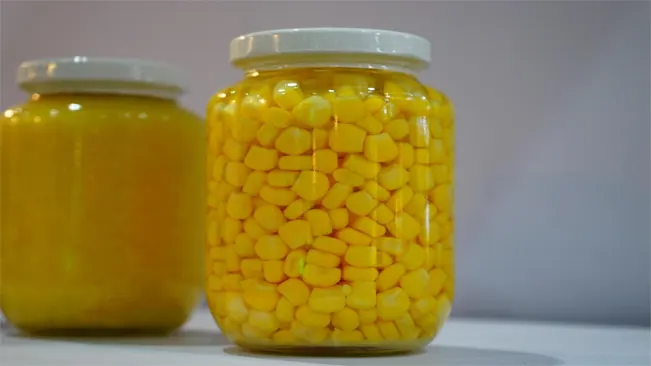
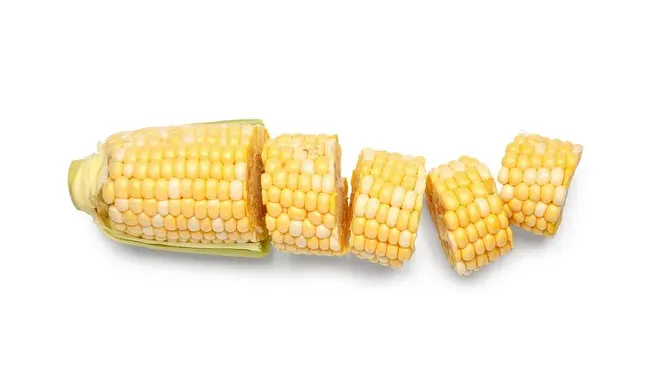
- Immediate Use: Corn is best eaten soon after harvesting as the sugar in the kernels begins to turn into starch, reducing sweetness.
- Storage: If you cannot eat the corn immediately, refrigerate it with the husks on to retain moisture and sweetness. Corn can be stored in the refrigerator for a few days.
- Freezing: For longer storage, corn can be blanched and frozen. Remove the husks and silk, blanch the ears in boiling water for a few minutes, then plunge into ice water. Dry and freeze the kernels or whole ears.
Common Mistakes to Avoid
- Delay in Harvesting: Waiting too long to harvest can lead to overripe corn, which is tough and starchy.
- Harvesting Too Early: Underripe corn will not be as sweet and can have a watery texture.
- Damage to Stalks: Be careful not to damage the corn stalks if there are other ears still developing.
Pest and Weed Control
Regularly check for pests like corn earworms. Use organic or chemical controls as needed. Keep the garden bed weed-free to prevent competition for nutrients.
Pest Control in Corn
- Corn Earworms:
- Identification: These are the larvae of a moth and are one of the most common pests in corn. They vary in color from green to brown and feed on the silks, kernels, and ears.
- Control: To manage earworms, you can use biological controls like introducing natural predators (e.g., Trichogramma wasps) or apply organic insecticides like Bacillus thuringiensis (Bt). In more severe cases, chemical insecticides might be necessary, but always follow label instructions and consider the environmental impact.
- Other Common Pests:
- Aphids, Corn Borers, and Cutworms: These pests also pose a threat to corn. Use organic pest control methods like neem oil, insecticidal soaps, or beneficial insects. Physical barriers, like row covers, can also be effective, especially for cutworms.
Weed Control in Corn
- Prevention:
- Mulching: Applying a layer of organic mulch around your corn plants can help suppress weed growth, retain soil moisture, and add organic matter to the soil.
- Pre-Emergent Herbicides: These can be applied before the weeds germinate. Choose a product that’s safe for use around corn and won’t harm your plants.
- Maintenance:
- Regular Weeding: Hand-pulling weeds is often the most effective method, especially in smaller gardens. It’s important to remove weeds before they set seed.
- Cultivation: Shallow cultivation around the corn plants can disrupt weed growth without harming the corn roots. Be cautious not to cultivate too deeply, as this can damage the corn roots.
- Integrated Weed Management:
- Consider crop rotation, cover cropping, and other sustainable agricultural practices to manage weeds in the long term. These practices can reduce weed seeds in the soil and improve overall soil health.
Important Considerations
- Timing: Early detection and management of pests and weeds are key. Regularly inspect your corn plants for signs of pests and weed growth.
- Organic vs. Chemical: Whenever possible, opt for organic controls. Chemical treatments should be a last resort due to their environmental impact and potential effects on beneficial insects and soil health.
- Local Advice: Consult local agricultural extensions or gardening clubs for advice tailored to your region’s specific pests and weeds.
Conclusion
Planting corn can be a rewarding experience for any gardener. By following these steps, you can enjoy a successful harvest of this versatile and delicious crop. Remember, patience and care are key to growing healthy corn plants.
FAQs (Frequently Asked Questions)
- When is the best time to plant corn seeds?
Plant corn seeds after the last frost when the soil temperature reaches at least 60°F (15°C). This typically occurs in late spring. - How deep should I plant corn seeds?
Corn seeds should be planted about 1 to 2 inches deep in the soil. - What is the ideal spacing for corn plants?
Space corn seeds about 9 to 12 inches apart in rows that are 30 to 36 inches apart. This spacing allows adequate room for growth. - How much water does corn need?
Corn requires about 1 inch of water per week, either from rainfall or irrigation. Keep the soil consistently moist but not waterlogged. - Do I need to fertilize my corn plants?
Yes, corn benefits from fertilization. Apply a balanced fertilizer at planting and a nitrogen-rich fertilizer when the plants are about 6 inches tall and again when they are knee-high. - Can I grow corn in a small garden?
Yes, but ensure adequate space for proper growth. Consider smaller varieties if space is limited. - How do I ensure good pollination of my corn plants?
Plant corn in blocks of several short rows instead of one long row to enhance wind pollination. This setup increases the likelihood of pollination. - What are common pests that affect corn and how do I control them?
Common pests include corn earworms and aphids. Control them through organic methods like introducing beneficial insects or using appropriate insecticides. - How long does it take for corn to be ready for harvest?
Most corn varieties are ready to harvest in 60 to 100 days after planting, depending on the variety and growing conditions. - Can I save corn seeds from my plants for next year?
Yes, you can save seeds from non-hybrid corn varieties. Allow the corn cobs to dry on the plants, then remove the kernels and store them in a cool, dry place.

Kristine Moore
Forestry AuthorI'm Kristine Moore, a seasoned garden landscaping professional with over 30 years of experience. My extensive career has been dedicated to transforming outdoor spaces into stunning, sustainable landscapes. With a deep understanding of horticulture, design principles, and environmental stewardship, I have become a respected figure in the field, known for creating harmonious, visually appealing, and eco-friendly gardens. My commitment to excellence and continuous learning in landscaping trends and techniques has solidified my reputation as an expert in garden design and implementation.


Leave your comment