How To MIG Weld: Essential Techniques for Beginners
- January 31, 2024
- 0 comment
Welcome to the fascinating world of Metal Inert Gas (MIG) welding! This guide is designed to introduce you to the basics of MIG welding, a process that intriguingly blends the use of electricity and metal to create strong, durable joints. Often celebrated for its simplicity and effectiveness, MIG welding is frequently likened to using a “hot glue gun” in the realm of metalwork, making it a highly accessible technique for beginners.
In this introductory guide, we’ll be covering the foundational aspects of MIG welding. However, it’s important to note that this is not an exhaustive tutorial but rather a starting point for those keen to embark on their MIG welding journey. For an in-depth understanding and mastery, I recommend seeking out comprehensive resources or guidance from seasoned professionals.
Think of this as your first step into the world of MIG welding. The true essence of welding lies not just in theoretical knowledge but in practical application. It’s a skill honed through hands-on experience, with a welding gun in one hand and a piece of metal in the other, gradually developing your technique over time. This guide aims to set you on that path, providing you with the essential information to begin practicing and improving your MIG welding skills.
List on How to MIG Weld:
- Understanding the Basics and Background
- Setting Up the Equipment
- Mastering the MIG Welding Techniques
- How the Machine Works
- Practice Makes Perfect
- Safety Gear First
- Patience and Persistence
- Refining Your Weld with Grinding
- Addressing Common Welding Issues
- Resolving Wire and Tip Fusion/Tip Replacement
Here are some advantages of MIG welding:
- The ability to join a wide range of metals and thicknesses
- All-position welding capability
- A good weld bead
- A minimum of weld splatter
- Easy to learn
10 of Step-By-Step For How to MIG Weld: Essential Techniques for Beginners
Step 1: Understanding the Basics and Background
Before igniting my first welding arc, delving into the essence of MIG welding was paramount. This fascinating process involves an electric arc that emerges between a consumable wire electrode and the workpiece. The arc’s heat melts the metal pieces, allowing them to merge seamlessly. This synergy of physics and craftsmanship captivated me.
Originating in the 1940s, MIG welding’s core principle remains largely unchanged over the decades. The technique harnesses an electric arc to form a short circuit between the wire-fed welding gun (anode) and the workpiece (cathode). The resultant heat, combined with a non-reactive gas, locally melts the metal, facilitating their amalgamation. Upon cooling, these metals solidify, creating a unified structure.

Although officially renamed to Gas Metal Arc Welding (GMAW), the term MIG welding endures in common parlance. Its versatility is evident as it can weld various metals including carbon steel, stainless steel, aluminum, magnesium, copper, nickel, silicon bronze, and other alloys, making it an indispensable tool in any welder’s arsenal.
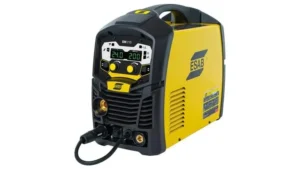
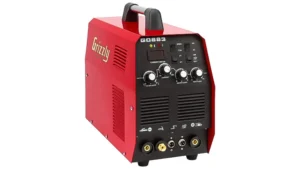
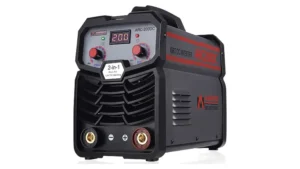
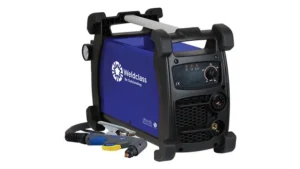
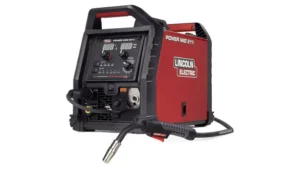
Step 2: Setting Up the Equipment
My journey in MIG welding began with the meticulous setup of the welding equipment. A critical aspect was choosing the appropriate wire and gas combination. For the majority of my projects, I opted for a solid wire complemented by a mix of argon and carbon dioxide gases.
Tuning the wire feed speed and voltage settings initially felt like navigating through a maze of trial and error. However, mastering these settings was crucial for achieving optimal weld quality.
Each adjustment in the settings significantly impacted the welding outcome, teaching me the importance of precision and attention to detail in welding. This preparatory stage laid a strong foundation for my welding endeavors, highlighting the intricacies and technicalities involved in MIG welding.
Advantages of MIG Welding
- MIG welding offers versatility in joining a diverse array of metals across various thicknesses.
- It is capable of welding in all positions, enhancing its flexibility.
- Produces aesthetically pleasing weld beads.
- Generates minimal weld splatter, ensuring cleaner results.
- MIG welding is relatively easy for beginners to learn and master.
Disadvantages of MIG Welding
- The technique is primarily suitable for thin to medium-thick metals, limiting its use on thicker materials.
- The necessity for inert gas reduces the portability of MIG welding compared to arc welding, which does not require an external shielding gas source.
- MIG welding generally results in a less neat and controlled weld when compared to TIG (Tungsten Inert Gas Welding), especially in terms of precision and finish.
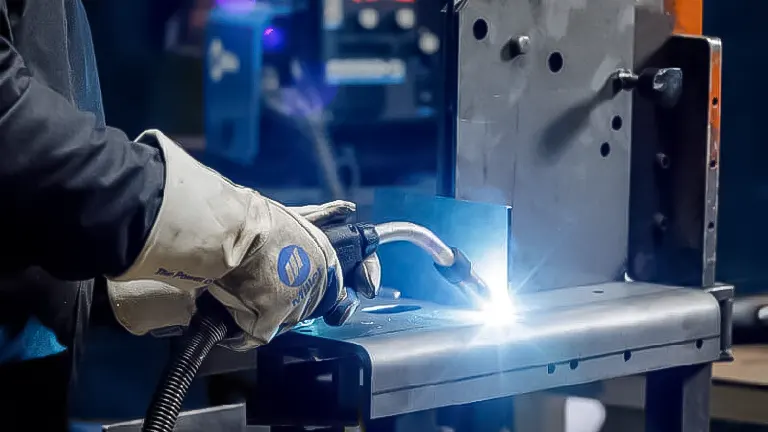
Step 3: Mastering the MIG Welding Techniques
- The Importance of a Good Ground Clamp: This was a game changer. A solid ground connection ensures a stable arc. I had to reposition it a few times to find the sweet spot.
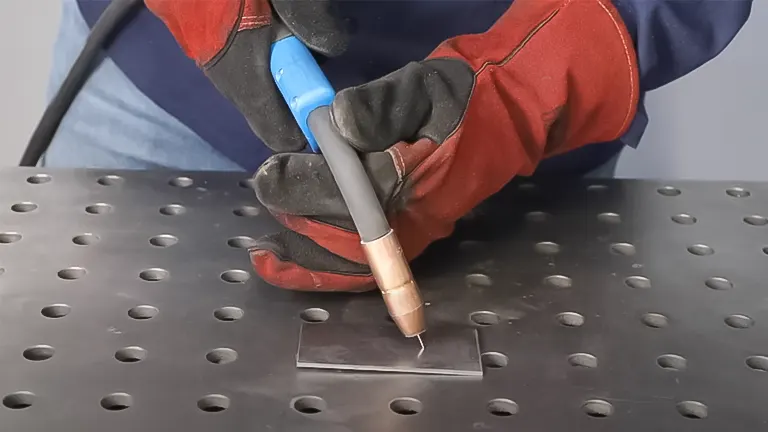
- Choosing the Right Angle and Direction: Holding the welding gun at about a 15-degree angle and pushing the gun away from the weld pool was the technique I found most effective. It provided better visibility and control.
- Controlling the Speed: Travel speed is vital. Moving too slow causes excessive weld metal to be deposited, while moving too fast can lead to a weak weld. It took practice to find the right balance.
- Consistent Arc Length: Keeping a consistent distance between the welding gun and the workpiece ensures a stable arc and uniform weld bead.
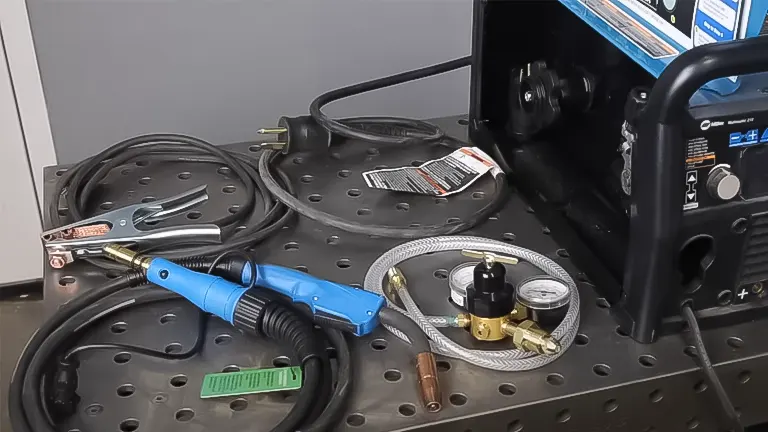
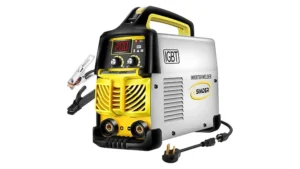
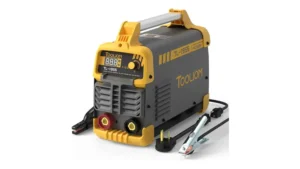
Step 4: How the Machine Works
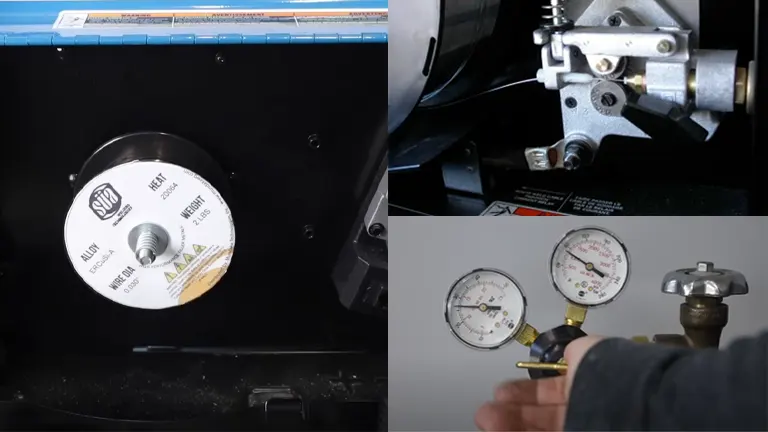
- The Welder: The heart of the welder houses a wire spool and rollers that feed the wire to the welding gun. Familiarizing yourself with these components is essential. The wire spool, secured by a tension nut, should have enough slack for the rollers to pull the wire but not enough to unravel. This system can jam occasionally, so understanding it is crucial. The rollers guide the wire from the spool to the welding gun. Depending on the welding task, like working with steel, the wire type and color may vary.
- The Gas Tank: When using a shielding gas in MIG welding, a gas tank is connected to the welder. The gas, typically Argon or a mix of Argon and CO2, is crucial for protecting the weld from air contaminants. Ensure the tank valve is slightly open for safety and easy emergency shut-off. The gauges should show appropriate pressure levels. From the tank, the gas travels through hoses to the welding gun, along with the charged electrode.
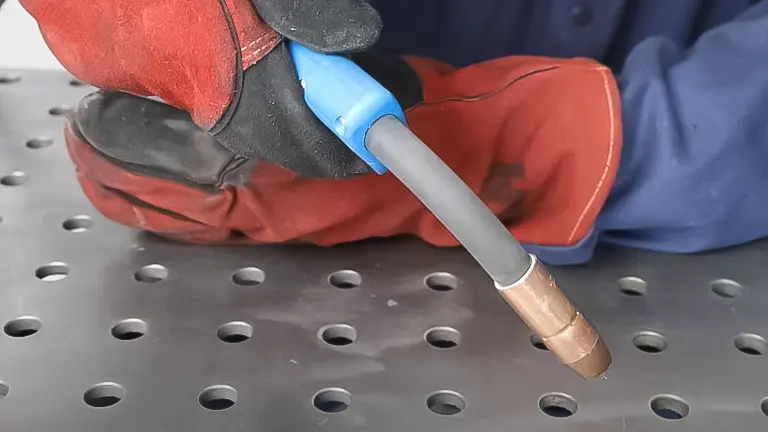
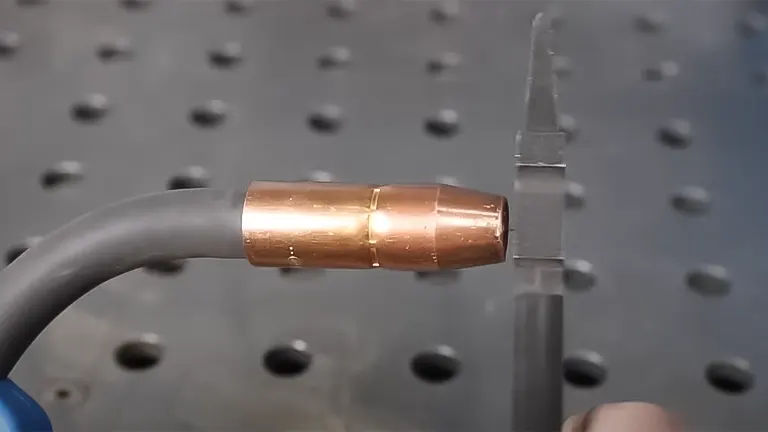
- The Welding Gun: The welding gun is the focal point of the operation. It includes a trigger controlling wire feed and electricity flow. The wire is fed through a copper tip, sized to match the wire diameter, and the tip of the gun is shielded by a ceramic or metal cup to direct the gas flow and protect the electrode. You’ll see a small wire piece protruding from the gun’s tip, ready for welding.
- The Ground Clamp: Acting as the cathode (-) in the circuit, the ground clamp completes the circuit between the welder, the welding gun, and the workpiece. It must be securely attached to the metal being welded, ensuring a clean contact point by removing any rust or paint. This connection is vital for the welding process to work effectively.
Step 5: Practice Makes Perfect
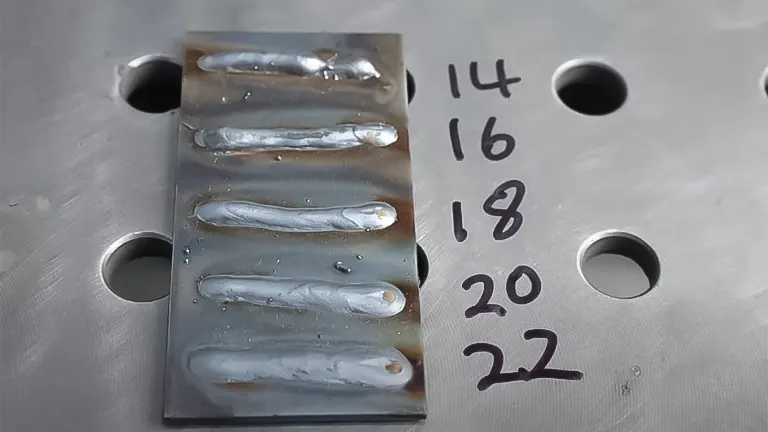
In the beginning, my MIG welding attempts were far from ideal. However, through persistent practice, I gradually honed my skills. I learned to discern the quality of a weld by its visual characteristics – a superior MIG weld resembles a series of neatly overlapping coins, a pattern that signifies uniformity and strength.
This understanding didn’t come overnight; it involved countless hours of practice on scrap metal, where each trial was a learning experience. Only after refining my technique and gaining confidence in my ability did I progress to working on actual projects. This phase of my journey was marked by a steep learning curve, where each welding attempt brought new insights and a step closer to mastering the art of MIG welding.
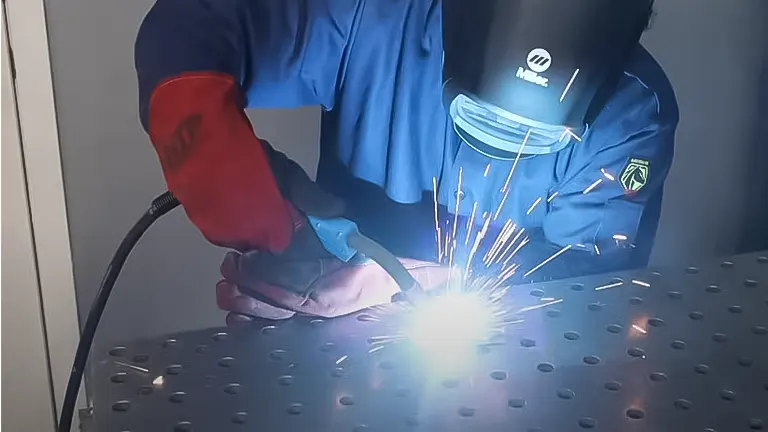
Step 6: Safety Gear First
Throughout my welding journey, prioritizing safety was non-negotiable. I always equipped myself with essential safety gear: a welding helmet fitted with the appropriate shade lens to protect my eyes from the bright arc, heat-resistant gloves to safeguard my hands, and protective clothing to shield my body from sparks and molten metal.
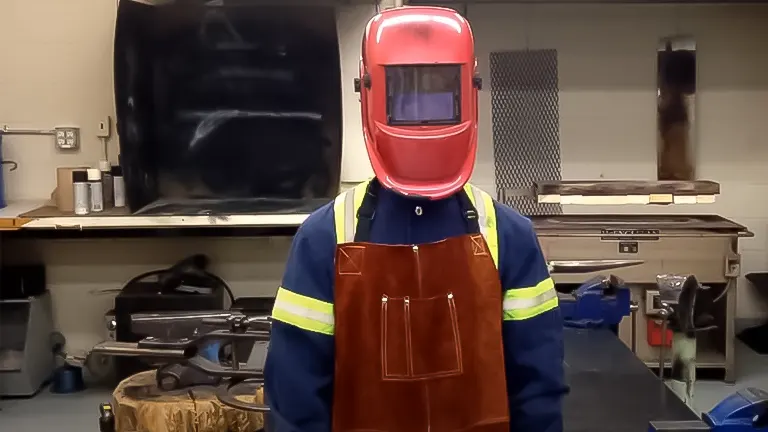
Moreover, I paid meticulous attention to the ventilation of my workspace. Good ventilation is critical to prevent the inhalation of harmful welding fumes and gases. This comprehensive approach to safety not only protected me from immediate hazards but also ensured my long-term well-being in the craft of welding.
Critical Safety Alert
Avoid welding galvanized steel at all costs. This type of steel is coated with zinc, which, when heated during welding, emits hazardous and carcinogenic gases. Inhaling these fumes can lead to serious health issues, including heavy metal poisoning (often referred to as “welding shivers”), which manifests as flu-like symptoms lasting several days and can potentially cause lasting harm. This warning is based on personal experience and is not to be taken lightly. I once welded galvanized steel without realizing the risks and quickly suffered the consequences. Please heed this advice to avoid similar harm.
Step 7: Patience and Persistence
My path to mastering MIG welding was paved with challenges, demanding both patience and perseverance. It wasn’t an easy skill to acquire; it required dedication and a willingness to persist through the inevitable frustrations. There were moments of doubt and setbacks, where the results didn’t meet my expectations.
Yet, it was the drive to improve and the resilience to continue practicing that ultimately led to success. The sense of fulfillment from achieving a flawless weld bead was incomparable, making every hour of practice worthwhile. This journey underscored a crucial lesson: in welding, as in life, patience and persistence are key ingredients to achieving excellence.
Step 8: Refining Your Weld with Grinding
After completing your welding, the subsequent step involves grinding the weld for aesthetic refinement, particularly important for visible or aesthetically focused projects. Utilizing an angle grinder with a grinding wheel is key for this process. The efficiency of grinding heavily depends on the neatness of the initial weld; a cleaner weld requires less grinding, saving effort and time.

Grinding should be approached with care to avoid overworking the metal or compromising the weld’s integrity, ensuring the grinder moves evenly across the surface to prevent overheating or uneven wear. This step requires patience and attention, especially on thin metals prone to discoloration under excessive grinding.
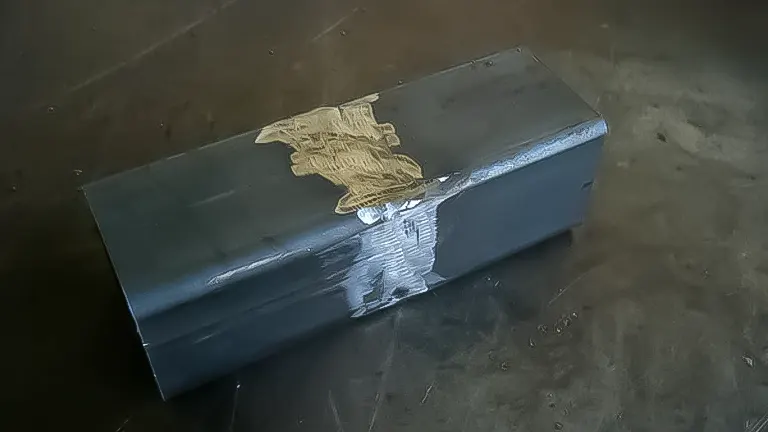
Regular breaks and proper safety gear, including a full-face mask, dust respirator, and ear protection, are essential, along with wearing snug-fitting clothing to avoid accidents with the grinder. The end result of this meticulous process varies depending on the welder’s skill and the project’s requirements, aiming for a polished and professional finish similar to the one shown in the accompanying photo.
Step 9: Addressing Common Welding Issues
As you begin your welding journey, encountering some challenges is common, especially until you gain consistent proficiency. Here are some typical problems you might face and their solutions:
- Inadequate Shielding Gas: If you notice your weld splattering tiny metal balls or changing to unpleasant shades of brown and green, it’s likely due to insufficient shielding gas coverage. This can be resolved by increasing the gas pressure.
- Lack of Weld Penetration: A weld that doesn’t penetrate deeply enough will result in a fragile joint, failing to properly fuse the metal pieces. This issue is often evident when the weld appears superficial on the surface.
- Excessive Weld Power: If your weld is burning through the material, it’s a sign of too much power. Adjusting and lowering the voltage should rectify this problem.
- Overly Thick Weld Pool: A weld resembling oatmeal or appearing excessively globular indicates an excess of wire feed. This can be corrected by decreasing the wire speed, thus reducing the amount of metal entering the weld pool.
- Inconsistent Welding Gun Performance: If the welding gun spits or fails to maintain a steady weld, it could be due to the gun being held too far from the welding surface. Ideally, the gun should be positioned about 1/4″ to 1/2″ from the weld for optimal performance.
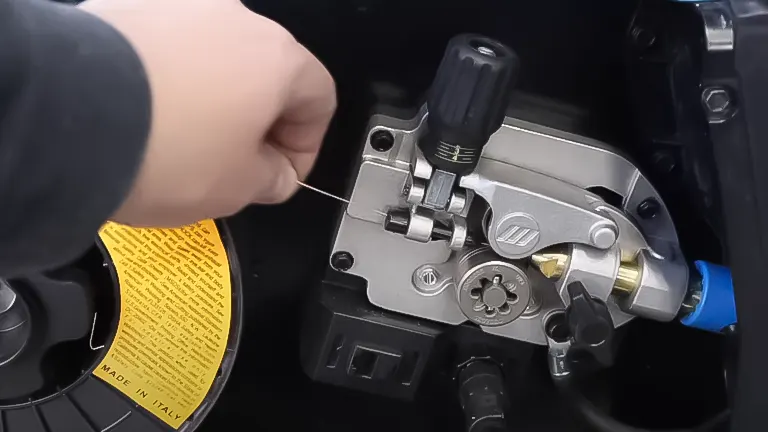
Step 10: Resolving Wire and Tip Fusion/Tip Replacement
At times, especially when welding too close to the material or generating excessive heat, the wire’s tip may fuse to your welding gun’s tip. This issue is apparent when a small metal blob forms at the gun’s tip, preventing the wire from exiting the gun. To rectify this, simply grasp the blob with pliers and pull it off. Refer to the provided photos for visual guidance.
However, if the gun’s tip is severely damaged, with the hole completely sealed by metal, it’s necessary to replace the tip. Ensure the welder is turned off before proceeding with the following steps, accompanied by a detailed photo series for clarity:
- Identify the Fused Tip: Recognize that the tip is fused shut.
- Remove the Welding Shield Cup: Unscrew and take off the protective cup from the gun.
- Detach the Damaged Tip: Unscrew and remove the fused welding tip.
- Insert a New Tip: Position a new tip in place within the gun.
- Secure the New Tip: Screw on the new tip to ensure it’s firmly attached.
- Reattach the Welding Cup: Put back and secure the welding shield cup.
- Restored Functionality: The welding gun should now be as good as new and ready for use.
Related Articles:
- First Welder Guide for DIYers: Practical Tips
- Best 5 MIG Welders: From Budget-Friendly to Premium Picks
- Best Black Friday Welding Machine Deals 2023
- Troubleshooting Common Welding Machine Problems
- Best TIG Welder for the Money: Your Ultimate Buying Guide
- Best TIG Welder for Beginners
- Underwater Welding: Techniques, Risks, and Impacts on Structural Durability
- Best Welding Helmet 2024
- Practical Guide To Basic Welding Positions
Concluding Reflections
Starting out in MIG welding offers a unique blend of educational and practical skill development. This guide has taken you through the foundational principles to tackling common welding challenges, highlighting the significance of consistent practice, patience, and adhering to safety protocols. Each element of MIG welding, from setting up your equipment to refining your welding techniques, contributes to your proficiency in this craft. As you progress and hone your skills, the importance of accuracy and maintaining safety standards becomes even more pronounced. Take on each challenge as an opportunity to grow, and relish the journey towards becoming a proficient MIG welder.
Frequently Asked Questions
- What is MIG Welding?
MIG welding, or Metal Inert Gas Welding, is a process where an electric arc forms between a wire electrode and the metal workpiece, melting them to create a joint. - What Materials Can I Weld with MIG?
MIG welding is versatile, suitable for welding a variety of metals such as steel, stainless steel, aluminum, and other alloys. - What Safety Equipment Do I Need?
Essential safety gear includes a welding helmet, heat-resistant gloves, protective clothing, and proper ventilation to avoid inhaling fumes. - How Do I Set Up a MIG Welder?
Setting up involves selecting the correct wire and gas type, adjusting wire feed speed, and setting the right voltage. - What Are Common MIG Welding Problems?
Common issues include inadequate gas flow, poor weld penetration, excess spatter, and overheating. - How Can I Improve My Weld Quality?
Practice consistently, maintain proper welding angles, and ensure correct speed and distance of the welding gun. - What Is the Ideal Welding Angle?
Generally, a 15-degree angle is recommended for optimal visibility and control. - Can I MIG Weld at Home?
Yes, with the proper equipment and safety measures, MIG welding can be done at home. - What Is the Difference Between MIG and TIG Welding?
MIG welding uses a continuously feeding wire, is easier and quicker, while TIG welding requires more skill, using a long welding rod and is often used for thinner metals. - How Do I Know If My Weld Is Good?
A good MIG weld should look like a series of evenly spaced ripples or overlapping coins, indicating proper fusion and bead formation.
We welcome your feedback! Share your experiences and thoughts about ‘How to MIG Weld: Essential Techniques for Beginners’ in the comments section below. Whether you’re a seasoned welder or just starting out, your insights and personal stories could greatly assist others in their welding journey. Your contribution can help fellow beginners navigate the world of MIG welding with more confidence and knowledge!

Edward Smith
Forestry AuthorWoodworking is about more than crafting; it's a harmonious connection with nature, mastering tools, and preserving our environment. I'm here to share my knowledge and experiences with you, forging a future where we can embrace wood's beauty and utility while safeguarding our forests' health and diversity.
Leave your comment