Practical Guide To Basic Welding Positions
- January 29, 2024
- 2 comment
Welding, a unique blend of artistic creativity and technical expertise, requires not only a steady hand and precision but also a deep knowledge of selecting the appropriate position for each specific task. My journey as a welder has involved innumerable hours clad in protective gear, meticulously fusing metals in a diverse array of styles and techniques. In this discussion, I aim to impart the insights I’ve gained through extensive hands-on practice.
I’ll delve into the fundamental welding positions, examining their practical applications, efficiency, and adaptability across a variety of welding projects. My goal is to provide a comprehensive overview that reflects my real-world experience in using these techniques, highlighting how each position can be optimally employed in different welding scenarios.
List of Practical Guide To Basic Welding Positions:
The Challenges of Out Of Position Welding
In the realm of welding, while the flat position is considered the easiest and most desirable due to its straightforward horizontal torch or rod movement on a flat metal surface, other welding positions, known collectively as Out Of Position, present greater challenges. These include the Horizontal, Vertical, and Overhead positions, each demanding a higher skill level.
Horizontal welding involves managing the sideways movement of the weld pool, Vertical welding requires controlling the pool against gravity, and Overhead welding, the most challenging, necessitates utmost precision to handle the downward pull of gravity on the weld pool. Mastering these positions is essential for any welder aiming to be versatile and proficient in various welding scenarios.
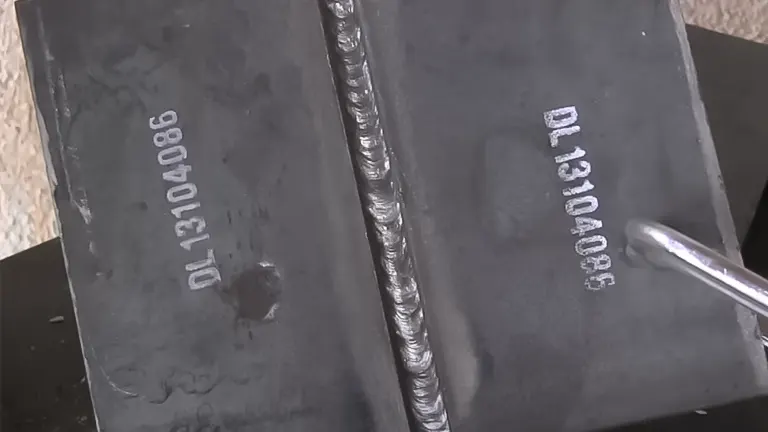
1. Flat Position (1G)
The flat position, commonly referred to as 1G in the welding world, serves as the foundational stepping stone for anyone venturing into the realm of welding. This position is akin to a comfort zone for welders, primarily because it works in harmony with gravity.
When working in the 1G position, the welder lays the metal flat and performs the weld along the top surface. This alignment with gravity significantly simplifies the process of controlling the weld pool – the molten metal created during welding.
The ease of handling the weld pool in this position is unparalleled, making it an ideal training ground for novices. Beginners can focus on honing their technique and understanding the behavior of the weld pool without the added complexity of battling gravity.
From my personal experience, I rate the flat position highly for its user-friendliness, awarding it a 9 out of 10 in terms of both speed and ease of execution. It allows for consistent, smooth welds, and the welder can maintain a steady hand with minimal effort, leading to neater, more controlled weld seams.
Pros
- Great for learning and practicing.
- High-quality, aesthetically pleasing welds.
Cons
- Not always applicable in real-life scenarios.
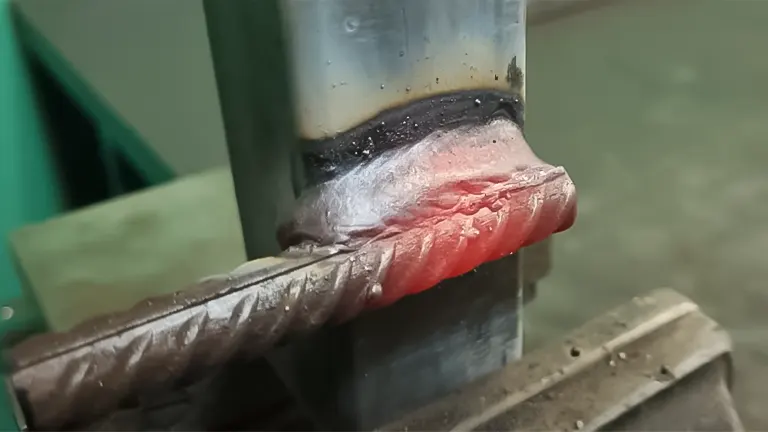
2. Horizontal Position (2G)
The Horizontal Position, designated as 2G in welding terminology, is a significant step up from the flat position and is commonly employed for welding the sides of plates or creating horizontal joints. In this position, the welder works on the vertical face of the metal, which presents a unique challenge due to the horizontal orientation of the weld.
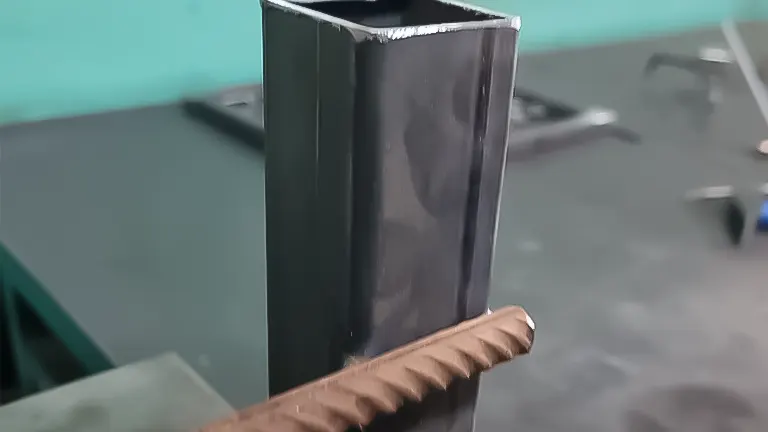
Gravity plays a more pronounced role here, pulling the weld pool downwards and away from the center of the weld path. This phenomenon demands heightened skill and control from the welder to ensure that the molten metal is deposited evenly and precisely. My personal experience in working with the 2G position has led me to rate it as moderately challenging, scoring it a 6 out of 10 on the difficulty scale.
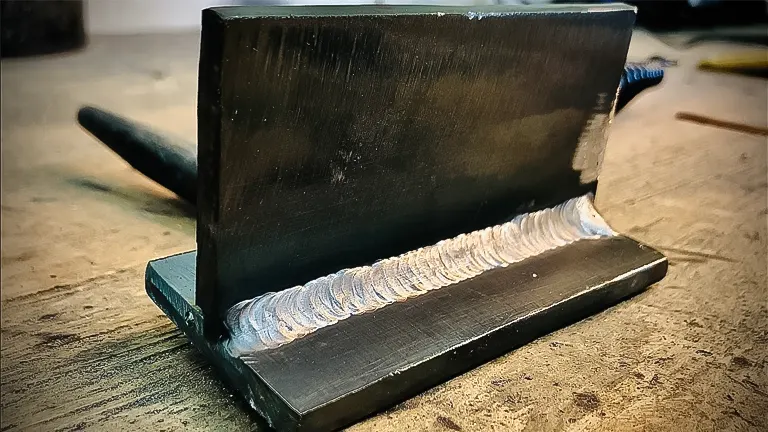
One of the most critical applications of the 2G position is in executing horizontal fillet welds, which are integral to many structural and fabrication projects. The welder must adeptly balance the speed of welding with the careful management of the weld pool to prevent sagging or uneven bead formation.
Mastery of the 2G position is essential for producing strong, visually appealing, and structurally sound welds, particularly in scenarios where flat welding is not feasible. It serves as a vital skill in a welder’s repertoire, especially in industrial and construction environments where precision and adaptability are key.
Pros
- Useful for a variety of applications.
- Offers a balance between difficulty and practicality.
Cons
- Requires more skill to manage the weld pool.
3. Vertical Position (3G and 4G)
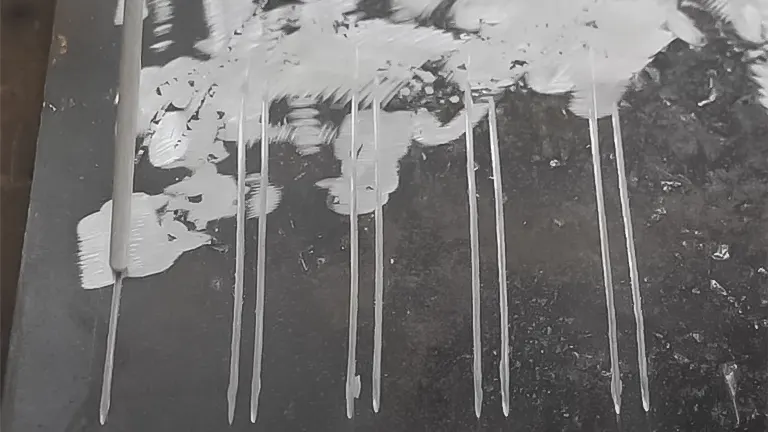
In the spectrum of welding positions, the Vertical Position, encompassing both 3G (vertical up) and 4G (vertical down), presents a formidable challenge even for skilled welders. This position is a true testament to a welder’s proficiency, as it involves battling gravity in a way that significantly affects the behavior of the weld pool.
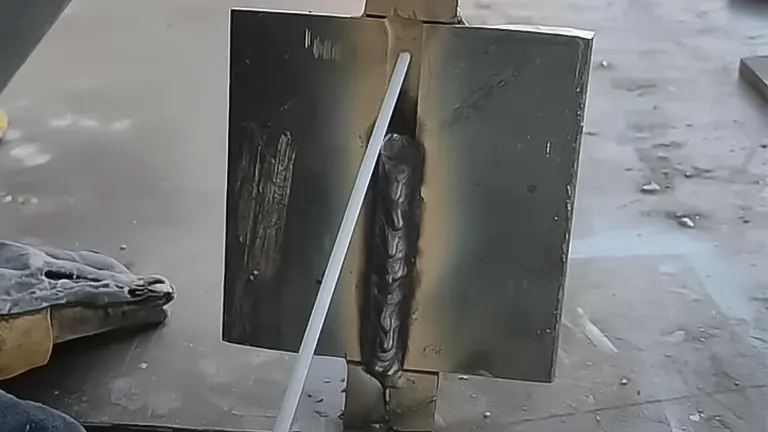
When welding vertically upwards (3G), the welder must skillfully maneuver the torch or rod to counteract gravity’s tendency to pull the molten metal downwards, which I find to be quite demanding, rating it a 7 out of 10 in terms of difficulty. However, the effort is worthwhile as this technique typically results in stronger and more penetrating welds, ideal for high-strength requirements.
Conversely, the vertical down technique (4G) is somewhat less challenging, meriting a 5 out of 10 on my difficulty scale, but it often leads to weaker welds due to the faster travel speed and reduced penetration. The choice between 3G and 4G often hinges on the specific requirements of the project, with 3G being preferred for critical structural work where strength is paramount.
These vertical welding techniques are indispensable in numerous structural projects, such as the construction of building frameworks and other vertical elements, where the integrity and strength of the weld are crucial. Mastering vertical welding is, therefore, essential for welders aiming to work on diverse and structurally demanding projects.
Pros
- Crucial for vertical joints in structures.
- 3G offers stronger welds, while 4G is faster.
Cons
- Challenging to master.
- Higher risk of defects.
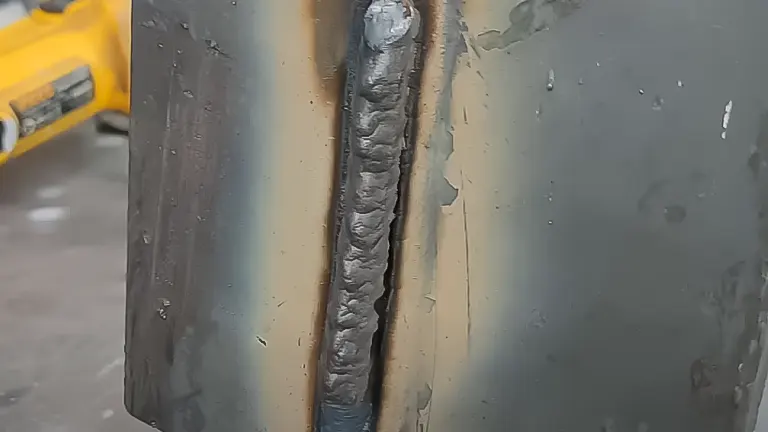
4. Overhead Position (4G or 4F)
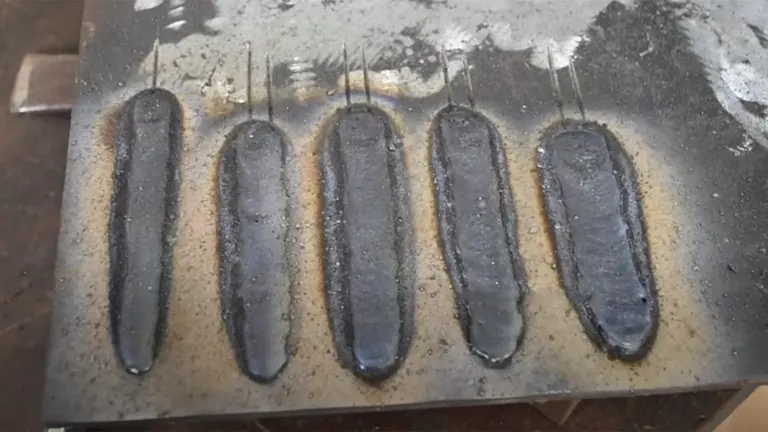
The Overhead Position in welding, referred to as either 4G or 4F, is often regarded as the pinnacle of welding challenges, testing the limits of a welder’s skill and expertise. This position is characterized by welding on the underside of a horizontal surface, which makes it inherently demanding due to the constant risk of molten metal falling due to gravity.

In my experience, the overhead position requires an exceptional level of focus, precision, and control, earning a formidable 8 out of 10 on my personal difficulty scale. The key to success in this position lies in the welder’s ability to deftly manage the weld pool, maintaining a steady hand and precise control over the welding torch to ensure that the molten metal bonds effectively without dripping or sagging. This level of difficulty is compounded by the need for extreme caution and safety measures to protect the welder from potential harm caused by falling hot metal.
Despite these challenges, the overhead position is indispensable in various construction scenarios, particularly when dealing with ceilings, overhead beams, and other structures where the welding joint is above the welder. Mastery of this technique is crucial for completing complex structural projects where welding cannot be performed in simpler positions. It’s a skill that not only demonstrates a welder’s technical prowess but also their commitment to tackling the most rigorous and demanding aspects of the craft.
Pros
- Essential for overhead welding tasks.
- Develops advanced welding skills.
Cons
- High difficulty level.
- Increased safety risks.
Decision-Making Factors
When selecting a welding position, consider:
- Project Requirements: Match the position to the job. Flat positions won’t work for vertical seams.
- Skill Level: Beginners should start with 1G and progress gradually.
- Safety: Overhead welding requires extra precautions.
Final Thoughts
In conclusion, each welding position has its unique place and importance. For beginners and hobbyists, mastering the flat and horizontal positions might be sufficient. However, for professional welders or those tackling diverse projects, proficiency in all positions is crucial. My journey through these positions has been both challenging and rewarding, offering a blend of skill, precision, and practical application. Remember, the best welding position is the one that fits the job at hand and aligns with your skill level. Stay safe and keep welding!
Frequently Asked Questions
- What are the basic welding positions?
The basic welding positions include Flat (1G), Horizontal (2G), Vertical (3G and 4G), and Overhead (4G or 4F). - Why is the Flat Position (1G) considered ideal for beginners?
The Flat Position is the easiest because it aligns with gravity, allowing for easier control of the weld pool and is a great starting point for beginners to learn basic welding techniques. - What challenges does the Horizontal Position (2G) present?
In the Horizontal Position, controlling the sideways movement of the weld pool is more challenging due to gravity, requiring more skill to achieve a clean and even weld. - How do Vertical Positions (3G and 4G) differ in terms of difficulty?
Vertical Positions are more challenging due to gravity affecting the weld pool. The 3G (vertical up) is generally more difficult than 4G (vertical down) but results in stronger welds. - What makes the Overhead Position (4G or 4F) particularly challenging?
The Overhead Position is challenging because of the risk of molten metal falling due to gravity, requiring high levels of skill, precision, and safety precautions. - Can all welding techniques be used in each position?
Not all welding techniques are suitable for every position. Some techniques may be more effective or easier to use in certain positions than others. - Is it necessary to master all welding positions?
While not all projects require mastery of every position, a well-rounded welder should be proficient in all basic positions to handle a variety of welding tasks. - What safety precautions should be taken in different welding positions?
Safety precautions include proper protective gear (helmet, gloves, apron), adequate ventilation, and position-specific measures, like securing oneself when welding overhead. - How does welding in different positions affect weld quality and strength?
Welding positions can significantly affect weld quality and strength. For instance, vertical and overhead welds might be less strong than flat welds due to gravity affecting the weld pool. - Are there any tips for transitioning from easier to more challenging positions?
Practice is key. Start with mastering the flat position, then gradually progress to more challenging positions, focusing on controlling the weld pool and maintaining a steady hand.
We greatly value your input! If you’ve had experiences with the different welding positions discussed in our ‘Practical Guide to Basic Welding Positions’, we invite you to share your stories and perspectives in the comments section below. Your personal insights and tips could be incredibly beneficial to fellow welders and enthusiasts looking to improve their skills and make informed choices in their welding journey. Let’s create a community of shared knowledge and expertise!

Edward Smith
Forestry AuthorWoodworking is about more than crafting; it's a harmonious connection with nature, mastering tools, and preserving our environment. I'm here to share my knowledge and experiences with you, forging a future where we can embrace wood's beauty and utility while safeguarding our forests' health and diversity.
2 comments
Here is a fun one: Try welding while having low vision! Its the space between being unable to drive and a bit worse than being legally blind. Mine right now is 20 /100 corrected in the "good" eye with some upper field loss from a detached retina in 1975. As for the other its light perception, both initially damaged by retinopathy of prematurity in 1955. it's eyesight not so great for distant, but adequate for close up tasks, around 20/40. I 'asked my doctor' some 25 years ago if I can weld... due to a contact lens myth, he said go for it. Since going to corrective safety glasses in 2002 and then to Wiley X's after a cataract operation, I've been doing small projects ever since and even built a truck bed... Some welds, a lot vertical, look like seagull crap, others like the flat ones, are perfect. Depends upon the helmet which took time to find the right one.... and practice. Reading the chart on the inside of the lid on the welder helps too! It scares the daylights out of the uninitiated and doubters... but I'm having fun! Just don't wear your New Balance lace ups and a loose fitting sweatshirt! Man that slag is hot!

I love welding
Lazarus Mato'ogani
February 4, 2024 3:18 am