How To Level Frameless Cabinets With Custom Toe Kicks
- February 21, 2024
- 1 comment
When I initially discussed my method for preparing and assembling frameless cabinets, a common inquiry arose regarding how I ensure they are leveled and the specific toe kicks I employ. The strategy I’ve adopted involves constructing separate toe kicks for each cabinet, a technique that markedly simplifies the installation process.
This approach allows me to concentrate solely on achieving a perfectly level base for the toe kicks, eliminating the need to adjust each cabinet individually for levelness. This focus on pre-leveling the toe kicks before cabinet installation not only streamlines the entire process but also enhances efficiency and ensures a smoother outcome.
By dedicating attention to crafting and leveling the toe kicks ahead of time, I’m able to mitigate potential issues that could arise from attempting to level each cabinet on its own, leading to a more cohesive and stable cabinet installation. This step-by-step methodology I’ve developed and refined over time underscores the importance of preparation and precision in achieving optimal results in cabinet installation, making the process more manageable and yielding a professional-grade finish.
Outline Table
| Section | Subsection | Details |
|---|---|---|
| Introduction | Brief overview of the need for leveling frameless cabinets and using custom toe kicks. | |
| Step 1: Preparing the Materials | – Ripping plywood to width | Explanation of how to prepare and size the materials for the toe kicks. |
| – Choosing materials | Discussion on selecting scrap plywood and the benefits of using certain types of wood. | |
| Step 2: Building the Supports | – Constructing L’s and T’s | Detailed guide on creating the supports for the toe kicks. |
| – Assembly without glue | Tips for assembling the supports using a narrow Crown stapler and screws. | |
| Step 3: Measuring and Marking | – Marking for supports placement | Instructions on how to measure and mark the placement of supports based on cabinet joints. |
| Step 4: Assembling the Toe Kick | – Stapling and screwing together | Step-by-step process for assembling the toe kick, including the order of attaching pieces. |
| Step 5: Preparing for Installation | – Cutting flooring (if necessary) | How to prepare the installation site, including cutting floating floors. |
| – Ensuring correct spacing | Advice on ensuring the toe kick is properly spaced from walls. | |
| Step 6: Leveling and Installation | – Using a laser level for precision | Techniques for leveling the base accurately with a laser level and shims. |
| – Attaching and shimming the base | Detailed instructions on securing the base to the wall and ensuring it remains level. | |
| Step 7: Final Adjustments and Cabinet Placement | – Securing cabinets on the toe kick | Guide on placing and securing cabinets on the leveled toe kick. |
| – Attaching cabinets to each other and the wall | Instructions on attaching cabinets together and to the wall for stability. | |
| Conclusion | Summarization of the importance of precision in leveling and installing cabinets with toe kicks. | |
| FAQs | 10 unique questions and answers related to the process. |
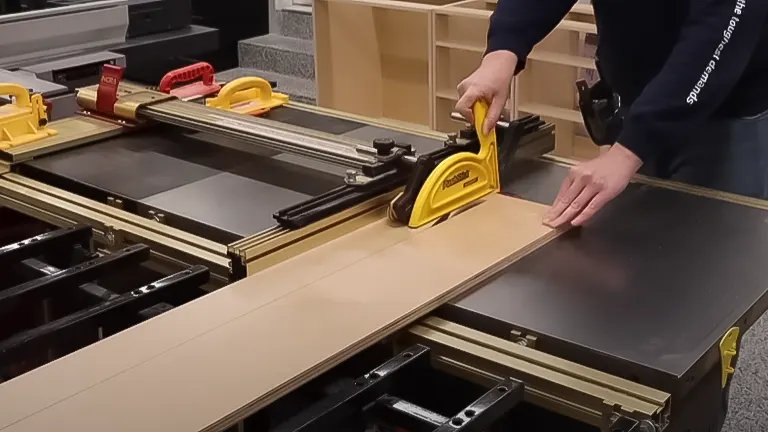
Step 1: Preparing the Materials
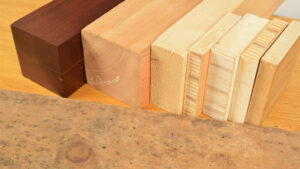
Starting off, the first step involves sizing the plywood pieces to match the required height for the toe kicks. This involves ripping scrap plywood, a practice that’s both cost-effective and environmentally friendly.
The selection of plywood is based on what’s available from previous projects, emphasizing a practical approach to material use. This step is crucial for ensuring that the foundation pieces are accurately cut to size, setting the stage for the construction of stable and consistent toe kicks.
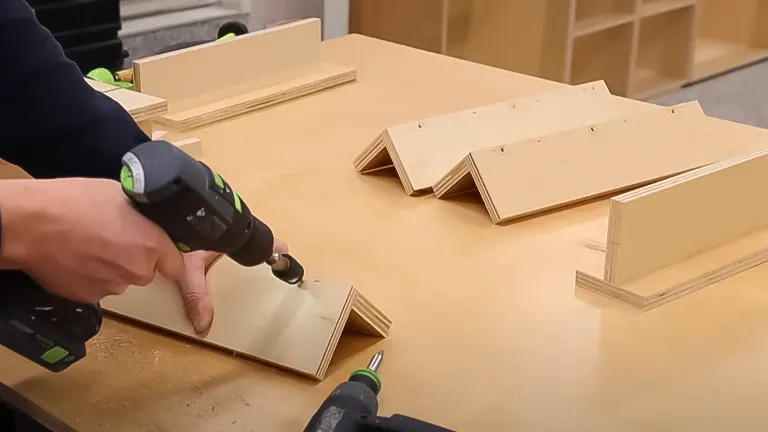
Step 2: Building the Supports
In this phase, the focus is on constructing the supports known as L’s and T’s. L’s are designated for the ends of the toe kicks, while T’s are used at points where cabinets will meet. This construction is carried out without the use of glue.
Initial assembly is achieved with a narrow Crown stapler, which temporarily holds the pieces in place. Following this, pre-drilling and screwing are employed to securely fasten the components, providing a durable base for the subsequent steps of the cabinet installation process.
Step 3: Measuring and Marking
Precision is paramount in this step. It involves measuring the specific points where cabinet joints will converge and marking these locations on both the front and back elements of the toe kick.
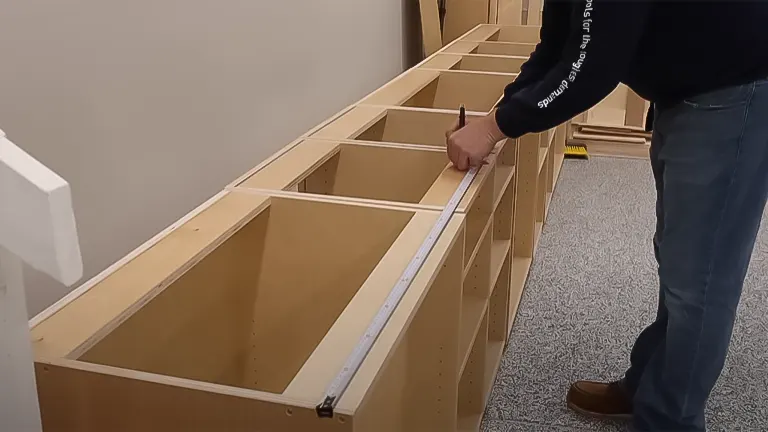
This meticulous process ensures that the supports are accurately positioned to align with the cabinets, facilitating a seamless and efficient installation. The goal here is to eliminate any guesswork, ensuring that each piece fits together perfectly.
Step 4: Assembling the Toe Kick
Assembly begins with attaching all parts to the front stretcher using a stapler, followed by reinforcing the structure with screws.
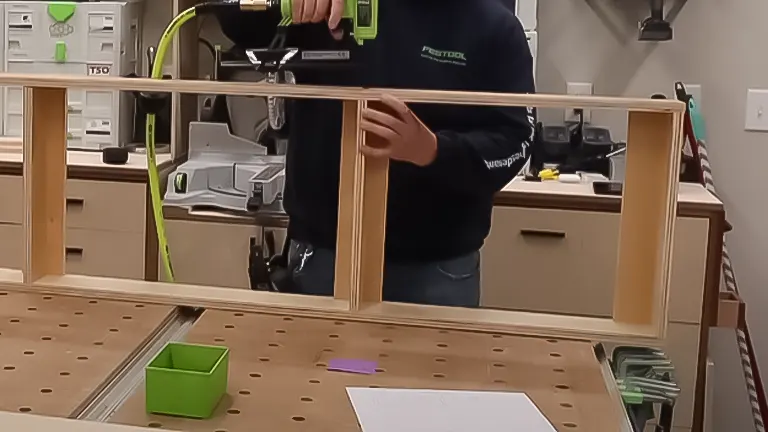
This sequential method guarantees the creation of a solid and supportive frame capable of bearing the weight of the cabinets. It’s a deliberate and organized approach designed to build a resilient foundation that can reliably support the cabinetry above.
Step 5: Preparing for Installation
This step is specific to the type of flooring present in the installation area. For floating floors, it necessitates cutting out the floor section where the toe kick will be positioned to prevent any limitation on floor movement.
This preparation is adapted to the unique requirements of the flooring to ensure the integrity of both the floor and the installation is maintained. It’s a tailored approach that takes into consideration the potential need for floor expansion and contraction.
Step 6: Leveling and Installation
The leveling process is critical for a successful installation. Utilizing a laser level, I ensure the toe kick is precisely aligned before proceeding. The use of shims is essential in achieving this levelness, allowing for adjustments to be made as needed.
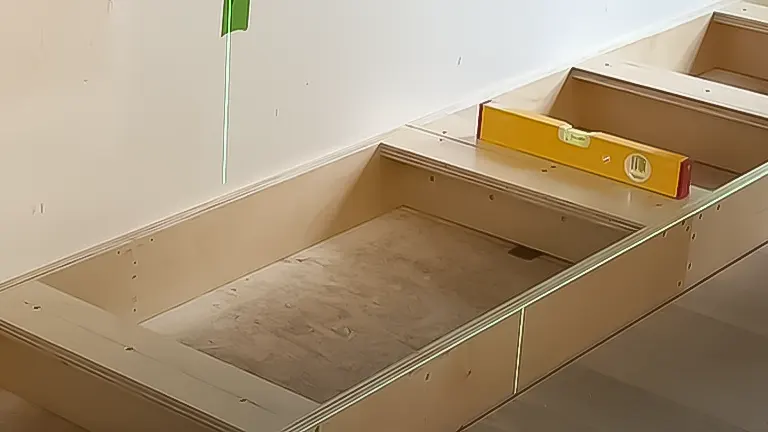
This step is approached with patience, understanding that the accuracy of the leveling directly influences the ease of cabinet installation, aiming for a flawless and stable base upon which to mount the cabinets.
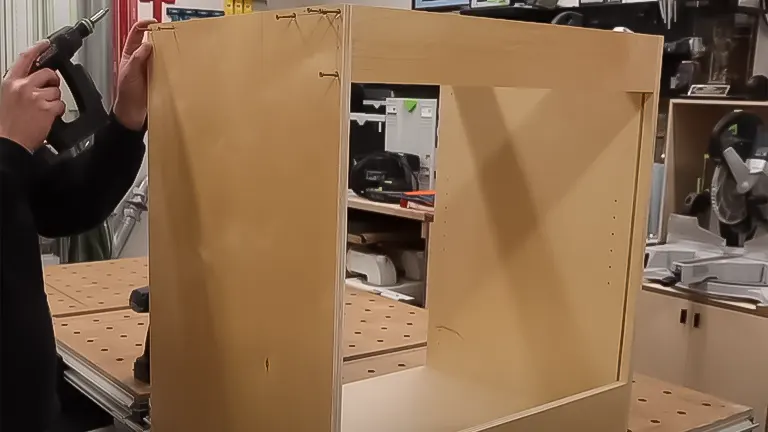
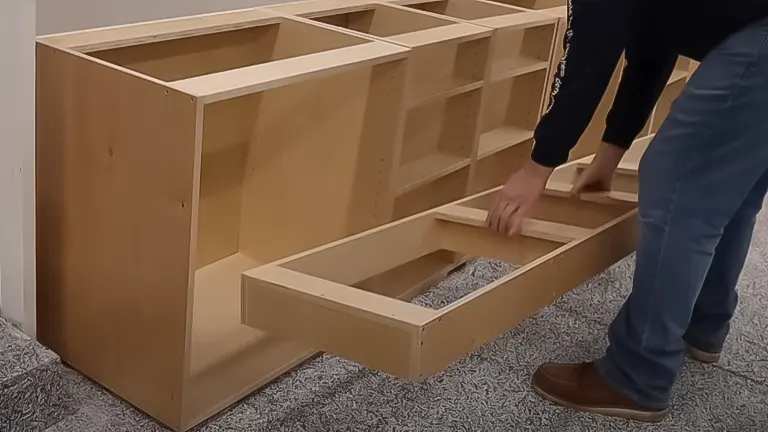
Step 7: Final Adjustments and Cabinet Placement
With a level base established, mounting the cabinets becomes a straightforward task. The cabinets are first interconnected for enhanced stability, followed by securing them to the wall. This strategy not only eases the alignment process but also ensures a robust installation overall.
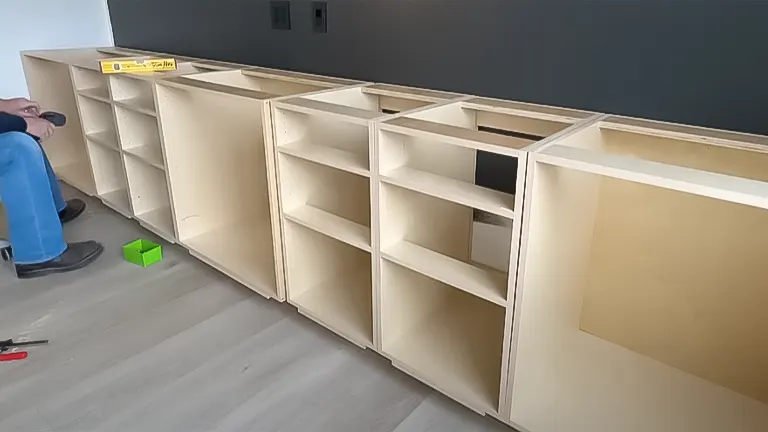
If there’s a necessity to fasten the cabinets to the base, the previously installed supports conveniently serve as anchoring points, facilitating a secure attachment and completing the installation process.
Pros
- Enhanced Stability: Custom toe kicks provide a solid foundation for frameless cabinets, significantly improving their stability.
- Aesthetic Uniformity: They allow for a seamless look that complements the sleek design of frameless cabinets.
- Customization: Tailoring the toe kicks to your specific needs and dimensions ensures a perfect fit and optimal functionality.
Cons
- Time-Consuming: The process requires a significant amount of time and patience, particularly during the leveling phase.
- DIY Complexity: For those less experienced with DIY projects, the process can be somewhat daunting, necessitating a steep learning curve.
Decision-Making Factors
For me, the key factors in choosing custom toe kicks over alternatives were stability, aesthetic continuity, and the personal satisfaction of a DIY project. While the process was time-intensive, the end result was incredibly rewarding, offering a perfect blend of functionality and style.
Final Recommendation
Based on my experience, I highly recommend custom toe kicks for anyone looking to install frameless cabinets. Despite the challenges and time investment, the outcome is well worth it, providing a stable, sleek, and satisfying addition to your home. The process not only enhances your cabinetry’s appearance and functionality but also imparts a sense of accomplishment that comes from tackling a complex DIY project head-on.
Final Conclusion
Finalizing the process of leveling frameless cabinets with custom toe kicks comes down to a blend of meticulous planning and precise execution. This method, centered on the use of individually tailored toe kicks, not only streamlines the installation process but also ensures a level and stable foundation for the cabinets. By focusing on the preparation and proper alignment of the toe kicks, you eliminate the common pitfalls associated with leveling each cabinet separately.
This approach facilitates a smoother installation process, ultimately resulting in a polished and professional appearance. The key takeaway is the importance of precision—from the initial measurement and cutting of materials to the final adjustments and securing of cabinets. Adhering to this detailed process ensures that the cabinets are not only aesthetically pleasing but also functionally sound, providing a lasting solution to the challenges of installing frameless cabinets.
Frequently Asked Questions
- What are custom toe kicks, and why are they used in installing frameless cabinets?
Custom toe kicks are support structures built to elevate and level frameless cabinets off the floor, providing a stable base and enhancing the overall appearance. They’re used to ensure cabinets are perfectly level and aligned, which is crucial for their functionality and aesthetics. - How do I determine the right height for my custom toe kicks?
The height of custom toe kicks should match the desired clearance between the bottom of the cabinet and the floor, typically around 3 to 4 inches. This height can be adjusted based on your specific design needs and the height of the flooring material. - Can I use any material to build toe kicks?
While various materials can be used, plywood is often preferred for its durability, ease of customization, and compatibility with the cabinet material. Ensure the material is sturdy enough to support the cabinet weight and withstand wear over time. - Do I need to level the floor before installing toe kicks?
Yes, it’s important to ensure the floor is as level as possible before installing toe kicks. Any significant unevenness in the floor should be corrected, or the toe kicks should be adjusted accordingly to ensure the cabinets are level. - How do I attach the toe kicks to the cabinets?
Toe kicks can be attached to cabinets using screws or brackets. It’s crucial to secure them firmly to prevent any movement, ensuring a stable base for the cabinets. - What tools do I need for installing custom toe kicks?
Essential tools include a level, measuring tape, saw for cutting the material, drill for pre-drilling holes and driving screws, and possibly a laser level for precise leveling across longer distances. - Can I install frameless cabinets without toe kicks?
While it’s technically possible, toe kicks are recommended for their practical benefits, including easier access to lower cabinets, protection from foot traffic, and enhanced stability and leveling. - How do I ensure the toe kicks are perfectly level?
Use a laser level to project a level line along the toe kick’s length, adjusting the height with shims under the toe kick until it aligns perfectly with the laser line. This ensures that the base is level before cabinet installation. - What if my cabinets are of different depths?
For cabinets of varying depths, toe kicks need to be customized accordingly. Each section should be built to match the cabinet it supports, ensuring a uniform look and proper support. - How do I finish the toe kicks to match my cabinets?
Toe kicks can be painted, veneered, or covered with a material that matches or complements the cabinets. If using plywood, consider applying a veneer or laminate that matches the cabinet finish for a cohesive look.
We’re eager to learn from your journey! Please share your own experiences and insights on leveling frameless cabinets with custom toe kicks in the comments section below. Your practical advice and personal stories could greatly assist others in navigating this process more effectively. Whether it’s a tip you’ve discovered or a challenge you’ve overcome, your contributions can help fellow DIY enthusiasts and professionals make well-informed decisions.

Edward Smith
Forestry AuthorWoodworking is about more than crafting; it's a harmonious connection with nature, mastering tools, and preserving our environment. I'm here to share my knowledge and experiences with you, forging a future where we can embrace wood's beauty and utility while safeguarding our forests' health and diversity.


I like to use this method. After I shim the bases I glue and screw plywood blocks that bare down to the floor so I can remove the shims. I find shims can become dislodged when the other trades come through. Thanks for the wall written article.
Walter
February 21, 2024 5:59 pm