Can You Use A Belt Sander On Hardwood Floors?
- December 1, 2023
- 0 comment
When it comes to refinishing hardwood floors, the journey can be as rewarding as the destination. As a homeowner with a penchant for DIY projects, I recently found myself faced with the task of rejuvenating the worn-out hardwood floors in my living room. Enter the belt sander – a powerful tool that promises to make this undertaking a breeze. But can you really trust a belt sander to handle the delicacy of hardwood? Join me as I take you through my experience, evaluating the pros and cons, and uncovering the best options for the job.
Refinishing wood floors is a time-consuming task that often spans several days. Opting for a do-it-yourself approach can lead to significant cost savings, provided you have the appropriate tools. Using the right equipment is crucial, and a belt sander proves to be highly effective in swiftly stripping and sanding the floor. The rapid results are achieved through the rotation of a sandpaper loop on the belt sander. It’s essential for the belt sander to be portable during the wood floor finishing process, allowing easy movement across the surface. Additionally, the belt sander belt is instrumental in leveling the floor and preparing it for the subsequent fine sanding.
List on How to a Use Belt Sander on Hardwood Floors
- Remove Any Loose Debris by Using a Vacuum to Prepare The Floor
- Wear a Dust Mask and Eye Protection
- Connect The Sander to the Power Source and Activate it While Keeping it Elevated Above The Floor
- Employ a Back and Forth Motion with Slighty Overlapping Strokes While Sanding
What You Need To Know About Use A Belt Sander On Hardwood Floors?
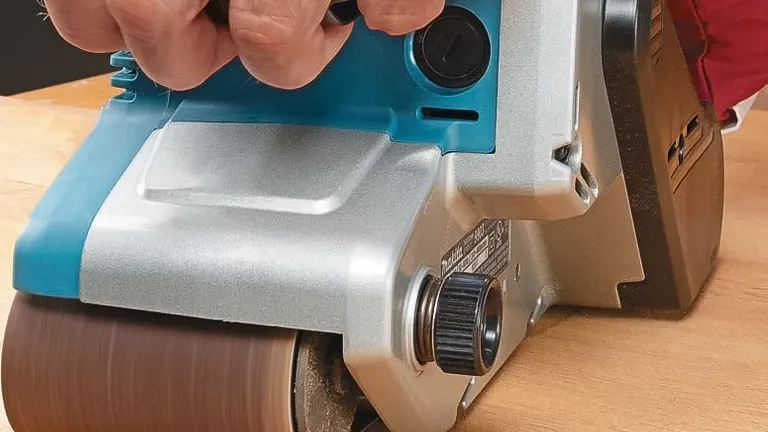
Belt sanders are a powerful tool that can be used to remove old finish and smooth out imperfections in hardwood floors. However, it is important to use them correctly to avoid damaging the wood. Belt sanders work by moving a continuous loop of sandpaper over the surface of the wood. The grit of the sandpaper determines how much material is removed. Coarse grit sandpaper is used for initial sanding, while finer grit sandpaper is used for finishing.
Before you begin sanding, it is important to make sure that your floors are in good condition. If there are any deep scratches or gouges, these will need to be filled in before you start sanding. You should also check for any loose boards or nails, as these could be damaged by the sander. Once your floors are ready, you can begin sanding. Start with a coarse grit sandpaper and work in the direction of the grain of the wood. Be careful not to apply too much pressure, as this could damage the wood. As you sand, you will see the old finish being removed and the wood underneath becoming smoother.
Once you have sanded the entire floor with a coarse grit sandpaper, you can switch to a finer grit sandpaper. This will help to further smooth out the wood and remove any scratches that were left behind by the coarse grit sandpaper. When you are finished sanding, you should vacuum your floors to remove any dust. You may also want to wipe them down with a damp cloth to remove any remaining debris.
Once your floors are clean and dry, you can apply a new finish. There are many different types of finishes available, so it is important to choose one that is compatible with your hardwood floors. Sanding your hardwood floors is a time-consuming process, but it is a rewarding one. With a little care and attention, you can refinish your floors and give them a beautiful new look.
Proper Safety Uses Guidelines
- Protective Gear: Always wear appropriate personal protective equipment (PPE), including safety glasses, hearing protection, and a dust mask. These items will shield you from potential hazards like flying wood particles and excessive noise.
- Clothing: Avoid loose-fitting clothing, jewelry, or any accessories that could get caught in the sander’s moving parts. Opt for snug-fitting attire to minimize the risk of accidents.
- Ventilation: Work in a well-ventilated area or use an additional dust extraction system. Hardwood sanding generates fine dust particles that can be harmful if inhaled, so proper ventilation is essential for a safe working environment.
- Stable Surface: Ensure the hardwood floor is securely fastened and doesn’t have any loose boards. The stability of the working surface is crucial to prevent unexpected movements that could lead to accidents.
- Firm Grip: Maintain a firm and controlled grip on the belt sander at all times. The powerful motor can cause the tool to pull or jerk if not properly handled, potentially resulting in loss of control.
- Proper Stance: Stand with your feet shoulder-width apart for stability. Distribute your weight evenly to maintain balance and control while operating the belt sander.
- Direction of Movement: Always move the belt sander in the direction of the wood grain. Sanding against the grain may result in uneven finishes and could lead to splintering.
- Gradual Pressure: Apply gradual and even pressure on the belt sander. Let the tool do the work, and avoid exerting excessive force, as this can lead to over-sanding and damage to the hardwood.
- Switch Off When Not in Use: When taking a break or changing sandpaper, switch off the belt sander and unplug it from the power source. This prevents accidental starts and ensures your safety during maintenance tasks.
- Read the Manual: Familiarize yourself with the manufacturer’s instructions and guidelines provided in the user manual. Each belt sander model may have specific safety recommendations, and understanding them is crucial for safe and effective use.
Guide On Utilizing A Belt Sander for Hardwood Floors
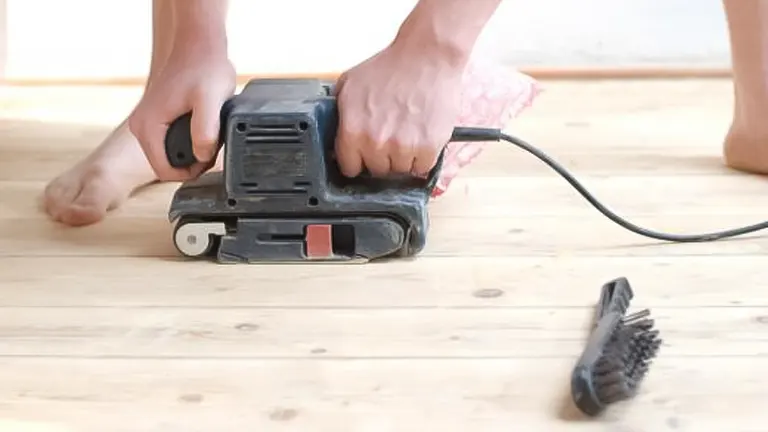
Guide 1: Remove Any Loose Debris by Using a Vacuum to Prepare The Floor
Initiating the hardwood floor refinishing process requires meticulous preparation, and the first crucial step involves the removal of any loose debris. To achieve this, employing a vacuum is not just a convenience but a strategic necessity. Before diving into the intricate work of sanding and refinishing, it’s paramount to create a clean canvas. Loose particles, dust, and small debris scattered across the floor can interfere with the smooth operation of the subsequent steps.
By using a vacuum, you not only ensure the elimination of these impediments but also lay the foundation for a more even and effective refinishing process. This initial act of cleaning sets the stage for the transformative journey ahead, providing a clear and debris-free surface on which the subsequent refinishing steps can unfold with precision and finesse.
Guide 2: Wear a Dust Mask and Eye Protection
Prior to embarking on the hardwood floor refinishing journey, a critical precautionary measure is to don a dust mask and eye protection. This seemingly simple step plays a pivotal role in safeguarding your respiratory health and ensuring the protection of your eyes during the sanding process. Belt sanders, while incredibly effective in smoothing and leveling hardwood surfaces, generate a substantial amount of fine dust particles. Inhaling this dust can pose respiratory risks, making the use of a dust mask imperative for a safe working environment.

Additionally, the swift rotation of the sanding belt can propel debris and wood particles into the air, underscoring the importance of eye protection. By wearing a dust mask and eye protection, you not only shield yourself from potential health hazards but also create a secure workspace that allows you to focus on the task at hand without compromising your well-being. Safety measures such as these not only contribute to a more comfortable working experience but also ensure a responsible and health-conscious approach to hardwood floor refinishing.
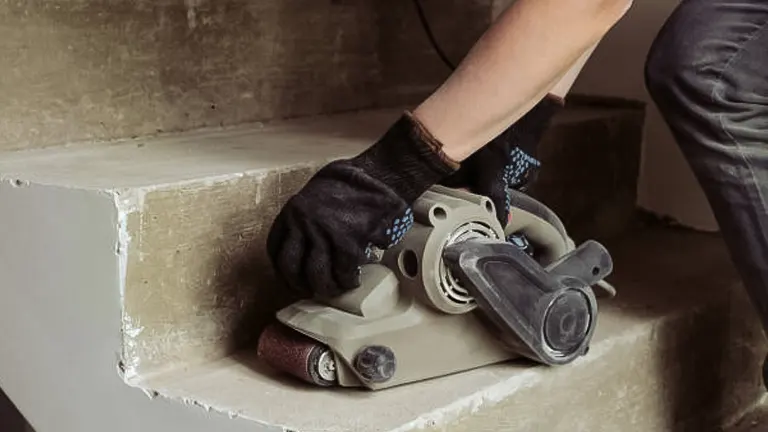
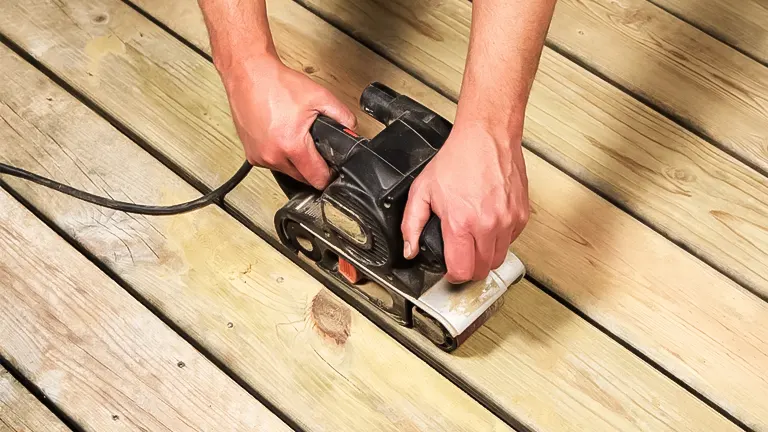
Guide 3: Connect The Sander to the Power Source and Activate it While Keeping it Elevated Above The Floor
Begin the hardwood floor refinishing process by plugging in the sander and activating it while holding it above the ground, grasping both the front and back handles securely. This initial step is crucial to ensure a smooth and controlled start to the sanding procedure. As the sander comes to life, lower it gradually toward the floor surface. This gradual descent is pivotal in preventing sudden and potentially damaging impacts on the wood.
By maintaining both handles in your grip, you establish a firm and stable hold on the machine, enabling you to guide it with precision. It’s imperative to sustain a continuous motion as you move the sander along the grain of the wood. Deviating from this direction may result in uneven sanding and compromise the overall quality of the refinishing process. Furthermore, hovering the sander in one spot poses the risk of creating a dent in the floor, underscoring the importance of maintaining a consistent and fluid motion throughout this stage of the refinishing journey.
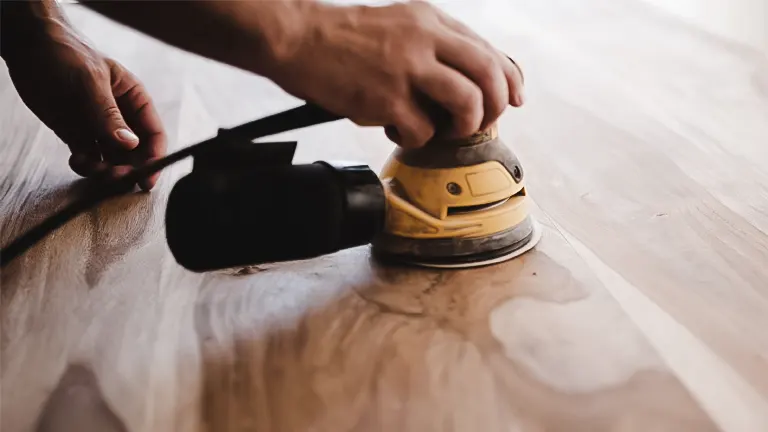
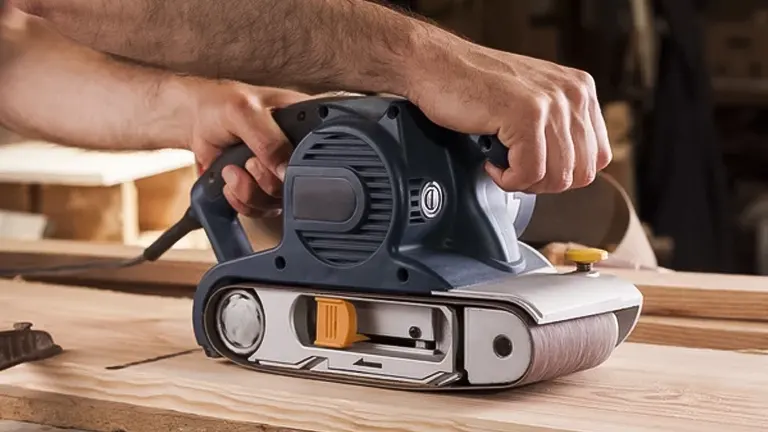
Guide 4: Employ a Back and Forth Motion with Slighty Overlapping Strokes While Sanding
When utilizing a belt sander on hardwood floors, the technique of employing a back-and-forth motion with slightly overlapping strokes during the sanding process is paramount. This deliberate and methodical approach ensures an even and consistent result across the entire floor surface. The back-and-forth motion allows the sanding belt to cover a broad area efficiently, while the slight overlap between strokes prevents any missed spots, guaranteeing uniformity in the sanding process.
This technique is especially crucial when dealing with hardwood, as it tends to have natural variations in grain and density. By adopting this meticulous sanding method, not only do you achieve a smoother and more polished finish, but you also mitigate the risk of creating uneven patches on the hardwood floor. It’s a practice that embodies precision and attention to detail, essential elements in the pursuit of a professionally refinished hardwood floor.
Conclusion
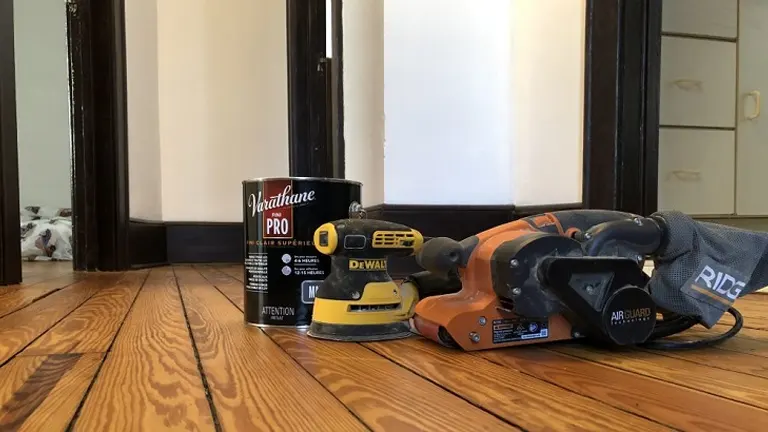
In conclusion, the use of a belt sander on hardwood floors is a transformative process that, when approached with the right tools and techniques, yields exceptional results. From the crucial initial steps of vacuuming and protective gear to the nuanced sanding methods, each phase demands careful consideration. Through my exploration, the Makita 9403 stood out as a powerhouse, exemplifying the perfect blend of power and precision. The variable speed settings of the Porter-Cable 362V and the advanced dust collection system of the Bosch OS50VC added further dimensions to the hardwood refinishing experience. In this endeavor, the meticulous details matter, from the even strokes to the gradual descent of the sander. The journey of revitalizing hardwood floors with a belt sander is an artful dance, where the right moves result in a floor that not only stands the test of time but becomes a testament to the marriage of craftsmanship and technology.
Frequently Asked Questions
- Can any belt sander be used on hardwood floors, or are there specific models designed for this task?
While many belt sanders can be employed for hardwood floor refinishing, it’s advisable to choose models with sufficient power, variable speed settings, and efficient dust collection systems for optimal results. Specialized hardwood floor belt sanders may offer features tailored to the unique demands of this task. - How crucial is the dust collection system in a belt sander when refinishing hardwood floors?
The dust collection system is paramount when using a belt sander on hardwood floors. Efficient systems, like the one in the Bosch OS50VC, not only maintain a cleaner workspace but also contribute to a healthier environment by minimizing airborne particles that could pose respiratory risks. - Is there a recommended grit size for sanding hardwood floors with a belt sander?
The recommended grit size can vary depending on the condition of the hardwood floor. Generally, a gradual progression from coarse to fine grits is advisable. Starting with a coarser grit (around 40 or 60) for initial sanding and moving towards finer grits (100, 120, or higher) for a smoother finish. - How long does it typically take to refinish hardwood floors using a belt sander?
The duration of hardwood floor refinishing with a belt sander depends on factors such as the size of the area, the condition of the floor, and the power and efficiency of the sander. On average, it may take several days, including preparation, sanding, and finishing. - Are there any safety precautions one should take when using a belt sander on hardwood floors?
Safety is paramount when working with a belt sander. Apart from wearing a dust mask and eye protection, it’s essential to ensure the sander is in good working condition, maintain a steady and controlled motion during operation, and be mindful of the power cord to avoid tripping hazards. Always follow the manufacturer’s safety guidelines.
We’re eager to learn from your experiences! Feel free to share your thoughts and personal insights on using a belt sander on hardwood floors in the comment section below. Your valuable input might just be the guidance someone needs for their own refinishing project. Let’s build a community of shared knowledge and expertise!

Edward Smith
Forestry AuthorWoodworking is about more than crafting; it's a harmonious connection with nature, mastering tools, and preserving our environment. I'm here to share my knowledge and experiences with you, forging a future where we can embrace wood's beauty and utility while safeguarding our forests' health and diversity.


Leave your comment