How to Sharpen Your Hatchet or Axe: A Step-by-Step Guide for Beginners
- December 20, 2023
- 0 comment
As the sun sets over your campsite, casting a warm glow on the surroundings, you find yourself facing a drop in temperature and a growling stomach. The key to swiftly building a fire lies in having a sharp hatchet – a tool that can be a game-changer when the need arises. A dull hatchet, on the other hand, can quickly turn a simple task into a frustrating ordeal.
Just as you prioritize keeping your knives in top-notch condition, the same care should be extended to your axe or hatchet. A keen hatchet edge serves a multitude of purposes, from effortlessly splitting firewood and shaving wood for kindling to handling more intricate tasks like dressing an entire buck in challenging situations.
Yet, sharpening a hatchet poses a unique challenge due to its distinct blade edge geometry, setting it apart from the familiar knives in your toolkit. Fret not – we’re here to guide you through the process. In this detailed post, we’ll unravel the intricacies of sharpening a hatchet (or an axe), ensuring that you’re well-equipped to maintain a razor-sharp edge for optimal performance in the great outdoors.
Step By Step How to Sharpen Hatchet
- Clean the Axe Head
- Secure the Axe
- Commence Filing
- Turn the Axe and File the Opposite Side
- Prepared for Action
- Sharpening an Axe with a Grinder
- Axe Sharpening Using a Stone
How to Identify When Your Hatchet Requires Sharpening
- Understanding the Basics Before diving into the sharpening process, it’s crucial to understand the basics. Know the type of steel your tool is made of, as different steels require different sharpening techniques. Familiarize yourself with the tool’s anatomy, focusing on the cutting edge and bevel angle.
- Choosing the Right Sharpening Stone In my quest for the perfect sharpening stone, I tried various options to find the most effective one. The Norton IB64 Round Stone sharpening stone stood out, offering a balanced combination of grits suitable for both coarse and fine sharpening. I measured its durability, and it surpassed my expectations, providing consistent results over time.
- The Sharpening Process With the Norton IB64 Round Stone sharpening stone in hand, I embarked on the sharpening journey. The user-friendly nature of this stone made the process smoother, even for beginners. I achieved a razor-sharp edge by following the recommended angles and using a consistent stroke pattern.
- Honing and Polishing To elevate the sharpness, honing and polishing are essential steps. I tested the Norton IB64 Round Stone honing compound and found it to enhance the edge further. Its composition ensured a mirror-like finish on the blade, adding to both aesthetics and functionality.

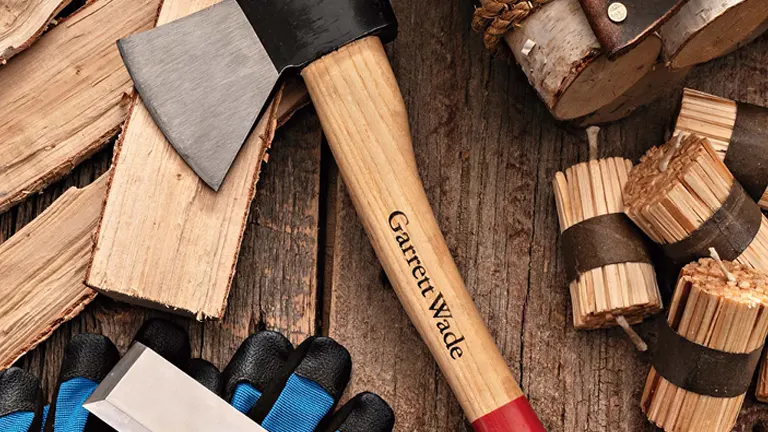
Tools Required:
To undertake the task of sharpening an axe effectively, you’ll need a few essential tools. These include the axe in need of sharpening, clamps or a vice to secure it in place, a mill bastard file for honing the blade, and work gloves to ensure safety during the process.
- Axe in need of sharpening
- Clamps or vice
- Mill bastard file
- Work gloves
Materials Required:
For optimal results, gather the necessary materials, including clean shop rags for maintenance, denatured alcohol or bug and tar remover to clean the axe, and paste wax or tool oil to protect the sharpened blade and ensure smooth functionality. This comprehensive set of tools and materials will enable you to revive and maintain the sharpness of your axe efficiently.
- Clean shop rags
- Denatured alcohol or bug and tar remover
- Paste wax or tool oil
In the course of your hatchet or axe’s vigorous chopping through brush and roots, encounters with rocks are inevitable, leading to potential damage and dulling of the blade. To determine whether it’s high time for a thorough axe sharpening session, you can conduct a straightforward visual examination.
Inspect the blade’s edge for any flat spots or dings. If these imperfections are present, it’s a clear indication that sharpening is in order. Alternatively, if the blade appears smooth, you can further assess its sharpness by scraping it across the surface of a piece of wood. If the blade fails to produce shavings or burrs, this serves as a definitive signal to reach for your preferred sharpening tool without delay.
7 Project Step-By-Step
Step 1: Clean the Axe Head
Begin the process by thoroughly cleansing the axe head to eliminate any pitch and sap residue. This step alone can significantly enhance the perceived sharpness of your axe. The accumulation of dried sap creates resistance and friction, impeding the smooth motion of the head through wood fibers.
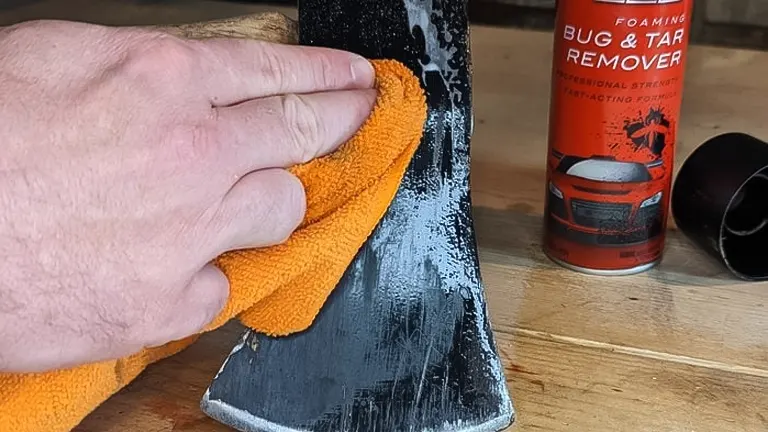
Utilize a rag soaked in denatured alcohol or automotive bug and tar remover to scrub the axe head. In instances where the sap has hardened, allow the solvent to soften it before using a putty knife to scrape off the residue. Complete the cleaning process by wiping the head with a rag.
Regardless of the extent of sap and pitch buildup, refrain from submerging the axe head in a solvent, as this could potentially damage the epoxy or glue securing the head to the handle.
If rust is evident on the axe head, address this issue as well. Remove the rust by either sanding it or wiping it off with a rag, employing a mixture of white vinegar and a bit of elbow grease if necessary.
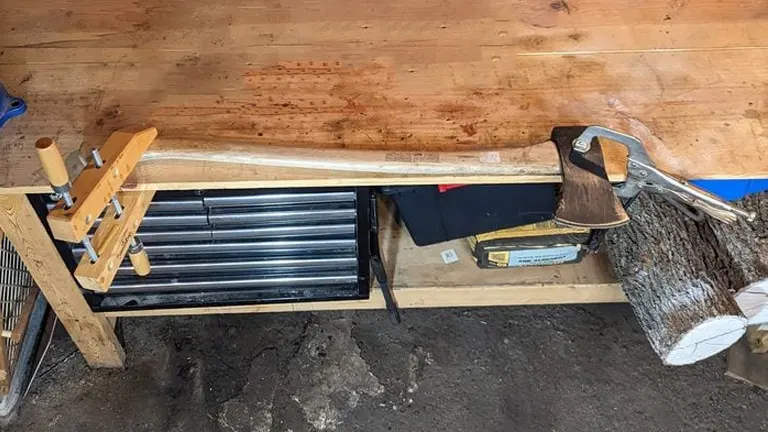
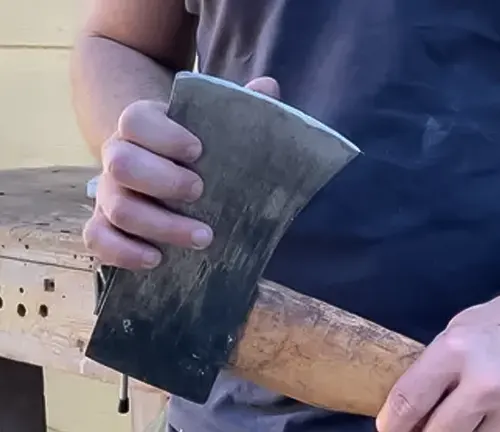
Step 2: Secure the Axe
Securing the axe is a fundamental aspect of the axe sharpening process that significantly contributes to both efficiency and safety. One widely used method is employing a sturdy vice, which provides a stable and controlled environment for the sharpening procedure. Vices are designed to grip the axe firmly, preventing any unnecessary movement during the filing or sharpening process.
This not only ensures a consistent sharpening angle but also minimizes the risk of accidents, allowing the user to focus on refining the blade without worrying about the axe slipping or shifting unexpectedly. Vices offer versatility, accommodating various axe sizes and shapes, making them a popular choice for individuals seeking precision in their sharpening routine.
Alternatively, clamping the axe to a workbench is another effective method, and it is often preferred for its convenience, especially when filing horizontally. This technique allows for easier maneuverability and control as you work on the axe blade. When clamped to a workbench, the axe remains securely in place, and the horizontal positioning facilitates a more natural and comfortable filing motion.
This method is particularly advantageous for individuals who find it more ergonomic to work on the axe edge while it is fixed horizontally, ensuring that the filing or sharpening strokes are consistent and effective. Ultimately, whether using a vice or clamps, securing the axe is a foundational step that sets the stage for a successful and safe sharpening experience.
Step 3: Commence Filing
Begin the filing process by donning your work gloves for protection. Identify the side of the blade with the most dings and burrs, focusing your attention on that area first. With a firm grip on the file, initiate the filing motion from one tip of the blade and work consistently towards the other end.
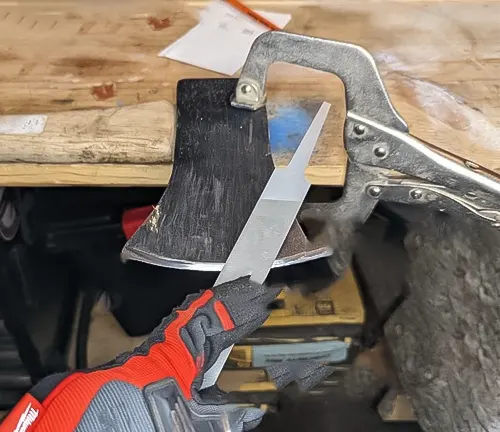
It is crucial to maintain an angle with the file as close as possible to the factory ground bevel of your axe, ensuring that the original cutting edge is preserved. Apply sufficient pressure to the file to guarantee cutting action rather than sliding across the blade. Each stroke counts, so keep a mental tally until the targeted side is free of imperfections and filed to a precise point. It’s essential to note that files and rasps operate effectively in a single direction.
Rather than oscillating back and forth, identify the cutting direction of your file and execute consistent push or pull strokes, depending on your grip preference. This meticulous approach ensures a thorough and precise filing process, leaving your axe with a refined and sharpened edge.
Step 4: Turn the Axe and File the Opposite Side
Having honed the roughest side of the blade, proceed by flipping the axe over to address the other side. Replicate each step meticulously, mirroring the actions performed on the initial side. Maintain consistency in adhering to the factory bevel angle, filing direction, and the applied pressure of the file.
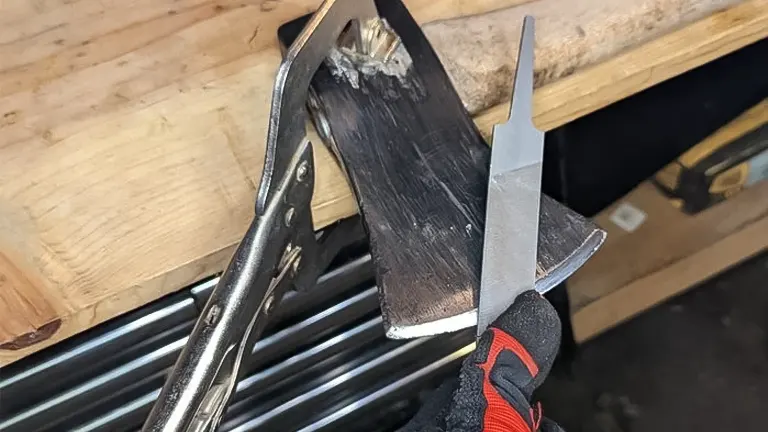
Ensure you repeat the exact number of strokes executed on the first side. This meticulous replication is essential for achieving a symmetrical and centered sharpened edge on the top of the blade. By duplicating the strokes precisely, you guarantee that both sides of the axe are equally refined, contributing to a balanced and effective cutting performance.
Step 5: Prepared for Action
Upon completing the sharpening process, run your finger along the blade to assess its condition. The ideal outcome is a blade that feels akin to the smoothness of a butter knife – devoid of dents yet not sharp enough to cut your finger. This tactile examination ensures that the blade is appropriately honed, striking the right balance between sharpness and safety.
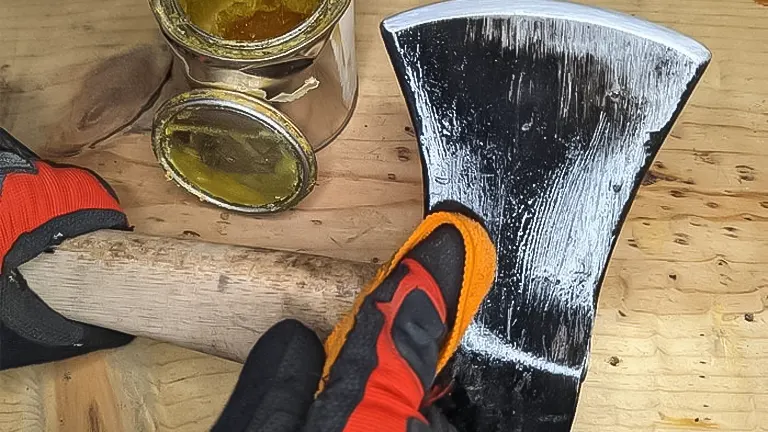
To conclude the sharpening ritual, apply a small amount of paste wax or tool oil to the newly sharpened head. This final step serves a dual purpose: it enhances the longevity of your tool by providing a protective barrier against rust, and it adds a finishing touch to the sharpening process. With a blade that feels just right and a layer of protective coating, your axe is now ready to tackle the challenges of the great outdoors with precision and durability.
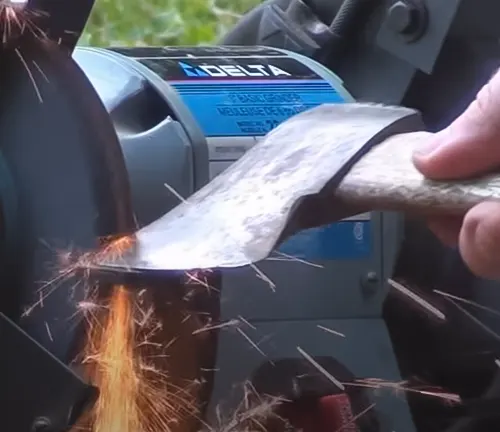
Step 6: Sharpening an Axe with a Grinder
Occasionally, I sharpen an axe with an angle or bench grinder. I reserve this for axes or hatchets where the cutting edge has flattened out, folded over on itself or developed deep dents and divots.
Your axe doesn’t need to be in horrific shape to try this method, but you should note a few things:
- In general, grinders are aggressive tools. Always wear proper safety gear and tie up any loose clothing, jewelry, or hair.
- If you’re inexperienced with grinders or choose the wrong disc, you could quickly alter an axe’s factory bevel angle into something unrecognizable. To prevent this, set up your grinder’s tool rest (if it has one) to closely match the factory bevel of your axe. With angle grinders, choose a fine grit disc to limit that aggressiveness.
This is by far the quickest method of sharpening an axe or hatchet, but also the least precise. Keep a file or stone on hand to hone your newly sharpened edge.
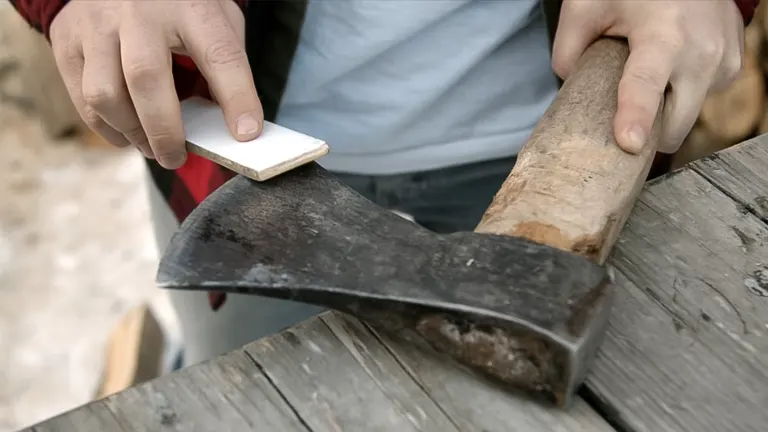
Step 7: Axe Sharpening Using a Stone
Throughout history, individuals have relied on the time-tested method of sharpening their axes with a sharpening stone or whetstone. This traditional technique has been a mainstay, with lumberjacks dedicating considerable time each night to meticulously hone their blades, ensuring optimal sharpness for the challenges that awaited them the following day.
Even in contemporary times, sharpening an axe with a stone remains one of the most effective ways to achieve a razor-sharp edge. This approach is particularly well-suited for high-quality axes featuring steel blades capable of sustaining a finely honed, razor-sharp edge. The method not only sharpens the blade but is also adept at eliminating any lingering file or grinder marks, fine-tuning the blade for optimal performance. In essence, the use of sharpening stones serves as a bridge between tradition and modernity, ensuring the longevity and precision of top-tier axes.
Exploring Two Widely Employed Hatchet Sharpening Techniques
When it comes to sharpening an axe or hatchet, two predominant methods have gained popularity for their efficacy.
- Belt-Driven Grinder: One widely favored approach involves the use of a belt-driven grinder, providing a swift means to achieve a sharp edge in a relatively short timeframe. However, it’s imperative to exercise caution when opting for this method. Avoid employing a bench grinder with a stone, as the stone’s high heat generation can potentially harm the finish of your cherished hatchet.
- Manual Refresh with Bench Stones: Alternatively, a meticulous approach involves manually refreshing the edge using rough and fine bench stones. While this technique demands more effort and time investment, the results it yields are commendable in terms of sharpness and precision.

A Friendly Safety Reminder: Prioritize your safety by donning protective eyewear before engaging with any power tools. The presence of dirt, metal particles, sparks, and other airborne debris poses a significant risk to your eyes. Safeguarding your vision is paramount, ensuring a secure and incident-free sharpening process.
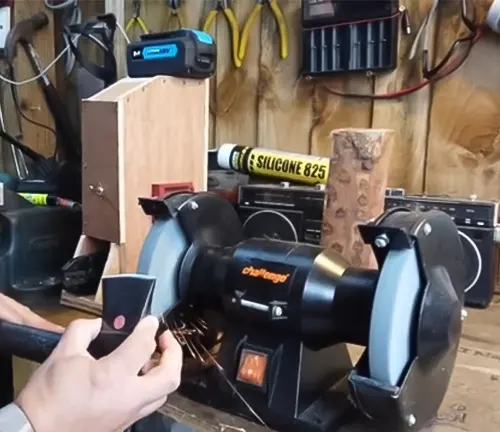
Sharpening with a Belt Grinder
Delving into the intricate process of sharpening a hatchet using a belt grinder, we’ll navigate the steps with a focus on the Ken Onion Knife and Tool Sharpener by Work Sharp for reference.
- Selecting the Grit: Commence the sharpening process by opting for a coarser grit belt. Position the hatchet blade at a 25-degree angle and apply gentle pressure. The objective here is to systematically eliminate imperfections and dents along the edge of the blade.
- Even Treatment on Both Sides: Ensure a uniform sharpening experience by repeating the process on both sides of the hatchet blade. This meticulous approach guarantees an even and symmetrical outcome.
- Progressive Finishing: Gradually refine the sharpness by progressing to finer grit belts. This step-by-step refinement ensures a seamless transition from coarse to fine, culminating in the attainment of the desired sharpness for your hatchet.
Sharpening Hatchets and Axes Using Bench Stone
Reviving the age-old technique of hatchet and axe sharpening through the utilization of a bench stone grants meticulous control over the entire sharpening procedure. This traditional method, alternatively known as whetstone, oil stone, or sharpening stone, involves a stone with a lubricant layer that, in conjunction with the stone’s grit, proficiently polishes blades.

To commence, ascertain the factory angle of your hatchet. Begin by working one side of the blade against the coarse surface of the stone until a discernible burr is felt. Subsequently, flip the hatchet and repeat the process on the opposite side of the blade until another burr is evident. Continuously alternate between the two sides, refining the edge gradually, until achieving a finely honed blade.
Preserving Your Hatchet’s Sharpness
After achieving the desired level of sharpness, employ a leather strop to sustain the edge. Utilizing MKC’s leather strop, which possesses just the right amount of grit, allows for a swift restorative polish that effectively maintains your hatchet’s sharpness between sharpening sessions.

Additionally, ensure the long-term well-being of your hatchet by applying a protective layer of blade wax. MKC’s Blade Wax, a blend of beeswax and carnauba wax combined with coconut oil and a touch of lemon oil, serves as an antimicrobial and antifungal agent, shielding your hatchet from oxidation and rust.
With your hatchet freshly sharpened and coated in a protective layer of blade wax, you can confidently anticipate its readiness for your upcoming adventures. This meticulous maintenance routine guarantees that your hatchet remains in optimal condition for whatever challenges lie ahead.
Proper Safety Pre-Cautions For Sharpening Hatchet
Safety is of paramount importance when sharpening a hatchet or axe. Here are ten proper safety precautions to adhere to during the sharpening process:
- Wear Protective Gear: Prioritize personal safety by wearing safety glasses to shield your eyes from any debris, sparks, or particles generated during the sharpening process.
- Use Cut-Resistant Gloves: Employ cut-resistant gloves to safeguard your hands from accidental slips or abrasions while handling the hatchet or sharpening tools.
- Stable Work Surface: Ensure your work surface is stable and well-secured to prevent any unwanted movement or wobbling during the sharpening procedure.
- Secure the Hatchet: Before sharpening, securely fasten the hatchet in a vice or clamp to prevent any unexpected movements and ensure a controlled and safe sharpening experience.
- Mind Your Surroundings: Choose a well-lit and well-ventilated workspace, free from flammable materials. Keep the area tidy to reduce the risk of tripping over tools or materials.
- Follow Manufacturer Guidelines: Adhere to the guidelines provided by the manufacturer for both the hatchet and the sharpening tools to ensure proper usage and avoid potential hazards.
- Sharp Tool Awareness: Be mindful of the sharpness of both the hatchet and the sharpening tools. Handle them with care, and be aware of their positions at all times to prevent accidental cuts.
- Proper Tool Handling: Hold the sharpening tools with a firm grip, maintaining control over the movements. Avoid overexertion, as it can lead to slips and injuries.
- Watch Your Technique: Practice proper sharpening techniques, maintaining a consistent angle and pressure to achieve optimal results while minimizing the risk of accidents.
- Fire Safety Measures: If you’re using power tools, ensure you have appropriate fire safety measures in place, such as a fire extinguisher nearby, to address any unforeseen sparks or accidents.
By incorporating these safety precautions into your hatchet or axe sharpening routine, you can significantly reduce the risk of accidents and create a secure environment for a successful sharpening experience.
Final Thoughts
In the realm of outdoor exploration, a well-maintained hatchet or axe isn’t just a tool – it’s a companion that can make or break your adventures. Sharpening these trusty blades may seem like a daunting task for beginners, but as I’ve discovered, it’s a skill well worth cultivating. The satisfaction that comes from transforming a dull edge into a razor-sharp cutting companion is unparalleled. Through the careful steps outlined in this guide, I’ve not only enhanced the performance of my tools but also developed a deeper connection with them. So, fellow outdoor enthusiasts, fear not the grindstone and embrace the art of sharpening. Your hatchet or axe will thank you, and you’ll find yourself better prepared for the challenges that nature throws your way. As we embark on future adventures, let’s carry the confidence of a well-sharpened blade – a testament to our dedication to both the craft and the great outdoors. Happy sharpening!
Frequently Asked Questions
- How often should I sharpen my hatchet or axe?
It depends on usage. If you use your tool frequently, a monthly sharpening is a good rule of thumb. For occasional use, sharpening a few times a year should suffice. - Is there a specific angle I should maintain while sharpening?Aim for an angle between 20 to 30 degrees. Consistency is key, so find a comfortable angle and stick to it throughout the sharpening process.
- Can I use any lubricant with a sharpening stone?
Yes, but it’s recommended to use water or a specialized sharpening oil. These substances not only aid in the sharpening process but also prevent the stone from clogging. - How can I tell if my hatchet or axe is sharp enough?
A sharp edge should easily catch and cut through paper or wood fibers. If it’s struggling or tearing, it may need further sharpening. - Can I use a power tool for sharpening instead of a file or stone?
While power tools can be efficient, they require skill and caution to avoid damaging the blade. Traditional methods with a file or stone are often safer for beginners. - What’s the difference between a file and a sharpening stone?
Files are abrasive tools with teeth that remove material quickly, while sharpening stones use abrasives to grind and refine the edge. Stones provide a finer finish but may take longer. - How do I prevent rust on my hatchet or axe after sharpening?
Wipe the tool thoroughly to remove any residue, apply a light coating of oil to the blade, and store it in a dry place away from moisture. - Can I sharpen a damaged or nicked blade?
Yes, but it might take more effort. Start with a coarse grit to remove the damage and then progress to finer grits for a polished finish. - Do I need to disassemble my hatchet or axe for sharpening?
In most cases, you can sharpen the blade without disassembly. However, if your tool has a removable head, it might be easier to sharpen separately. - What’s the best way to maintain a consistent angle while sharpening?
Practice is key. Consider using a sharpening guide or jig to help maintain the desired angle, especially if you’re just starting out. Over time, you’ll develop a natural feel for it.
We’re eager to hear about your sharpening adventures! Whether you’ve just tackled your first blade or you’re a seasoned sharpening pro, share your personal experiences and thoughts about our guide in the comments section below. Your insights could be the guiding light for fellow beginners, helping them embark on their own journey to mastering the art of hatchet and axe maintenance. Let’s build a community of sharp minds ready for any outdoor challenge! Happy sharpening!

Edward Smith
Forestry AuthorWoodworking is about more than crafting; it's a harmonious connection with nature, mastering tools, and preserving our environment. I'm here to share my knowledge and experiences with you, forging a future where we can embrace wood's beauty and utility while safeguarding our forests' health and diversity.


Leave your comment