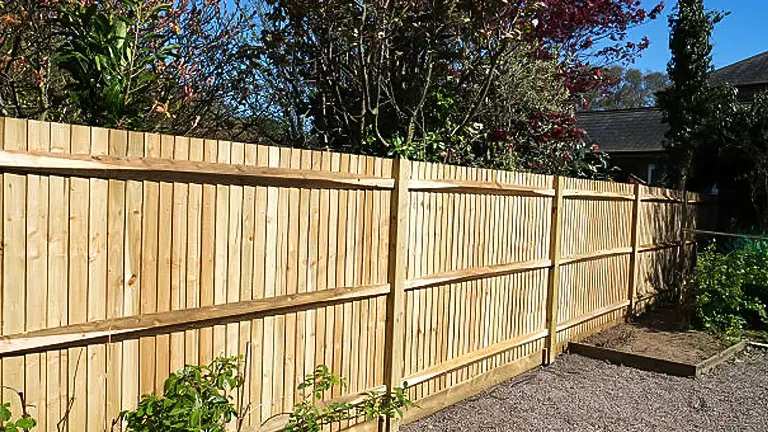
How to Build a Wooden Fence: Tips and Techniques for a Sturdy Structure
- January 31, 2024
- 0 comment
Discover the simple steps to build a wooden fence, from planning to finishing touches, for a sturdy and stylish backyard addition. Building a wooden fence is a practical and rewarding project for homeowners seeking to enhance their outdoor space. This guide provides a straightforward approach to constructing a durable and visually appealing fence. We will cover essential steps from selecting the right materials to the final installation, ensuring that even beginners can confidently undertake this project.
Our focus is on clarity and simplicity, making the process accessible to everyone. Whether you aim to increase privacy, secure your property, or simply add aesthetic value, this article will walk you through each stage of building your wooden fence.
Disclaimer: The instructions and measurements provided in this article are general guidelines and may not apply to all situations. The sizes of materials such as fence posts, rails, and pickets, as well as the spacing between them, can vary greatly depending on individual preferences, specific site conditions, and local building codes. It is important for readers to adjust these dimensions according to their own needs and to consult local regulations to ensure compliance. This article is intended for educational and informational purposes only, and while every effort has been made to ensure accuracy, the author and publisher are not responsible for any errors or omissions, or any loss or damage resulting from the application of this information.
List of Guides on How To Build a Wooden Fence
- Site Preparation and Layout Planning
- Digging Post Holes
- Setting and Securing the Fence Posts
- Attaching Horizontal Rails
- Installing Fence Pickets
- Applying Finishing Touches
- Regular Inspection
Materials Needed
- Cedar Fence Pickets
- Pressure Treated Fence Posts (4×4)
- Pressure Treated Fence Rails (2×4)
- Rail Brackets
- Fence Screws
- Cement
- Shovel
- Post Hole Digger
- Mason Line
- Tape Measure
- Post Level or a 4′ Level
- Landscape Stakes
Step-by-Step Process
1. Site Preparation and Layout Planning
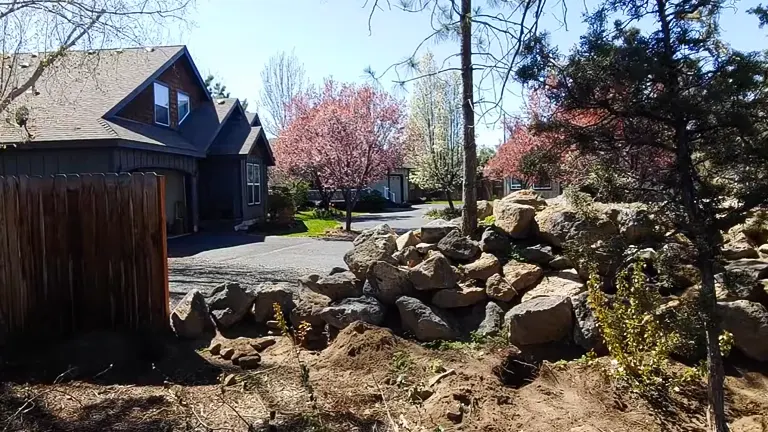
Before any physical work begins, it’s crucial to prepare the site and plan the layout. Start by clearing the fence line of any obstacles like rocks, plants, or debris. Using landscape stakes and mason line, mark out the exact path of the fence. This step is critical for visualizing the final product and identifying any potential issues. Measure the total length to determine the amount of materials needed. Remember to check for underground utilities to avoid any mishaps during digging.
Pro Tips:
- If available, use landscaping design software to create a digital layout of your fence. This can help in visualizing the final look and in making precise measurements.
- When planning the layout, take into account the natural landscape. Work with the contours of your land to minimize excessive digging and to integrate the fence seamlessly into your yard.
- Ensure you are building the fence on your property. Consult your property’s blueprint or consider hiring a surveyor to confirm property lines to avoid future disputes.
- Beyond just checking for utilities, if you find any, mark their location with a different color or flag. This will serve as a constant reminder during the digging process.
- Consider future access needs or potential expansions. Include gates or removable sections in your plan to accommodate these possibilities.
- Study the pattern of sunlight and wind in your yard. Position the fence to provide optimal shade, privacy, and protection based on these patterns.
- Assess the soil type in your yard. Different soil types may require different post-setting techniques for stability.
- If your area has wildlife, plan your fence in a way that either deters unwanted animals or doesn’t harm the local fauna.
2. Digging Post Holes
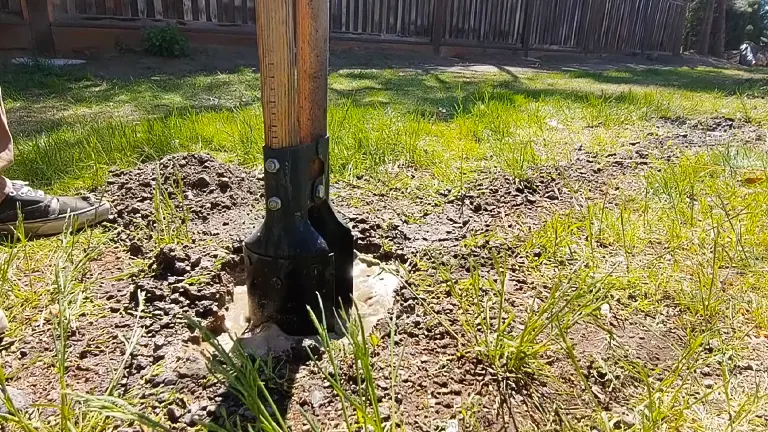
Once the layout is set, the next step is to dig holes for the fence posts. These holes should be about 2 feet deep and 10 inches in diameter, providing a stable base for the posts. Space the holes according to the width of your fence panels, typically 6 to 8 feet apart. Consistent spacing is key for a uniform and sturdy fence. Use a post hole digger for this task; it’s more efficient and precise than a regular shovel.
Pro Tips:
- Mark your post hole digger at the 2-foot depth with tape for consistent hole depth.
- Loosen hard soil by inserting a bar a few inches into the ground before digging.
- Keep a bucket nearby to collect soil, which can be used for backfilling later.
- Dig the bottom of the hole wider than the top for enhanced post stability.
- If you encounter large rocks or roots, use a mattock or similar tool to clear them.
- In soft soil, reinforce the sides of the hole temporarily to prevent collapsing during digging.
- After digging, double-check the depth and width with a tape measure for accuracy.
3. Setting and Securing the Fence Posts
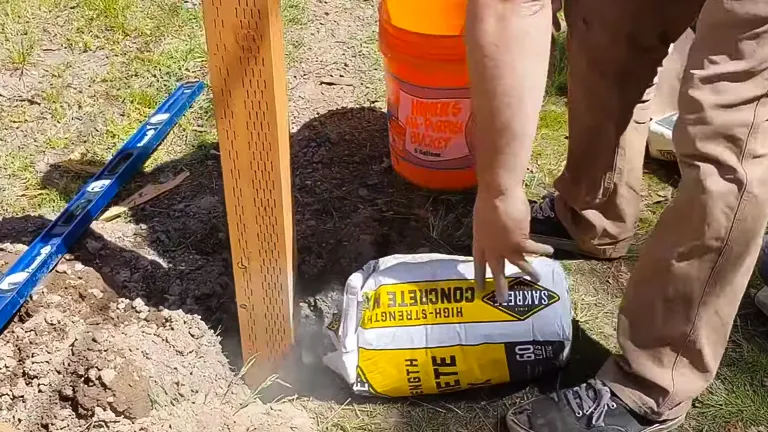
After digging the holes, place the pressure-treated 4×4 posts into them. It’s essential to use a post level to ensure each post is perfectly vertical. Once aligned, secure the posts by pouring mixed cement into the hole around each post. The cement should be allowed to cure for at least 24 hours to ensure the posts are firmly anchored in place. This step is foundational for the fence’s durability and stability.
Pro Tips:
- Pour a layer of gravel at the bottom of each hole before setting the post for better drainage.
- Use braces to keep the post stable while the cement cures.
- Check the post alignment in multiple directions with a level for perfect verticality.
- Slope the top of the poured cement away from the post to prevent water pooling.
- Wet the hole slightly before pouring cement to help it set more effectively.
- Mix the cement to a thick, pourable consistency to ensure it surrounds the post well.
- Allow the cement to cure for more than 24 hours in colder or more humid conditions for optimal strength.
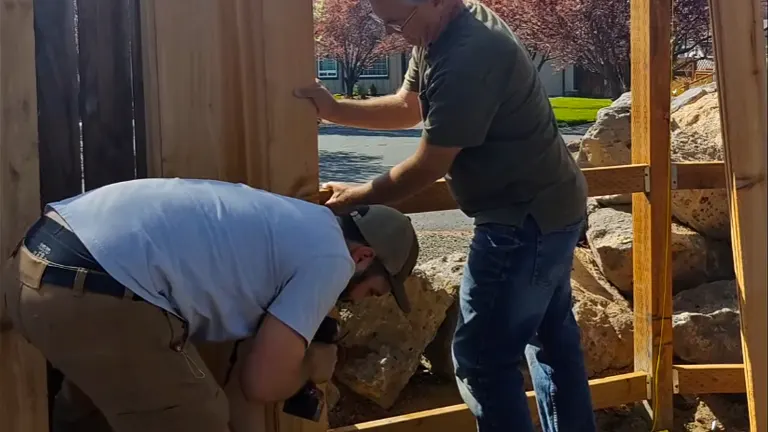
4. Attaching Horizontal Rails
With the posts secured, attach the horizontal rails. Measure and cut the 2×4 pressure-treated fence rails to fit between the posts. Fasten the rails to the posts using rail brackets and fence screws. Typically, you’ll attach two or three rails per section: one at the bottom, one in the middle, and one at the top. Ensuring that the rails are level when attaching them is crucial for a professional-looking fence.
Pro Tips:
- Stagger the rail joints on different posts to increase the fence’s overall strength.
- For a stronger attachment, angle the screws slightly when fastening the rails to the posts.
- If the ground is uneven, adjust the height of the bottom rail to maintain consistent clearance from the ground along the fence line.
- When measuring for rail length, remember to account for the width of the rail brackets.
- In areas prone to high winds, consider adding a third rail for additional stability.
- Temporarily clamp the rail to the post to keep it in place while attaching.
- If the fence is long, use a chalk line to mark the rail positions on all the posts to ensure alignment.
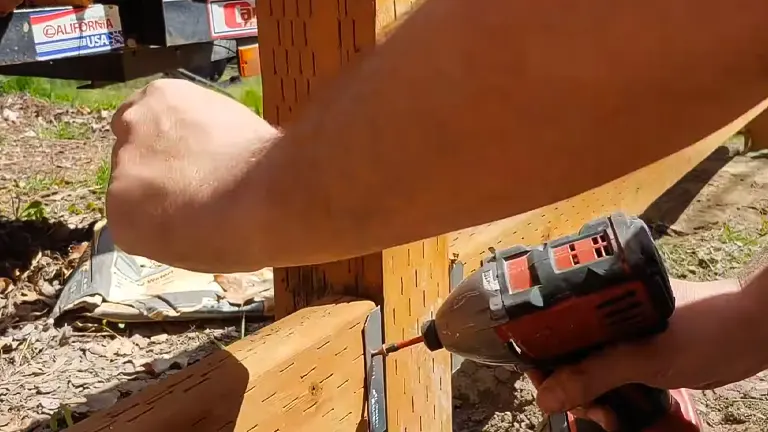
5. Installing Fence Pickets
Now, start attaching the cedar fence pickets to the rails. Begin from one corner of the fence, using a spacer to maintain even gaps between the pickets for a uniform appearance. Attach each picket to the rails using fence screws. It’s important to keep the pickets level to achieve a neat and aesthetically pleasing finish. The choice of picket spacing can vary depending on the desired level of privacy and design preference.
Pro Tips:
- Use a consistent spacer, like a small wooden block, to maintain even gaps between pickets.
- Check the level of each picket both vertically and horizontally before securing.
- Start and end each fence section with a full-width picket for a symmetrical look.
- Pre-drill holes in the pickets to prevent splitting, especially near the ends.
- For a unique look, consider varying the picket heights or creating a pattern.
- If using a power screwdriver, set the torque low to avoid overtightening and damaging the wood.
- Treat the bottom of each picket with a wood preservative to prevent rot from ground moisture.
- In very sunny areas, leave slightly wider gaps between pickets to allow for wood expansion.
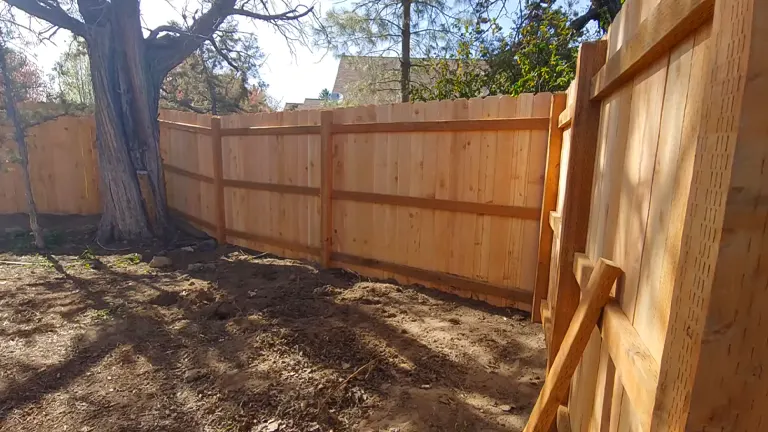
6. Applying Finishing Touches

Once all pickets are in place, consider applying a sealant or stain to the wood. This not only enhances the fence’s appearance but also provides additional protection against the elements, especially for cedar wood, which, while durable, benefits from extra sealing. Clean up the worksite, removing any leftover materials, and conduct a final inspection of the fence to ensure that every component is securely installed and aligned.
Pro Tips:
- Sand any rough edges on the pickets and rails before applying sealant or stain.
- Choose a sealant or stain with UV protection to prevent fading and weather damage.
- Apply the finish with a brush or sprayer for even coverage, following the wood grain.
- Allow the first coat to dry completely before applying a second coat if needed.
- Check and tighten any loose screws or hardware during the final inspection.
- Trim any overhanging or protruding ends of the rails for a neat finish.
- Remove debris and sawdust from the area to prevent it from sticking to the fresh finish.
7. Regular Inspection
Finally, establish a routine for inspecting and maintaining your fence. Check for any signs of damage, loose screws, or rot, and make repairs as necessary. Regular cleaning and reapplying sealant or stain every few years will prolong the life and appearance of your fence.
Pro Tips:
- Inspect your fence after severe weather events, as wind and rain can cause damage.
- Look for signs of insect infestation, especially in wood like cedar that can attract certain pests.
- Check the stability of posts by gently pushing them to see if they move or wobble.
- Clear vegetation and debris from around the base of the fence to prevent rot and moisture damage.
- Lubricate any hinges or locks on gates to keep them functioning smoothly.
- Re-tighten any screws or brackets that may have become loose over time.
- Use a soft brush or pressure washer on a low setting for regular cleaning to remove dirt and grime.
Safety Tips
- Wear Appropriate Safety Gear Safety should be your first priority. Always wear protective gear, including safety goggles to protect your eyes from flying debris, heavy-duty gloves to prevent splinters and cuts, and sturdy boots to protect your feet. If you’re using loud power tools, ear protection is also recommended. This gear will help minimize the risk of injury while working.
- Check for Underground Utilities Before digging any holes, it’s crucial to check for underground utilities. Accidentally hitting a utility line can be dangerous and costly. Call your local utility companies or a designated line-locating service to mark any underground lines. This step is not just a safety measure but often a legal requirement.
- Proper Use of Tools and Equipment Ensure you’re familiar with all the tools and equipment you’ll be using. Read the manuals for power tools like post hole diggers and saws, and follow the recommended safety guidelines. Keep tools in good condition, and immediately repair or replace damaged ones. Always use each tool for its intended purpose to avoid accidents.
- Lifting Techniques Building a fence often involves lifting heavy materials. Use proper lifting techniques: bend at the knees and lift with your legs, not your back. If an object is too heavy, don’t hesitate to ask for help or use a wheelbarrow or dolly. Avoiding strain and overexertion can prevent back injuries.
- Stay Hydrated and Take Breaks Fence building can be physically demanding, especially in hot weather. Stay hydrated and take regular breaks to avoid exhaustion. Working continuously without rest can lead to mistakes or accidents, so listen to your body and rest as needed.
- Secure Your Work Area Keep your work area organized and free of unnecessary clutter to prevent tripping hazards. Store tools and materials safely when not in use. If you’re working in a yard that’s accessible to others, especially children or pets, ensure they are kept at a safe distance from the work area.
- Handling Chemicals and Materials If you’re using pressure-treated wood, wear a dust mask to avoid inhaling sawdust, which can contain harmful chemicals. When applying sealants or stains, work in a well-ventilated area, wear protective gloves, and follow the manufacturer’s safety instructions.
- Be Aware of Environmental Conditions Be cautious of environmental conditions that could impact safety. Avoid working in extreme weather conditions like high winds, rain, or lightning. In hot weather, take measures to prevent heat exhaustion, and in cold conditions, dress warmly to prevent hypothermia.
By following these safety tips, you can ensure that your fence-building project is not only successful but also conducted safely and responsibly.
Maintenance and Care
- Regular Cleaning: Keeping your wooden fence clean is essential for maintaining its appearance and longevity. Over time, fences can accumulate dirt, mold, and mildew, which can damage the wood. Use a soft brush or a pressure washer on a low setting to gently clean the surface. For tougher stains or mildew, a mild detergent mixed with water can be effective. It’s important to clean your fence at least once a year to keep it looking its best and to prevent long-term damage.
- Inspecting for Damage: Regular inspections are crucial to identify any potential problems early on. Check your fence for signs of damage such as loose boards, cracks, rot, or insect infestations. Pay special attention to areas close to the ground, as these are more susceptible to rot and insect damage. If you find any loose screws or nails, tighten or replace them as needed. Addressing these issues promptly can prevent more extensive repairs later.
- Applying Sealant or Stain: Applying a sealant or stain every few years can significantly extend the life of your fence. These products provide a protective layer against moisture, UV rays, and insects. When choosing a product, look for one that offers UV protection and water resistance. Before applying, ensure the fence is clean and dry. Apply the product according to the manufacturer’s instructions, typically with a brush or sprayer, and allow it to dry completely.
- Managing Vegetation: Overgrown vegetation can cause damage to your fence over time. Plants and shrubs growing against the fence can trap moisture, leading to rot and mold. Regularly trim back any vegetation that is in contact with your fence. Additionally, avoid using your fence as a support structure for climbing plants, as this can lead to additional strain and potential damage.
- Repairing Damages Promptly: When damage is identified during inspections, it’s important to repair it as soon as possible. For minor damage like a cracked board, you can simply replace the affected section. More significant issues, such as structural instability or extensive rot, may require professional help. Timely repairs not only keep your fence looking good but also prevent problems from worsening, which can lead to higher repair costs.
- Preventing Moisture Damage: Moisture is one of the biggest threats to a wooden fence. Ensure that your fence has proper drainage around it and that sprinklers or other water sources do not directly hit the fence. In areas with high moisture, consider adding a gravel or stone barrier around the base of the fence to prevent direct soil contact, which can lead to rot.
- Seasonal Considerations: Depending on your climate, certain seasons may require additional care. For example, before winter, check that your fence is structurally sound to withstand heavy snow or wind. In areas with humid summers, be vigilant about mold and mildew growth. Adapting your maintenance routine to the seasons can help in preserving the integrity of your fence.
By following these maintenance and care tips, you can ensure that your wooden fence remains strong, functional, and attractive for many years. Regular attention and care are the keys to getting the most out of your investment.
Conclusion
Building a wooden fence is a rewarding project that not only improves the look of your property but also provides privacy and security. By following these steps, even beginners can successfully construct a durable and attractive wooden fence. Remember, the key to a successful DIY project is careful planning, precise execution, and regular maintenance.
FAQs
- How deep should I dig the holes for my fence posts? Typically, holes for fence posts should be dug about 2 feet deep. This depth provides stability, especially in areas with high winds or soft soil. However, always check local building codes as they may have specific requirements.
- What’s the best wood for building a fence? Cedar is a popular choice due to its natural resistance to rot and insects. Pressure-treated pine is also a good option as it’s treated to resist decay and termites. The choice often depends on your budget and the climate in your area.
- How do I ensure my fence is straight and level? Use a string line stretched between corner posts to ensure a straight line. For leveling, a 4-foot level or a post level is ideal. Regularly check alignment both when setting posts and when attaching rails and pickets.
- How far apart should I space my fence posts? Posts are typically spaced 6 to 8 feet apart. The exact spacing can depend on the type of fence, the terrain, and the width of your panels or pickets.
- Is it necessary to treat or seal a wooden fence? Yes, treating or sealing your wooden fence is important to protect it from moisture, UV rays, and insect damage. For cedar fences, a clear sealant is often recommended to preserve its natural color, while pressure-treated wood can be painted or stained.
- How do I handle sloped areas when building a fence? For slight slopes, you can ‘step’ the fence by keeping the post height consistent but lowering each section of fencing. For steeper slopes, a racked or contoured fence that follows the slope is more appropriate.
- What is the recommended gap between the ground and the bottom of the fence? A gap of 1 to 2 inches between the bottom of the fence and the ground is recommended to prevent rot and to allow for airflow, especially in damp regions.
- Can I build a fence directly on the property line? While this varies by locality, it’s generally advisable to build within your property lines. Check local zoning laws and consider having a survey done to accurately determine your property boundaries.
As we wrap up our guide on building a wooden fence, we hope you feel equipped and inspired to start your project. With the right tools and a bit of patience, you’re well on your way to enhancing your outdoor space. Best of luck, and enjoy the process of creating something both functional and beautiful for your home!

Benjamin Brooks
Forestry AuthorGreetings! I'm Benjamin Brooks, and my journey over the past 15 years has revolved around the fascinating realms of content creation, expertise in snow clearing, and the intricate world of lumberjacking and landscaping. What began as a simple curiosity about the natural world and heavy machinery has evolved into a passionate profession where my love for crafting words intertwines seamlessly with my lumberjacking and garden skills.


Leave your comment