How to Build a Wooden Box: Easy Steps for Beginners
- January 31, 2024
- 0 comment
Building a wooden box is a classic project that combines practicality with the pleasure of crafting something by hand. Whether you’re a beginner or an experienced woodworker, creating a box offers an opportunity to hone your skills in measuring, cutting, and assembling. In this guide, we’ll walk through the process of constructing a simple yet sturdy wooden box. From selecting the right materials and tools to the final touches of sanding and finishing, we’ll cover each step to ensure your wooden box is both functional and aesthetically pleasing. Let’s embark on this woodworking journey and turn a few pieces of wood into a beautiful and useful item.
List of How to Build a Wooden Box
- Design and Planning
- Material Selection and Cutting
- Assembling the Base and Sides
- Smoothing Edges
- Attaching the Top
- Final Touches
- Quality Check
Understanding the Basics
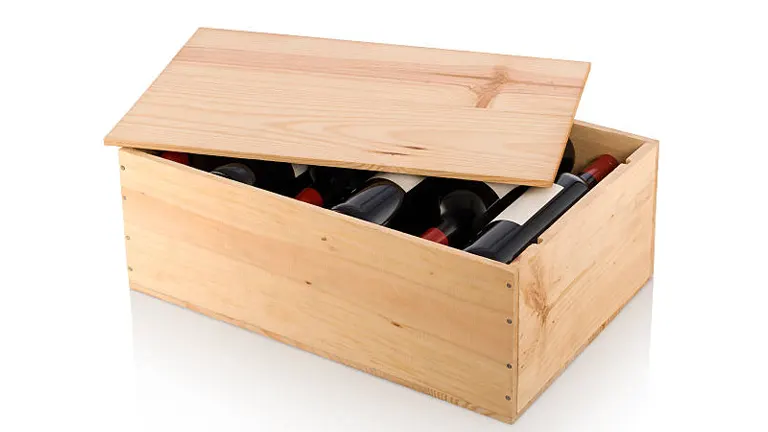
A wooden box is a versatile and enduring container, crafted from wood, known for its natural strength and aesthetic appeal. Fundamentally, these boxes serve a multitude of purposes, ranging from storage and organization to decorative and artistic uses. Historically, wooden boxes have been an integral part of human life, used for storing valuables, transporting goods, and even in rituals and ceremonies across various cultures. They come in myriad shapes and sizes, tailored to specific needs – from small trinket boxes to large storage chests. The choice of wood, such as pine, oak, or cedar, imparts unique qualities like durability, resistance to decay, and distinct grain patterns, adding both functional and aesthetic value. The construction of a wooden box typically involves precise joinery techniques, ensuring sturdiness and longevity. In modern times, wooden boxes have transcended their utilitarian origins, becoming a canvas for craftsmanship and creativity, often featuring intricate carvings, inlays, and finishes. This blend of practicality and beauty makes wooden boxes not just useful objects, but also cherished heirlooms and artistic expressions.
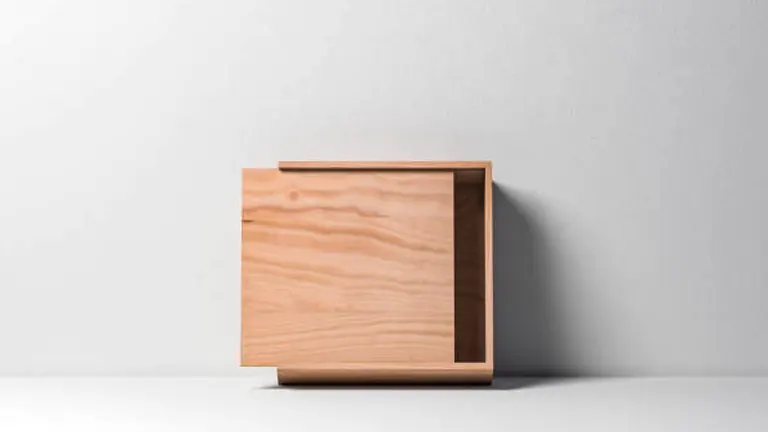
Disclaimer: The wooden box featured in this article has specific dimensions of 13.5 inches in length, 9 inches in width, and 3.5 inches in thickness. These measurements were chosen to suit the particular design and purpose of my project. However, it’s important for readers to understand that these dimensions are merely an example and can be adjusted to fit individual needs and preferences.
Materials Needed
- Wood (Pine, Oak, Cedar, etc.)
- Nails or Screws (1.5 inches long)
- Wood Glue
- Sandpaper
- Finish (Paint, Stain, or Varnish)
Tools Required
- Saw (Hand Saw, Japanese Pull Saw, or Power Saw)
- Hammer or Screwdriver
- Drill (Hand Drill, Corded Drill, or Cordless Drill)
- Measuring Tape
- Pencil
- Square
- Clamps (Quick Clamp or similar)
- Utility Knife
- Block Plane
- Chisels
- Spokeshave
- Vise
- Miter Box
- Coping Saw
- Multi Screw Driver
Step-by-Step Building Guide
Step 1: Design and Planning
Start by deciding the dimensions of your box. For a standard box, you might choose dimensions like 13.5″ L x 9″ W x 3.5″ T. Sketch a basic plan or blueprint of your box, clearly marking the length, width, and height on each piece of wood you’ll need. This step ensures you have a clear vision of the final product and aids in accurate material measurement.
Pro Tips:
- Use graph paper to sketch your box for accurate dimensions.
- Plan cuts to enhance the wood’s natural beauty.
- Remember to subtract wood thickness from internal dimensions.
- Design with wood expansion and contraction in mind.
- Select wood type based on the box’s intended use.
- Ensure the box size fits its intended contents.
- Create templates for intricate cuts.
- Consider how pieces will join for both strength and aesthetics.
- Leave room for internal lining or padding if needed.
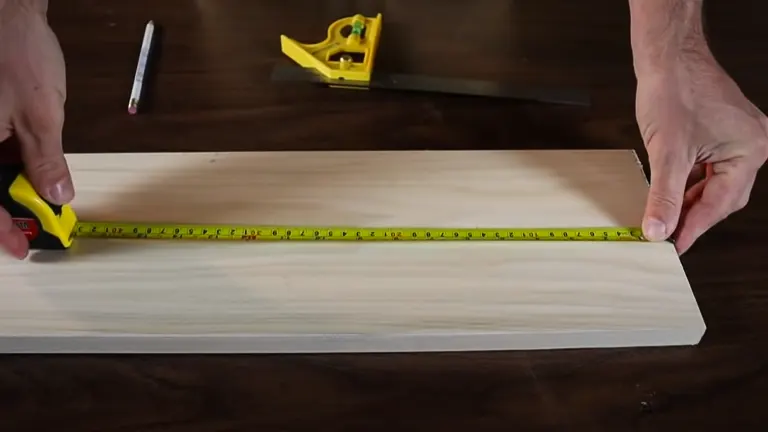
Step 2: Material Selection and Cutting
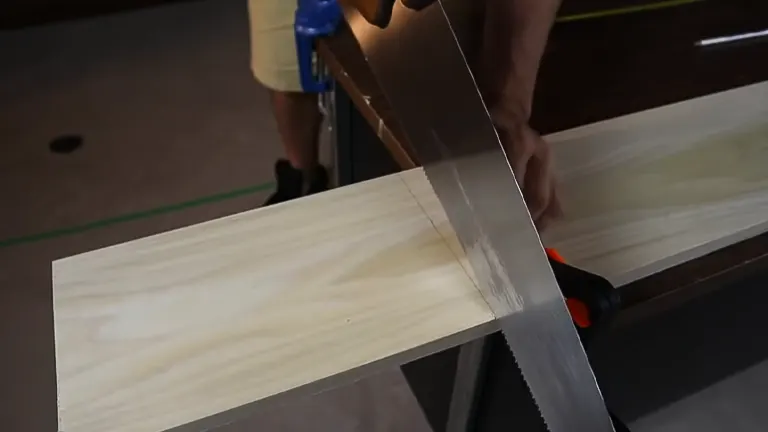
Choose a suitable type of wood, like pine or oak, for durability and ease of work. Based on your design, cut the wood into the following pieces: two pieces for the top and bottom (13.5″ x 9″), two pieces for the front and back (13.5″ x 3.5″), and two pieces for the sides (9″ x 3.5″). Ensure each piece is precisely measured and cut to fit perfectly with the others.
Pro Tips:
- Select wood free from knots and imperfections for a cleaner look and easier workability.
- Double-check measurements before cutting to avoid mistakes.
- Ensure your cutting tool has a sharp blade for cleaner and more precise cuts.
- Use a straight edge or a carpenter’s square as a guide for straight cuts.
- Secure the wood with clamps while cutting to prevent movement.
- Work in a well-ventilated area and clean sawdust frequently to maintain a clear view and a safe workspace.
- Always wear safety glasses and gloves to protect yourself.
- Apply steady and even pressure when cutting to avoid uneven edges.
- After cutting, label each piece (e.g., top, bottom, side) to avoid confusion during assembly.
- Remember that the saw blade removes a small amount of material (kerf), so account for this in your measurements.
Step 3: Smoothing Edges
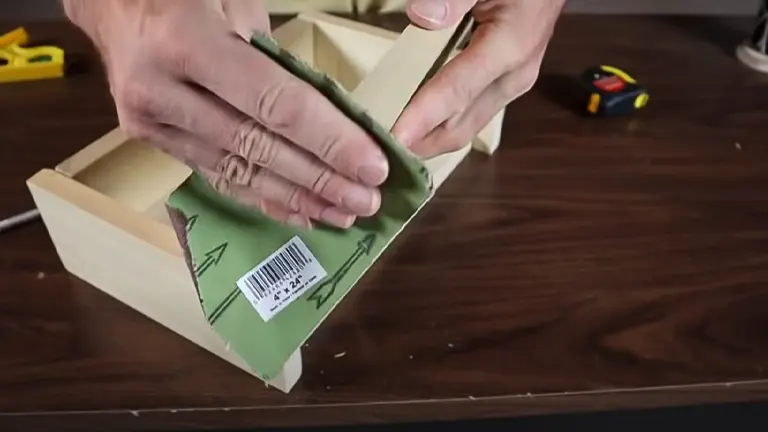
Once the pieces are cut, use sandpaper to smooth all edges and surfaces. This step is crucial for preventing splinters and ensuring a clean, professional finish. Pay special attention to the corners and edges, as these are often the most prone to roughness.
Pro Tips:
- Start with coarser grit and progress to finer grit for a smooth finish.
- Always sand in the direction of the wood grain to avoid scratches.
- For even pressure and smoother results.
- Run your hand gently over the surface to find any rough spots.
Step 4: Assembling the Base and Sides
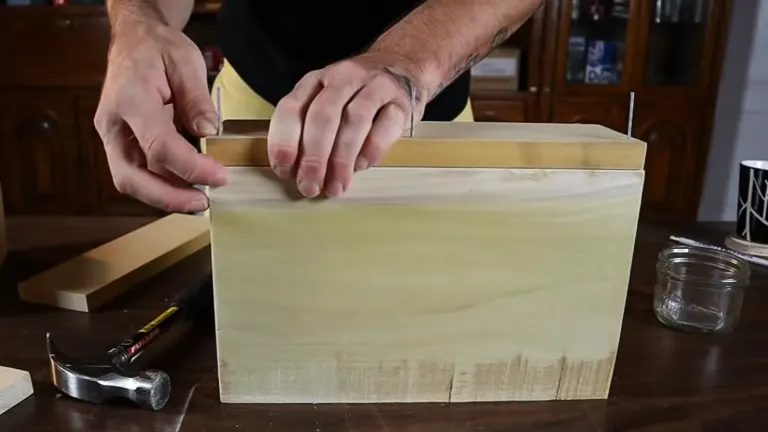
Begin the assembly by attaching the sides, front, and back pieces to the base. Apply wood glue along the edges and clamp them together for a strong bond. Once the glue dries, reinforce the structure with nails or screws for added stability, ensuring that they are evenly spaced and countersunk for a smooth finish.
Pro Tips:
- Assemble the pieces without glue to check the fit.
- Use just enough glue to bond without excessive squeeze-out.
- Ensure corners are perfectly square with right angle clamps.
- Before nailing or screwing, pre-drill holes to avoid wood splitting.
- For a smooth finish, countersink screws below the surface.
Step 5: Attaching the Top
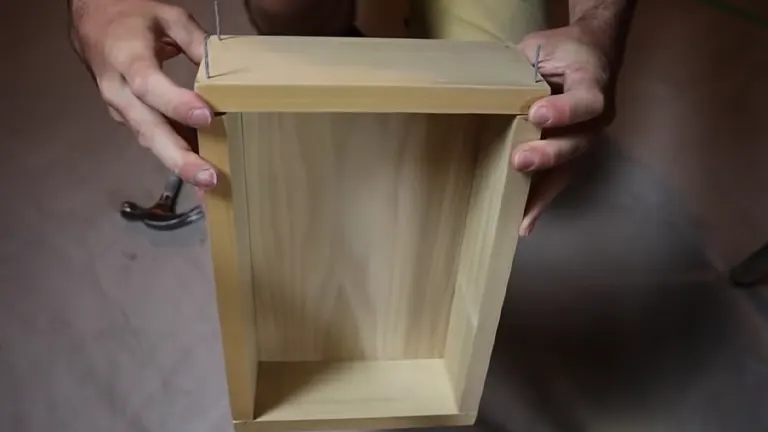
Fit the top piece onto the assembled base and sides. If you desire a hinged lid, attach the hinges to one side of the top and corresponding side of the box. Alternatively, if the lid will be removable, simply ensure it fits snugly over the box. Glue or screw the lid in place as per your design preference.
Pro Tips:
- If using hinges, pick ones that complement the box’s style and size.
- Before finalizing, ensure the lid opens and closes smoothly.
- If the top is not hinged, consider felt strips for a snug fit.
Step 6: Final Touches
Finish your box by sanding it all over once more, this time focusing on achieving a smooth, even surface ready for painting or staining. Apply your chosen finish – paint, stain, or varnish – to protect the wood and enhance its appearance. Allow adequate time for the finish to dry completely.
Pro Tips:
- Apply finish evenly to avoid drips and streaks.
- Work in a well-ventilated area when applying finish.
- Apply multiple thin coats for best results, sanding lightly between coats.
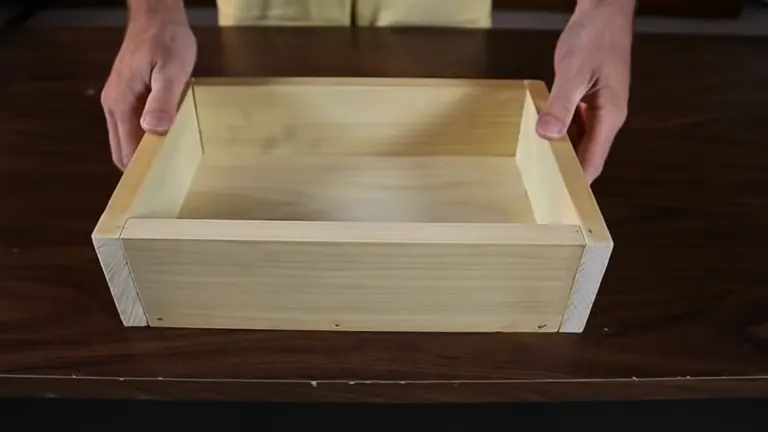
Step 7: Quality Check

Finally, inspect your box for any uneven edges or loose joints. Make any necessary adjustments. This step is vital for ensuring the longevity and aesthetic appeal of your wooden box.
Pro Tips:
- Check the box from every angle for any missed imperfections.
- Ensure the box sits flat and doesn’t wobble.
- Open and close the lid several times to test for ease of use.
Troubleshooting Common Issues
- Misaligned Joints: Misalignment often occurs if the cutting was not precise or if the wood warped. To fix this, check all pieces before assembly. If they’re already assembled, you may need to disassemble, trim, or sand the offending parts for a better fit. Using a square during assembly can help ensure right angles.
- Weak Joints: Joints may become weak if not enough glue was used, or if the nails or screws aren’t properly placed. Strengthen them by applying more glue and clamping the joint firmly until it dries. For additional reinforcement, add more nails or screws, ensuring they’re evenly spaced and countersunk.
- Wood Splitting: This issue can arise when nailing or screwing near the end of a board. Prevent splitting by pre-drilling holes, especially near the edges of the wood. Choose the correct screw or nail size – too large can cause splitting, while too small may not hold securely.
- Lid Doesn’t Fit: If the lid doesn’t fit properly, it could be due to inaccurate measurements or warping. Double-check the measurements and sand down any areas that are too tight. For a hinged lid, ensure the hinges are correctly aligned and installed. If the wood has warped, sometimes applying moisture and clamping it flat until dry can help.
- Sticky Lid: A lid that sticks is usually due to paint or varnish buildup or wood expansion due to humidity. Sand the edges of the lid lightly where it sticks. Applying a thin layer of wax along the sticking edges can also help. Make sure to allow enough drying time for finishes before testing the fit.
- Rough Finish: A rough finish can result from inadequate sanding or not cleaning the wood surface before applying a finish. Sand the surface smoothly, progressing from coarse to fine grit, and wipe the wood clean of dust before applying any paint, stain, or varnish.
- Visible Glue or Screws: If glue squeezes out from joints or screws are too visible, clean up excess glue with a damp cloth before it dries. For screws, make sure they are countersunk, and you can cover them with wood filler. Sand over the area after the filler dries for a smooth, seamless appearance.
Addressing these common issues requires patience and attention to detail. Often, a simple adjustment or additional step can make a significant difference in the quality and appearance of your wooden box.
Maintenance and Care
- Regular Dusting: Dust accumulation can dull the appearance of your wooden box over time. Regular dusting with a soft, dry cloth helps maintain its luster. Avoid using harsh or abrasive cloths that might scratch the surface. For intricate carvings or hard-to-reach areas, use a soft-bristled brush.
- Avoiding Moisture and Direct Sunlight: Prolonged exposure to moisture can cause wood to warp or rot, while direct sunlight can fade the finish. Place your wooden box in a dry, cool area away from direct sunlight. If the box gets wet, immediately wipe it dry with a soft cloth.
- Handling Scratches and Scuffs: Minor scratches and scuffs can be treated with a matching wood marker or wax crayon. For deeper scratches, gently sand the area and reapply a matching stain or finish. Always test these treatments in an inconspicuous area first.
- Applying Furniture Polish or Wax: To enhance the natural beauty and protect the surface, apply furniture polish or wax periodically. Follow the product’s instructions for the best results. This not only adds a protective layer but also gives the wood a refreshed and vibrant look.
- Checking and Tightening Hardware: If your box has hinges, handles, or other hardware, check them periodically to ensure they are secure. Tighten any loose screws and lightly oil hinges if they become stiff. This preventive maintenance keeps the box functional and prolongs its life.
- Dealing with Environmental Changes: Wood naturally expands and contracts with changes in humidity and temperature. In extreme cases, this can lead to cracking or warping. To mitigate this, try to maintain a stable environment with moderate humidity levels. Using a dehumidifier or humidifier in extreme conditions can help.
- Cleaning Spills and Stains: Clean spills immediately with a slightly damp cloth followed by a dry one. Avoid using harsh chemicals or abrasive cleaners that can damage the wood and finish. For stubborn stains, consult a professional or use a cleaner specifically designed for wood.
Regular care and maintenance will keep your wooden box looking beautiful and ensure it lasts for many years. Each of these steps is straightforward but plays a crucial role in preserving the quality of your box.
Conclusion
In summary, building a wooden box is a rewarding endeavor that combines practical skills with creative expression. This guide has provided you with the foundational steps to create not just a box, but a lasting piece of craftsmanship. Whether it’s your first project or one of many, the satisfaction of building something by hand is unparalleled. Embrace this experience, and let it inspire your future woodworking adventures.
FAQs
- What’s the best wood to use for a beginner?
For beginners, pine is an excellent choice. It’s affordable, easy to work with, and readily available. Pine is soft enough to cut and shape easily but sturdy enough for a durable box. - How do I ensure my box is square during assembly?
Use a carpenter’s square to check the angles as you assemble. Clamping the pieces together and adjusting before the glue dries is crucial. Checking that diagonal measurements are equal can also ensure your box is square. - Can I build a wooden box without power tools?
Yes, you can build a wooden box using hand tools. A handsaw, hammer, chisel, and screwdriver are sufficient for basic box construction. It might take more time and effort, but it’s certainly doable. - What type of finish is best for a wooden box?
The best finish depends on the box’s use. For decorative boxes, a stain followed by a clear varnish can enhance the wood’s natural beauty. For a more durable finish, especially for boxes used for storage, consider using a polyurethane coating. - How do I prevent my wooden box from warping over time?
To prevent warping, use kiln-dried wood and apply a stable finish on all sides of the wood. Keep the box away from extreme temperature changes and humidity. Also, consider the wood grain direction during construction. - What’s the best way to attach a lid to the box?
It depends on the desired functionality. For a hinged lid, use two or three small hinges. For a removable lid, ensure a snug fit, perhaps with a lip on the inside of the box to prevent the lid from sliding off. - How can I make my wooden box more unique?
Personalize your box with decorative carvings, unique handles, or by using a mix of different woods. Inlays, wood burning, or even painting designs on the box are great ways to add a unique touch. - Is wood glue alone strong enough to hold a box together?
Wood glue can be very strong, especially when clamped properly until fully cured. However, for added strength, especially for larger boxes or those that will carry weight, reinforcing the joints with nails or screws is recommended.
As we wrap up our guide on building a wooden box, we hope you feel inspired and ready to take on this rewarding project. With the right tools, a bit of patience, and your newfound knowledge, you’re all set to create a wooden box that not only serves a purpose but also reflects your craftsmanship. Happy woodworking, and may your box be as unique as your creativity!

Benjamin Brooks
Forestry AuthorGreetings! I'm Benjamin Brooks, and my journey over the past 15 years has revolved around the fascinating realms of content creation, expertise in snow clearing, and the intricate world of lumberjacking and landscaping. What began as a simple curiosity about the natural world and heavy machinery has evolved into a passionate profession where my love for crafting words intertwines seamlessly with my lumberjacking and garden skills.


Leave your comment