How to Carve Wood: Techniques and Tips for Beginners
- August 9, 2023
- 0 comment
Whether you are contemplating an artistic venture or seeking a new hobby, wood carving might be the right path. This timeless craft allows you to create objects and sculptures that not only manifest beauty but also encapsulate your individual expression. This article will delve into detailed techniques, tips, and nuances for beginners venturing into the fascinating world of wood carving.
1. Selecting the Right Wood
Your first wood carving experience significantly depends on the type of wood you select. Softwoods are recommended for beginners due to their ease of carving.
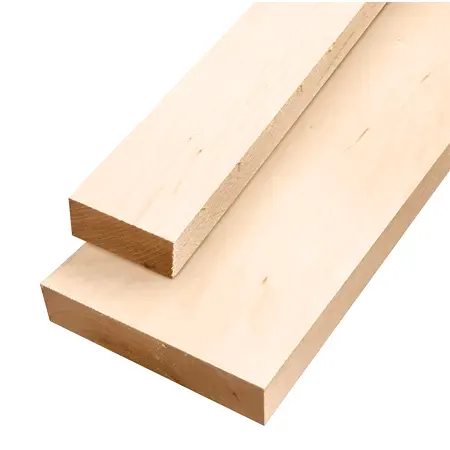
Basswood
Preferred by many beginners and professionals alike, basswood is soft, fine-grained, and has minimal knots, making it a joy to carve.

Pine
Easily available, pine is soft and ideal for whittling projects.

Aspen
It is a soft, white wood that’s easy to carve, making it another excellent choice for beginners.
As you become more proficient, you may want to experiment with hardwoods such as walnut, cherry, or mahogany.
2. Equipping Yourself with the Necessary Tools
To embark on your wood carving journey, it’s imperative to have the right set of tools at your disposal. The foundation of your toolset should include the following fundamental instruments:
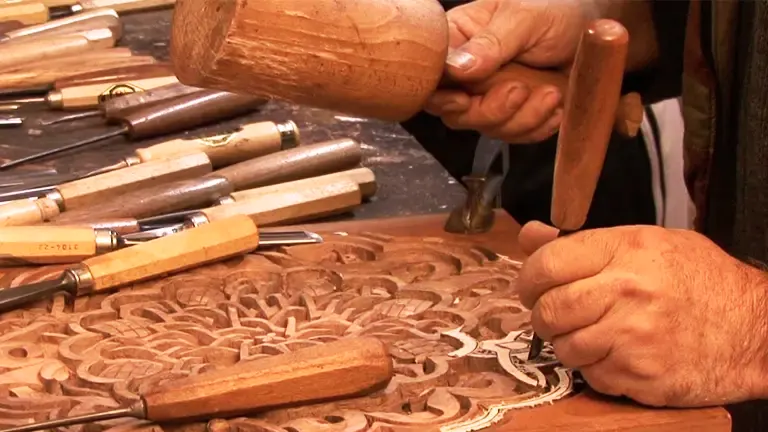
Carving Knives: Central to any wood carver’s toolkit, a high-quality carving knife serves as a cornerstone tool. These knives are crafted in diverse shapes and sizes, tailored to cater to the distinct demands of various carving techniques. Whether you’re sculpting intricate patterns or refining delicate details, a well-chosen carving knife is your trusted companion.
Gouges: Gouges feature a curved cutting edge, making them indispensable for creating rounded incisions in the wood. These tools manifest in a spectrum of sizes and curve depths, enabling you to produce a plethora of shapes and contours. Whether you’re fashioning subtle curves or crafting pronounced arches, gouges empower you to bring your envisioned forms to life.
Chisels: Equipped with a straight cutting edge, chisels play a pivotal role in executing straight cuts and extracting larger portions of wood. The chisels in your toolkit are your go-to for shaping the foundational structure of your carving. Their versatility enables you to sculpt a wide array of designs, ensuring the precision and finesse that your work demands.
Mallets: Employed in conjunction with hardwoods, mallets are indispensable for imparting force to your chisels and gouges. These sturdy tools transmit controlled impacts, allowing you to make decisive and controlled cuts. The harmony between mallet and tool grants you the power to shape the wood with precision, resulting in the realization of your artistic vision.
Sandpaper: An essential component of the finishing phase, sandpaper contributes to the refinement and perfection of your work. Available in a variety of grits, sandpaper enables you to smooth out any rough surfaces and achieve the desired level of finesse. It’s the final touch that imparts a polished and professional appearance to your carving.
As you gather these foundational tools, you’re setting the stage for a fulfilling wood carving experience. With the right instruments at your fingertips, you’re equipped to explore the realms of creativity that wood carving offers, crafting intricate designs and transforming raw wood into works of art.
3. Prioritizing Safety
As you set out on your exciting wood carving journey, it’s crucial to make safety a top priority. Here are some key safety measures to consider:
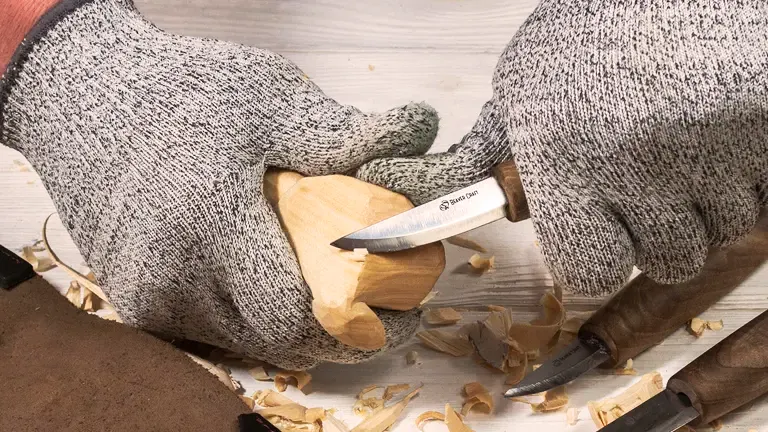
Protective Gear: Safeguarding your eyes is paramount, given the nature of wood carving. Wearing safety glasses is not just a recommendation, but a necessity to shield your eyes from any wood chips or debris that may be produced during carving. Additionally, when engaging in tasks like sanding, wearing a dust mask is highly beneficial to protect your respiratory system from inhaling fine wood particles. To safeguard your hands from accidental slips and nicks, consider wearing a carving glove designed for this purpose. This combination of protective gear creates a robust barrier between you and potential hazards.
Sharp Tools: Maintaining sharp tools is a fundamental safety practice in wood carving. A tool that is properly sharpened offers numerous advantages. Firstly, it grants you enhanced control over your carving, allowing you to maneuver with precision and confidence. Secondly, a sharp tool necessitates less force to cut through the wood, thereby reducing the physical strain on your body. Lastly, a well-sharpened tool minimizes the likelihood of accidents. Dull tools can slip or catch unexpectedly, leading to unintended cuts or injuries. By keeping your tools sharp, you ensure a smoother, safer carving process.
4. Familiarizing Yourself with Basic Wood Carving Techniques
Several wood carving techniques can be employed, but as a beginner, it’s essential to grasp the basics:
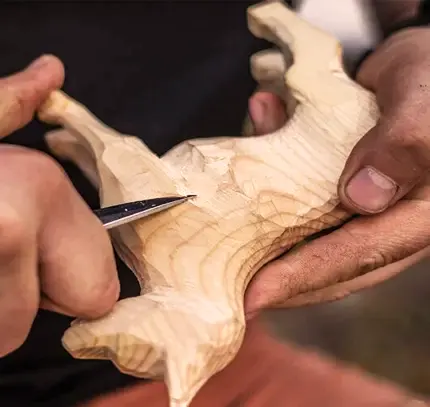
Whittling
This is the most basic form of wood carving. Using a knife and a piece of wood, you cut away small bits of wood in a controlled manner to create your desired shape.
Relief Carving
In this style, you carve figures into a flat wooden panel. The figures project only slightly from the background, creating a three-dimensional appearance.
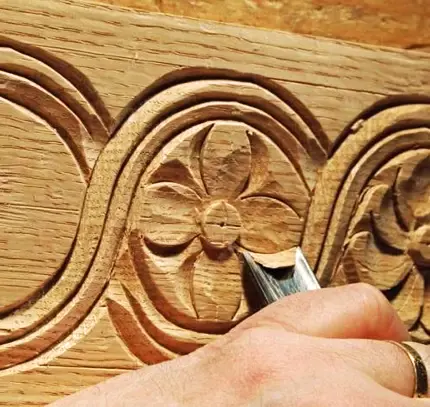
Chip Carving
This involves the removal of small chips of wood to create patterns and intricate designs.

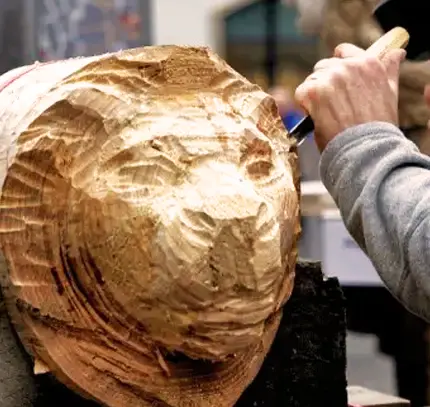
Carving in the Round
This is more complex and involves carving an object in three dimensions, often resulting in figures or statuettes.
5. Starting with Simplicity
Embarking on a new skill or hobby can be both exhilarating and daunting. The desire to create intricate masterpieces or achieve expert-level prowess might be strong, but diving into complexities straight away can lead to frustration and burnout. This is why, especially as a novice, the mantra should always be: “Start with simplicity.”
- Building Foundations: In any art or skill, there’s immense value in starting with straightforward projects. Much like a child learning to build with blocks, beginning with basic shapes and structures provides a solid foundation. In carving, for instance, one can initiate the learning process by focusing on elementary figures like squares, circles, or even elementary depictions of animals.
- 2. Importance of Mastery: Rather than hastily jumping from one intricate design to another, dedicating time and energy to mastering basic shapes has its rewards. By perfecting simpler designs, you get to understand the medium you’re working with, be it wood, stone, or clay. It provides an opportunity to make mistakes, learn from them, and refine techniques without the overwhelming pressure of ruining an intricate piece.
- 3. Building Confidence: One of the pitfalls many beginners face is the feeling of inadequacy when they can’t achieve desired results quickly. By starting simple, each completed project, no matter how basic, becomes a confidence booster. It’s a testament to progress and a stepping stone to more ambitious projects.
- 4. Progression is Key: Once the basic techniques are internalized and the hands are familiar with the tools and materials, transitioning to more complex subjects becomes smoother. It’s much like learning a new language; you start with alphabets, then words, sentences, and gradually stories. By then, the understanding of nuances, intricacies, and the art’s subtleties has been ingrained, making the learning curve less steep.
In Conclusion:
Every expert was once a beginner. The road to mastery in any field is paved with patience, practice, and perseverance. While it’s tempting to rush into creating advanced works, there’s wisdom in starting with simplicity. This approach ensures a solid foundation, instills confidence, and sets the stage for future growth and excellence.
6. The Importance of Planning Your Design
In every creative endeavor, having a clear plan or blueprint is crucial. Whether you’re constructing a building, creating a painting, or carving a piece of wood, this principle remains the same. When it comes to woodworking, the importance of planning your design cannot be overstated. Let’s delve deeper into why sketching your design onto the wood before you begin carving is so pivotal.
- Visualization: Just as an architect wouldn’t start building without a blueprint, a wood carver shouldn’t begin without a clear image in mind. Sketching your design on the wood serves as a preliminary visual. This aids in conceptualizing the final look of the product, ensuring that the envisioned design is feasible and aesthetic. A visual representation can guide the direction and flow of your carving, giving you clarity about the depth, dimensions, and details you’ll need to incorporate.
- Serves as a Roadmap: As you carve, having that sketch on the wood acts as your roadmap. It provides clear guidelines and boundaries that can steer your tools in the right direction. Much like a roadmap in a journey, this outline ensures that you stay on track, and don’t end up carving too deep or straying from your desired design.
- Minimizes Errors: One of the significant advantages of planning and sketching beforehand is error reduction. With a clear plan, you can anticipate potential challenges and address them before they become irreversible mistakes. For instance, you might realize that a particular design element is too intricate or too close to another, risking structural integrity. Recognizing such issues in the planning phase can save valuable time and resources.
- Boosts Confidence: For both novice and experienced carvers, having a design sketched onto the wood can be a confidence booster. The uncertainty of the outcome can be daunting. However, with a visible plan, there’s a reassuring guide that can help bolster confidence and encourage steady progress.
- Efficiency and Time-saving: When you have a clear path charted out in front of you, it can significantly speed up the carving process. Instead of frequently pausing to rethink or reassess the direction, the carved can move fluidly, following the outline. This efficiency can result in not only a quicker completion but also a more polished end product.
7. Unique Tips and Tricks for Wood Carving
As you delve deeper into wood carving, here are some tips and tricks to keep in mind:
- Patience is Paramount: Remember that wood carving is a slow, meticulous process. Each stroke forms a part of your creation. Take your time and enjoy the journey.
- Texture Matters: Playing with different textures can add a whole new level to your carving. Smooth, rough, or patterned – each texture can add depth and realism to your piece.
- Understanding Grain: Wood carving isn’t just about carving out shapes. It’s also about understanding the wood’s grain. Learn to carve in various directions, with and against the grain.
- Embrace Technology: Don’t hesitate to use modern tools such as Dremel tools or even 3D carving machines. They can enhance your projects and also speed up the carving process.
- Regular Tool Maintenance: Regularly sharpen your tools to keep them in top condition. A well-maintained tool not only eases the carving process but also enhances safety.
Wood carving is a rewarding craft, one where the journey is as fulfilling as the finished product. Remember, practice makes perfect, and every piece you carve brings you one step closer to mastering this ancient art form. So pick up your carving tools and let the wood tell its story through your hands.
Frequently Asked Questions
- How do I transfer a design onto wood for carving?
You can trace or draw your design directly onto the wood using carbon paper, or create a template and trace the lines onto the wood’s surface. - How do I prevent splintering and tear-out while carving?
Carve with the grain of wood to minimize splintering. Additionally, using sharp tools and making shallow cuts before deepening them can help reduce tear-out. - What finishing techniques should I use after carving?
After carving, sand the surface to smooth out any rough areas. You can apply wood finishes like oil, wax, or varnish to enhance the wood’s appearance and protect it. - How can I improve my wood carving skills?
Practice regularly and seek out tutorials, online courses, or workshops to learn from experienced carvers. Don’t be afraid to experiment and make mistakes – they’re part of the learning process. - Are there any common mistakes beginners should avoid?
Avoid rushing through a project, as patience is key to achieving good results. Also, don’t remove too much material at once, as it’s difficult to fix over-carved areas. - Can I make a career out of wood carving?
Yes, wood carving can lead to various career paths, including creating and selling your carvings, teaching carving classes, or working in the woodworking and restoration industries. - What’s the most important tip for beginners starting with wood carving?
Start with a positive attitude and a willingness to learn. Wood carving can be challenging, but with persistence and dedication, you’ll see improvement over time. - What is wood carving?
Wood carving is the art of shaping and creating designs in wood using various tools. It involves removing material from a wooden block to reveal a desired form or pattern. - Can anyone learn wood carving, or is it only for skilled artists?
Wood carving can be learned by anyone, regardless of skill level. While artistic aptitude can help, with practice and guidance, even beginners can create impressive carvings. - How do I choose a wood carving project suitable for my skill level?
Start with simple projects that involve basic shapes and minimal intricate details. As you gain confidence and skill, you can gradually move on to more complex designs. - What safety precautions should I take when wood carving?
Wear safety goggles to protect your eyes, use gloves to prevent cuts, and keep your tools sharp to avoid slip-ups. Work in a well-ventilated area, and always carve away from your body to prevent accidents.
We’re eager to hear from you! Share your thoughts and experiences about the “How to Carve Wood: Techniques and Tips for Beginners” guide in the comments section below. Your insights could inspire fellow beginners and contribute to a vibrant discussion. Don’t hesitate—your feedback matters!


Leave your comment