How to Plant Luffa Gourd: Grow Your Eco-Friendly Sponges
- March 19, 2024
- 0 comment
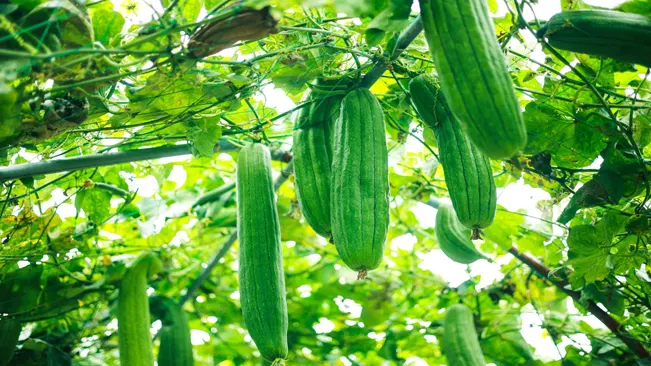
Learn How to Plant Luffa Gourd for a unique gardening experience. Grow your own natural sponges from these fascinating plants, perfect for kitchen and bath. Our guide covers everything from selecting the right type, be it angled for edible fruits or smooth for sponges, to successful cultivation, adding an exotic touch to your garden.
Benefits of Luffa Gourd
| Benefit | Description |
|---|---|
| Natural Exfoliation | The fibrous texture of dried luffa gourds makes them excellent for removing dead skin cells, promoting smoother, more radiant skin. |
| Eco-Friendly | Luffa sponges are a sustainable and biodegradable alternative to synthetic sponges, reducing plastic waste in the environment. |
| Supports Healthy Digestion | Young luffa gourds are edible and rich in dietary fiber, which aids in digestion and promotes a healthy gut. |
| Rich in Nutrients | Luffa gourds contain vitamins like vitamin A, C, and some B vitamins, as well as minerals such as magnesium, potassium, and iron, contributing to overall health. |
| Versatile in Use | Besides their application as sponges, young luffa gourds can be cooked and eaten, offering a nutritious addition to meals. |
| Homegrown Natural Sponges | Growing your own luffa gourds provides a continuous supply of natural sponges, reducing the need for store-bought alternatives. |
| Enhances Garden Aesthetics | Luffa plants, with their lush vines and attractive flowers, can add beauty and interest to garden spaces. |
| Wildlife Attraction | The flowers of the luffa plant attract pollinators like bees and butterflies, supporting local ecosystems. |
| Soil Improvement | Like other members of the cucurbit family, luffa plants can help improve soil health through their root systems and organic matter. |
| Educational Value | Growing luffa gourds can be an educational experience, teaching about plant life cycles, sustainable living, and gardening skills. |
List on How To Plant Luffa Gourd
- Choosing the Right Time and Location
- Seed Preparation and Planting
- Transplanting
- Care and Maintenance
- Harvesting and Processing
- Saving Seeds
Choosing the Right Time and Location
Timing
Luffa gourds are warm-season crops that are sensitive to frost and require a long, warm growing season to fully develop. Starting the seeds indoors is a common practice, especially in regions with shorter growing seasons. This head start allows the plants to mature before the weather turns cold. Here are some timing tips:
- Indoor Start: Begin by planting seeds indoors about 4 to 6 weeks before the last frost date. This gives your luffa plants a head start, especially important in areas with shorter growing seasons.
- Transplanting: Transplant the seedlings outdoors once the danger of frost has passed and the soil has sufficiently warmed. This is typically in late spring or early summer, depending on your local climate.
Location
Choosing the right location is just as important as timing when planting luffa gourds. They have specific requirements for sunlight, soil, and space:
- Sunlight: Luffa plants require full sun, meaning at least six hours of direct sunlight each day, to thrive. The more sunlight they receive, the better they will grow and produce. A south-facing garden that gets plenty of sunlight throughout the day is ideal.
- Soil: The soil should be well-draining and rich in organic matter. Luffas are not particularly picky about soil pH but generally prefer a range between 6.0 and 7.5. You can improve your soil’s quality by incorporating compost or aged manure before planting, which will help with both drainage and fertility.
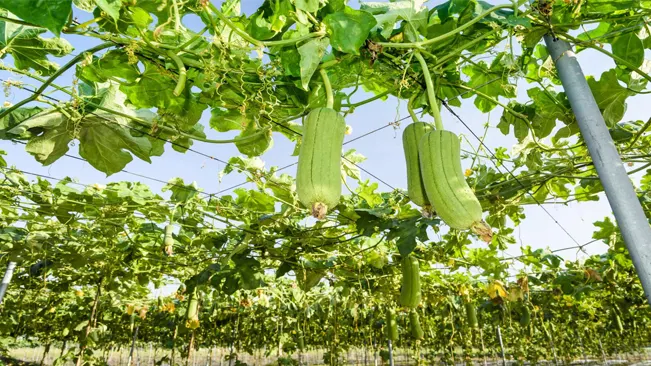
- Space: Luffa vines can grow very long, often reaching 20 to 30 feet or more. They require plenty of space to spread out, and they’ll need a strong support structure like a trellis, fence, or arbor to climb. Ensure the support is in place at the time of planting to avoid disturbing the roots later.
Seed Preparation and Planting
Seed Preparation
Luffa seeds have a hard outer coating, which can make germination a bit challenging. To increase the chances of successful germination, it’s advisable to prepare the seeds before planting:
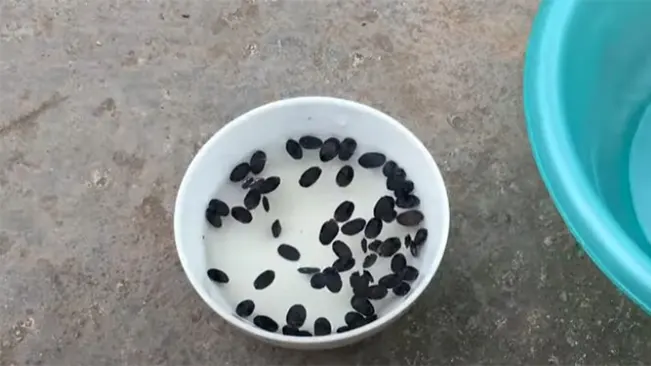
- Soaking: Soak the luffa seeds in room temperature water for 24 hours. This soaking process softens the hard outer shell of the seeds, encouraging the absorption of water, which is crucial for germination. After soaking, some seeds may show signs of swelling or even cracking open, indicating they are ready for planting.
- Scarification (Optional): Some gardeners also recommend lightly scratching the seed’s surface with sandpaper or a file (a process known as scarification) to further help water penetrate the seed coat. This step is optional and should be done with care to avoid damaging the inner seed.
Planting
After preparing the seeds, the next step is to plant them:
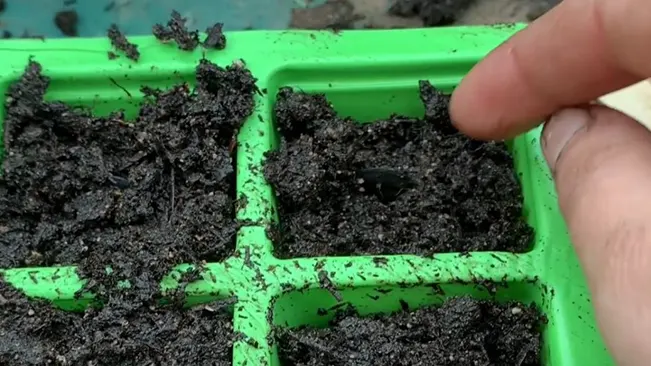
- Biodegradable Pots: Using biodegradable pots is highly recommended for luffa seeds due to their sensitive root systems. Transplanting can be stressful for plants, and luffa gourds in particular don’t respond well to root disturbance. Biodegradable pots can be planted directly into the soil, minimizing root disruption and easing the transition from pot to garden.
- Soil and Depth: Plant the seeds in a good-quality, well-draining potting mix. Sow the seeds about ½ inch deep, covering them lightly with soil. The depth is important as planting too deep might hinder germination, while too shallow planting could dry out the seeds.
- Moisture and Warmth: Keep the soil consistently moist but not waterlogged. Luffa seeds need warmth to germinate effectively, so maintaining a temperature around 70-90°F (21-32°C) can expedite germination. If you’re starting seeds indoors, a heating mat can help maintain this optimal temperature range.
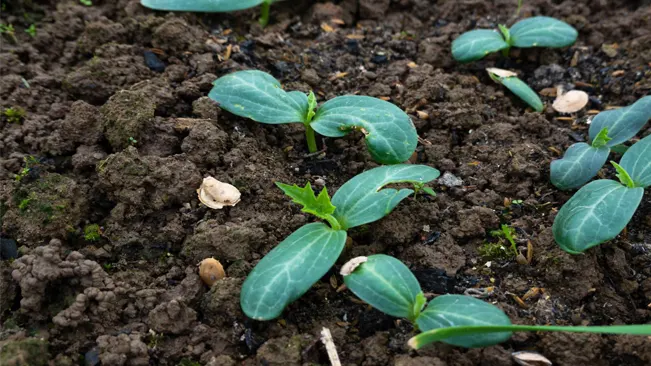
- Germination Time: Under ideal conditions, luffa seeds typically germinate within one to two weeks. However, it’s not uncommon for some seeds to take a bit longer, so patience is key. Ensure the soil remains moist and warm throughout the germination period.
- Thinning: If you plant multiple seeds per pot to ensure germination, you may need to thin out the seedlings once they’ve sprouted, leaving the strongest one to continue growing. This process ensures that the remaining seedling has enough space and resources to develop healthily.
Transplanting
Transplanting luffa seedlings into your garden is a critical step that ensures they have the best conditions for vigorous growth and fruitful development. Here’s a more detailed look at each stage of the transplanting process:
Hardening Off
- Purpose: Gradually acclimate indoor-grown seedlings to the harsher conditions outdoors such as direct sunlight, wind, and temperature fluctuations.
- Process: Start by placing your seedlings outside in a sheltered, partially shaded spot for a few hours each day, gradually increasing their exposure to full sunlight and outdoor conditions over the course of a week.
Choosing the Right Spot
- Sunlight: Luffa plants require full sun, so select a location that receives at least 6 hours of direct sunlight daily.
- Soil: Opt for a spot with well-draining soil that’s rich in organic matter. Consider amending your garden soil with compost if it’s not ideal.
Spacing and Arrangement
- Spacing: Luffa plants need plenty of space to grow. Plant them about 2 feet apart to give each plant ample room to expand and facilitate good air circulation, which helps prevent fungal diseases.
- Rows: Arrange your plants in rows that are about 6 feet apart. This spacing accommodates the sprawling nature of luffa vines and allows for easier access for maintenance and harvesting.
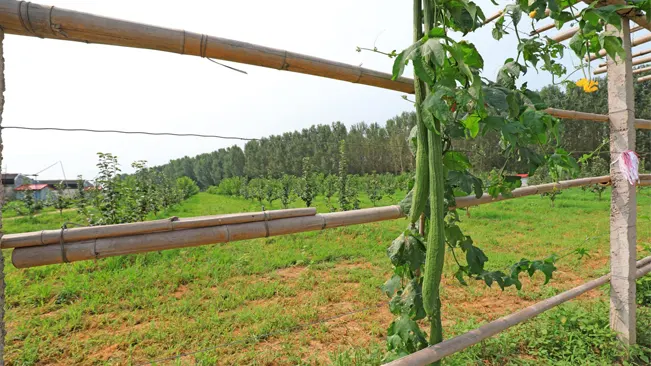
Providing Support
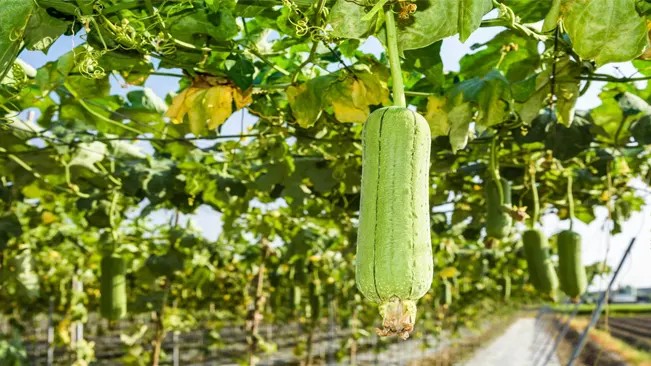
- Importance of Support: Luffa vines can grow exceptionally long, often reaching 20 feet or more. A sturdy support structure not only helps manage this vigorous growth but also keeps the fruits off the ground, reducing the risk of pests and diseases.
- Types of Support: Use trellises, fences, or tall stakes. Ensure your chosen support is strong enough to bear the weight of the vines and developing fruits. Installing the support at the time of transplanting helps avoid disturbing the plant’s roots later on.
Planting Technique
- Hole Preparation: Dig holes that are slightly larger than the root ball of your seedlings. This gives the roots room to expand and makes it easier for them to access nutrients and water.
- Transplanting: Gently remove the seedlings from their pots, taking care to keep the root ball intact. Place each seedling in a prepared hole and fill it with soil, patting down gently to remove air pockets. Water the seedlings immediately after planting to help settle the soil around the roots.
Care and Maintenance
Water the luffa plants regularly, keeping the soil consistently moist but not waterlogged. Apply a balanced, slow-release fertilizer at the time of planting and then a high-potassium fertilizer when the first fruits appear to promote healthy growth and fruiting. Regularly check for pests and diseases and manage them promptly to keep your plants healthy.
Watering
- Consistency is Key: Luffa plants prefer a consistent level of soil moisture. Inconsistent watering can lead to stress, affecting growth and fruit development.
- Deep Watering: Instead of frequent light waterings, opt for less frequent but deep waterings. This encourages deeper root growth, making plants more resilient.
- Mulching: Applying a layer of organic mulch around the base of your plants can help retain soil moisture, reduce weed competition, and maintain a more consistent soil temperature.
Fertilizing
- Initial Feeding: Using a balanced, slow-release fertilizer at the time of planting provides your luffa plants with essential nutrients as they establish. Look for a fertilizer with an equal balance of nitrogen, phosphorus, and potassium (e.g., 10-10-10).
- Boosting Fruit Development: As the first fruits start to appear, switch to a high-potassium fertilizer. Potassium is crucial for fruit quality and development. Avoid high nitrogen fertilizers at this stage, as they can encourage more foliage growth at the expense of fruiting.
- Organic Options: If you prefer organic gardening, consider using compost, well-rotted manure, or a specifically formulated organic vegetable fertilizer.
Pest and Disease Management
- Regular Monitoring: Keep an eye on your plants for signs of pests and diseases. Common pests include aphids, cucumber beetles, and spider mites. Diseases like powdery mildew and downy mildew can also affect luffa plants.
- Natural Predators: Encourage beneficial insects, such as ladybugs and lacewings, which prey on harmful pests. Planting flowers nearby can attract these helpful insects.
- Neem Oil: For managing a wide range of pests and mildews, neem oil can be an effective organic option. It’s safe for beneficial insects when used correctly.
- Good Hygiene: Remove and destroy any affected plant parts promptly. Avoid overhead watering to reduce the risk of fungal diseases, and ensure good air circulation around your plants.
Support and Training
- Sturdy Support: Luffa vines can grow very long and heavy, especially when laden with fruit. Ensure your trellis, fence, or support structure is sturdy enough to bear the weight throughout the growing season.
- Training Vines: Gently guide young luffa vines onto their support to encourage vertical growth. This not only saves space but also improves air circulation and sun exposure, reducing disease risk.
Soil Health and Rotation
- Maintaining Soil Health: Incorporate organic matter into your soil annually to maintain its fertility and structure. Healthy soil supports healthy plant growth.
- Crop Rotation: Practice crop rotation to prevent the buildup of soil-borne pests and diseases. Avoid planting luffa or other cucurbits in the same spot year after year.
Harvesting and Processing
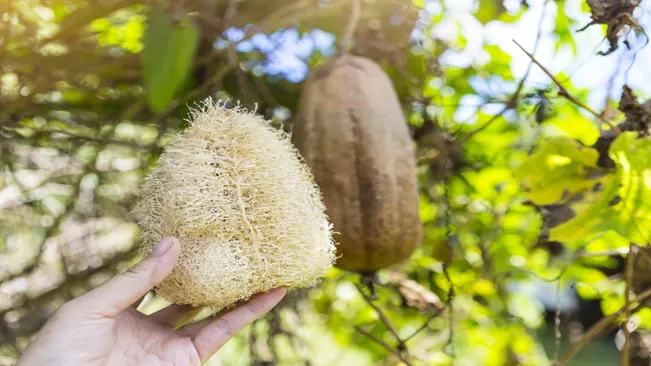
Luffa gourds are ready to harvest when the skin begins to brown and the fruit feels lightweight. To process the luffas for use as sponges, peel off the outer skin and remove the seeds and pulp from inside. Rinse the fibrous skeleton thoroughly and let it dry in the sun for a few days.
Harvesting Luffa Gourds
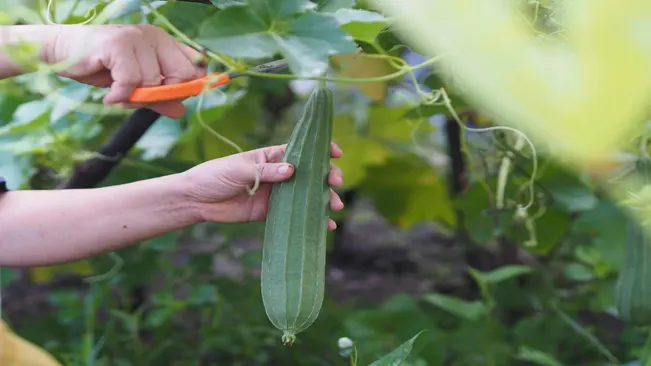
- Timing: The key indicator that a luffa gourd is ready for harvest is its color and weight. When the skin turns brownish and the gourd feels significantly lighter than when it was green, it’s a good sign that it’s ready. This typically happens in late summer or fall, depending on your climate and when you planted.
- Technique: Use a sharp knife or pruning shears to cut the gourd from the vine, leaving a few inches of stem attached. This helps in handling the gourd and potentially reduces the risk of the sponge rotting during drying if cut too close to the sponge itself.
Processing Luffa Gourds
Processing luffa gourds involves several steps to transform them from a fresh vegetable to a usable sponge:

- Peeling: Start by peeling off the dry, brown outer layer. This layer may come off easily for fully matured gourds. For some, especially if they’re not fully dry, you might need to make a slit along the length of the gourd with a knife to help peel the skin away.
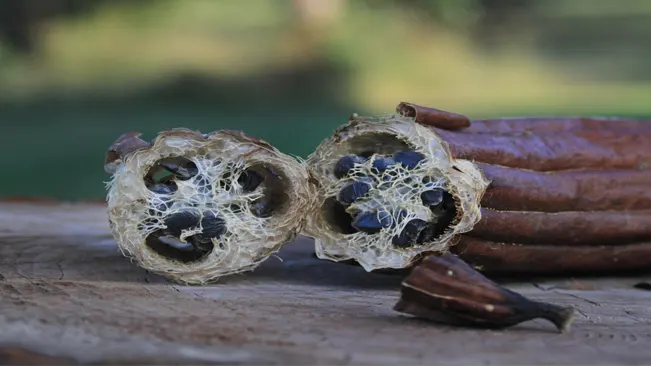
- Removing Seeds and Pulp: Once peeled, you’ll find the interior filled with seeds and some residual pulp. Shake out and remove as many seeds as possible—these can be saved for planting next season. For the remaining seeds and pulp, you can split the luffa open lengthwise to make cleaning easier. A hose or a high-pressure water jet can be very effective in removing the seeds and any stubborn pulp.
- Rinsing and Soaking: After the initial cleaning, soak the luffa in a solution of water and a small amount of bleach (or vinegar for a more eco-friendly option) for a couple of hours. This helps to remove any remaining sap, kill bacteria, and can help whiten the luffa fibers.
- Final Rinse and Drying: Rinse the luffa thoroughly under running water after soaking. Squeeze out any excess water gently. Then, allow the luffa to dry completely in a well-ventilated area with plenty of sunlight. This could take a few days depending on the humidity and temperature. The luffa is ready for use once it’s completely dry and feels light and airy.
Saving Seeds
If you wish to save seeds for next season, select a few healthy fruits and let them mature fully on the vine until they become very dry and brown. Extract the seeds from the dried fruit, rinse them clean, and let them dry before storing them in a cool, dry place.
Selecting Fruits for Seeds
- Choose Healthy Specimens: Look for luffa gourds that are free from diseases and pests. The healthiest fruits often produce the best seeds for next season’s planting.
- Let Them Mature: Unlike luffas harvested for use as sponges, seed luffas should be left on the vine until they are fully mature. This usually means they will turn a deep yellow or brown color and feel lightweight.
Harvesting Seeds
- Timing: Wait until the gourds are very dry and the skin is brittle. This typically occurs in late fall, but timing can vary based on your local climate and growing conditions.
- Removing the Seeds: Carefully crack open the dried gourds. Inside, you’ll find the seeds embedded in the fibrous material. Gently remove the seeds by hand or shake them loose over a container.
Cleaning and Drying
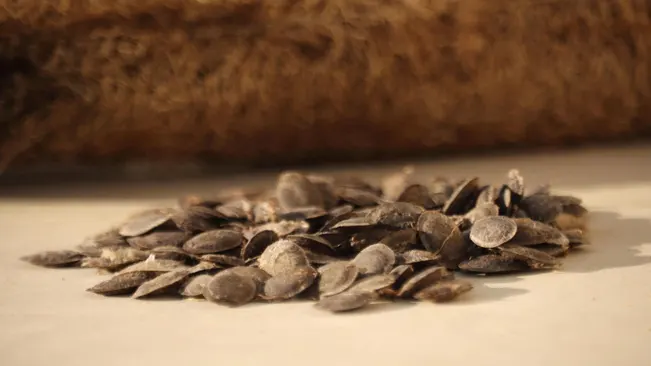
- Rinse Seeds: It’s important to remove any clinging pulp or fibrous material from the seeds to prevent mold or diseases. Rinse the seeds gently under running water and use a fine sieve to avoid losing them down the drain.
- Drying: Spread the seeds out in a single layer on a paper towel or a clean cloth. Choose a well-ventilated, dry area away from direct sunlight for drying. Seeds typically need several days to dry completely, depending on humidity levels. Turn the seeds occasionally to ensure even drying.
Storage
- Proper Conditions: Store the dried seeds in a paper envelope or a breathable container. Label the container with the seed variety and the date of harvest.
- Cool, Dry Place: Keep your seeds in a cool, dry location, away from direct sunlight. A temperature between 32°F and 41°F (0°C and 5°C) is ideal. Some gardeners use a refrigerator for seed storage, which can help maintain optimal conditions.
Related Post:
- How to Grow Ground Cherry: Simple Steps for Lush Growth
- How to Grow Spaghetti Squash: Your Thriving Garden Guide 2024
- How to Grow Runner Beans: A Comprehensive Guide for Bountiful Harvests
- How to Grow Jicama: Your Easy Guide to Cultivating the Mexican Yam Bean
- How to Grow Cinnamon Basil: A Beginner’s Guide to Aromatic Gardening
- How to Grow Roma Tomatoes: Expert Tips for a Lush Homegrown Harvest
- How to Grow Blackberries: Easy Steps to Grow and Nurture Your Own
Conclusion
Growing luffa gourds can be a fascinating and fulfilling endeavor, yielding both useful natural sponges and a unique gardening experience. By following these detailed steps and providing your plants with the care they need, you can successfully cultivate luffa gourds in your own garden and enjoy the fruits of your labor both in the kitchen and in the bath.
FAQs (Frequently Asked Questions)
- What is the best time to plant luffa gourds?
- Plant luffa gourds after the last frost when the soil has warmed up, typically in late spring or early summer in most climates.
- Plant luffa gourds after the last frost when the soil has warmed up, typically in late spring or early summer in most climates.
- How long does it take for luffa gourds to mature?
- Luffa gourds require a long growing season, usually around 150 to 200 days from planting to harvest.
- Luffa gourds require a long growing season, usually around 150 to 200 days from planting to harvest.
- Do luffa gourds need a lot of sunlight?
- Yes, luffa gourds thrive in full sunlight. They need at least six hours of direct sunlight daily to grow well.
- Yes, luffa gourds thrive in full sunlight. They need at least six hours of direct sunlight daily to grow well.
- What kind of soil is best for luffa gourds?
- Luffa gourds prefer well-draining, fertile soil rich in organic matter. A pH between 6.0 and 7.5 is ideal.
- Luffa gourds prefer well-draining, fertile soil rich in organic matter. A pH between 6.0 and 7.5 is ideal.
- How much water do luffa plants need?
- Keep the soil consistently moist but not waterlogged. Water deeply once or twice a week, depending on weather conditions, to encourage deep root growth.
- Keep the soil consistently moist but not waterlogged. Water deeply once or twice a week, depending on weather conditions, to encourage deep root growth.
- Do I need to provide support for luffa plants?
- Yes, luffa plants are vigorous climbers and need strong support like a trellis, fence, or sturdy stakes to support their growth and the weight of the fruits.
- Yes, luffa plants are vigorous climbers and need strong support like a trellis, fence, or sturdy stakes to support their growth and the weight of the fruits.
- How far apart should I plant luffa seeds or seedlings?
- Space luffa plants about 2 feet apart along the support structure to ensure they have enough room to grow and adequate air circulation.
- Space luffa plants about 2 feet apart along the support structure to ensure they have enough room to grow and adequate air circulation.
- When and how do I harvest luffa gourds?
- Harvest luffa gourds when they feel lightweight and the skin begins to yellow and harden, typically in late summer or fall. Cut the gourds from the vine with a few inches of stem attached.
- Harvest luffa gourds when they feel lightweight and the skin begins to yellow and harden, typically in late summer or fall. Cut the gourds from the vine with a few inches of stem attached.
- How do I process luffa gourds to use as sponges?
- Peel off the dry outer layer, remove the seeds and any remaining pulp, and then wash and dry the fibrous skeleton thoroughly in the sun.
- Peel off the dry outer layer, remove the seeds and any remaining pulp, and then wash and dry the fibrous skeleton thoroughly in the sun.
- Can I save seeds from my luffa gourds for next planting?
- Yes, allow some of your luffa gourds to mature fully on the vine until they turn brown and dry. Open them, remove the seeds, rinse and dry them well before storing in a cool, dry place for next season.

Kristine Moore
Forestry AuthorI'm Kristine Moore, a seasoned garden landscaping professional with over 30 years of experience. My extensive career has been dedicated to transforming outdoor spaces into stunning, sustainable landscapes. With a deep understanding of horticulture, design principles, and environmental stewardship, I have become a respected figure in the field, known for creating harmonious, visually appealing, and eco-friendly gardens. My commitment to excellence and continuous learning in landscaping trends and techniques has solidified my reputation as an expert in garden design and implementation.


Leave your comment