How to Create the Perfect Indoor Chicken Brooder: From Start to Outdoor Transition
- March 7, 2024
- 0 comment
Setting up an indoor chicken brooder from scratch transformed into an enlightening journey that intertwined my curiosity with a newfound passion for poultry care. Diving headfirst into this endeavor required not only a thorough investigation but also an immersive experience into the world of chicken husbandry.
My approach was anchored in personal trial and error, supplemented by rigorous research that painted a comprehensive picture of what these tiny dinosaurs needed to thrive from their earliest moments.
This reflective review aims to distill the essence of that journey, offering a concise yet thorough step-by-step guide that encapsulates the highs and lows of creating a nurturing environment for chicks. Whether you’re a seasoned farmer or a curious novice, my adventures in brooder setup could serve as a beacon, potentially igniting your own passion for raising chickens.
Through a mix of practical advice and personal anecdotes, I hope to provide an insightful and engaging overview of the essentials, challenges, and triumphs of indoor brooder setup, aiming to equip you with the knowledge and inspiration needed for your poultry-raising pursuits.
List of How To Set-Up An Indoor Chicken Brooder:
- Installing the Heat Source
- Setting Up Bedding and Sanitation
- Nutrition for Feeding the Chick
- Safety Measures to Protecting the Flock
- Health Monitoring and Engagement
- Maintaining a Healthy Brooder Environment
- Preparing for Transition to the Outdoors
Understanding the Basics of a Chicken Brooder
A chicken brooder is essentially a controlled environment designed to simulate the warmth and security provided by a mother hen.
It’s equipped with a heat source, bedding, food and water stations, and, in some cases, a protective enclosure to safeguard the chicks from external dangers.
The brooder’s primary objective is to maintain optimal conditions for the chicks’ health and growth until they’re ready to transition to outdoor living.
Step 1: Installing the Heat Source
Chicks require consistent warmth, especially in the absence of their mother. A heat lamp positioned securely above the brooder serves this purpose well, providing a heat gradient within the enclosure.
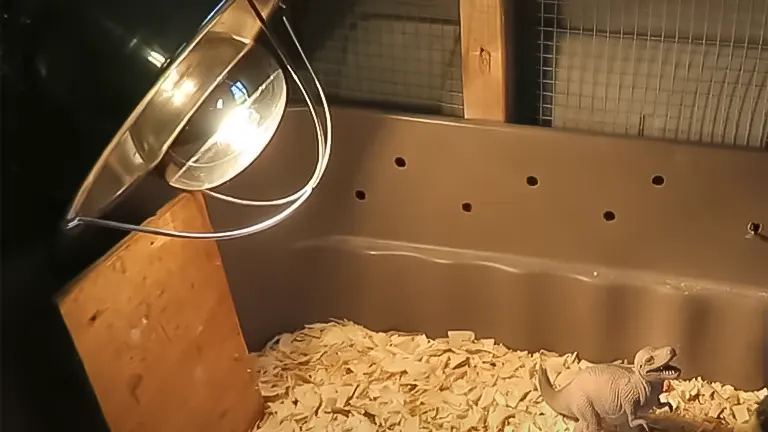
This allows chicks to self-regulate their temperature by moving closer to or away from the heat source.
Monitor the temperature closely, aiming for approximately 95°F in the brooder’s warmer area during the first week, and gradually reducing the temperature by 5°F each week thereafter.
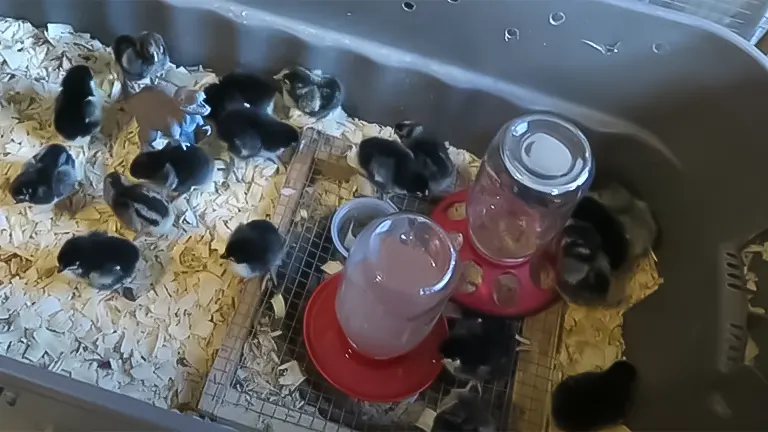
Step 2: Setting Up Bedding and Sanitation
Proper bedding is essential for comfort and cleanliness. Pine shavings or a similar material work well, absorbing moisture and making it easier to maintain a clean brooder.
Avoid cedar shavings, as they can be harmful to chicks. Regularly clean and replace the bedding to prevent the buildup of waste and bacteria, ensuring a healthy living environment for the chicks.
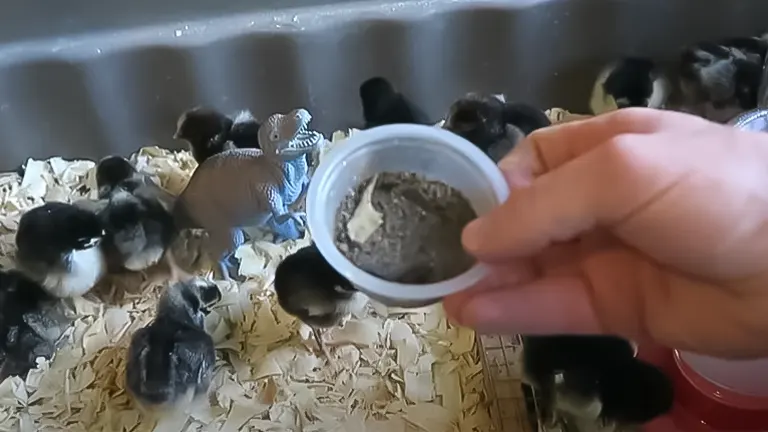
Step 3: Nutrition for Feeding the Chick
Understanding that chicks don’t have teeth but a gizzard for grinding food, I ensured they had access to creek sand and small rocks to aid digestion.
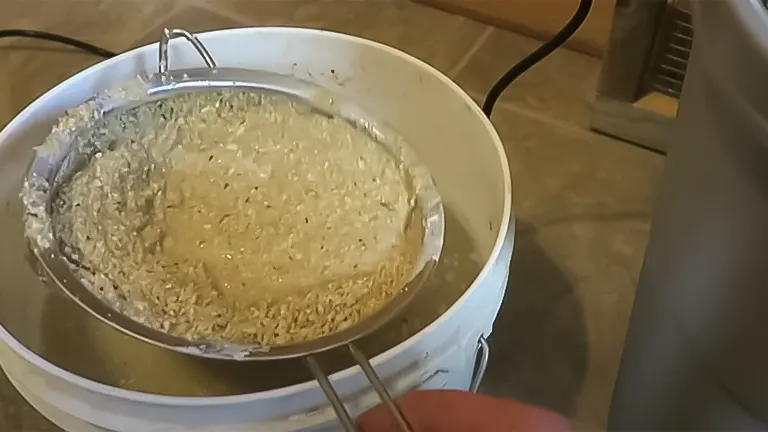
The diet was primarily a high-quality starter feed, rich in protein to support their rapid growth. Additionally, incorporating kitchen scraps like finely chopped vegetables and hard-boiled eggs not only enriched their diet but also introduced them to foraging behavior early on.
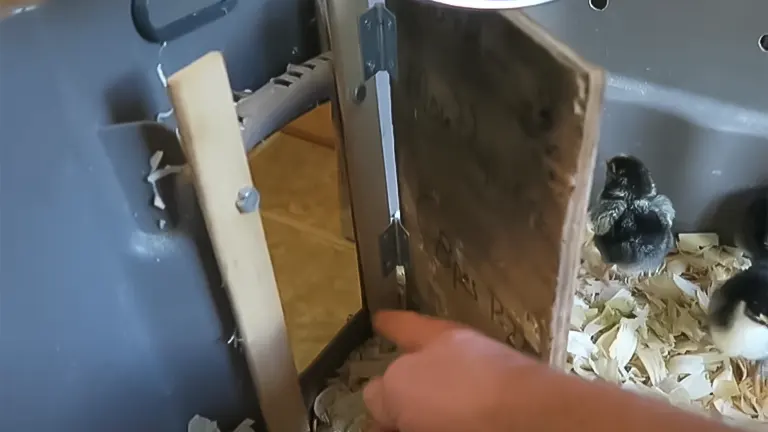
Step 4: Safety Measures to Protecting the Flock
With the open brooder setup in my kitchen, ensuring the chicks’ safety became a priority, especially to prevent them from hopping out or being mishandled by curious pets or children.
I crafted a custom-sized mesh cover that allowed air circulation while keeping the chicks securely inside. This barrier also helped maintain a controlled environment, protecting the chicks from external stressors.
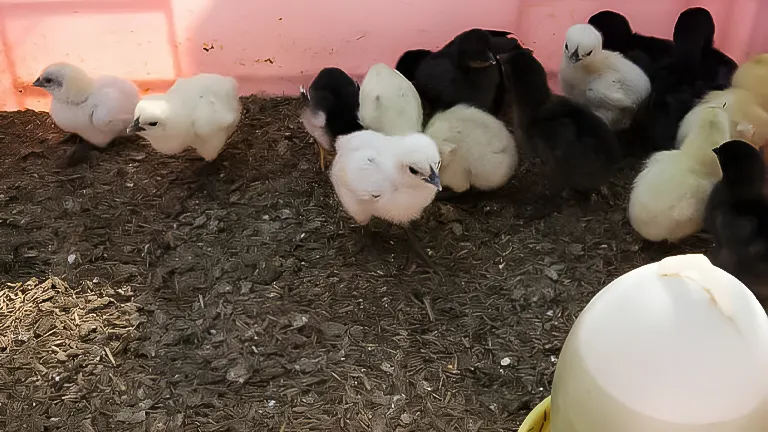
Step 5: Health Monitoring and Engagement
Observing and interacting with the chicks daily was not just a delight but a necessity. Early detection of any health issues, such as the unfortunate incident with a chick whose leg circulation was cut off by thread, was crucial.
Although not all were saved, these experiences taught me the importance of vigilant care and the natural challenges of raising chicks. Providing them with natural stimuli, like grass or clover, not only kept them entertained but promoted a healthy diet and lifestyle.
Step 6: Maintaining a Healthy Brooder Environment
Ensuring a healthy brooder environment is pivotal for the well-being of young chicks. Regular checks are necessary to observe any behavioral changes or physical signs of distress, which could indicate illness or discomfort. It’s important to adjust the heat source as the chicks grow, maintaining the appropriate temperature gradient within the brooder.
This involves lowering the temperature by approximately 5°F each week until it matches the ambient temperature. Cleanliness is another critical aspect, requiring frequent changing of bedding to prevent ammonia build-up and reduce the risk of disease. Additionally, make sure that food and water are always available and clean, to support the chicks’ growth and health.
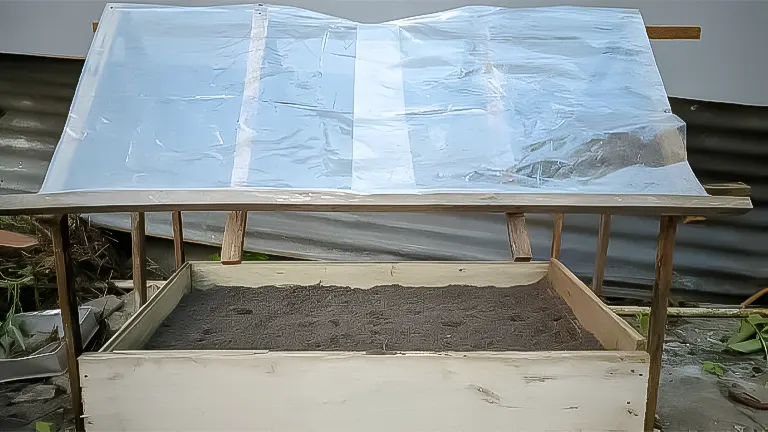
Step 7: Preparing for Transition to the Outdoors
Transitioning chicks from an indoor brooder to outdoor living is a delicate process that should be managed carefully to ensure their safety and well-being. Start by gradually introducing them to the outdoor environment for short periods, increasing their exposure as they grow older and more feathered. This helps acclimate them to the temperature fluctuations and different stimuli they will encounter outside.

Ensure that their outdoor coop is ready, providing adequate protection from predators and harsh weather. It’s also important to continue monitoring their health and behavior closely during this period to address any issues promptly. This phased approach helps minimize stress for the chicks, easing their adjustment to their new outdoor home.
Pros and Cons of Indoor Brooding
Pros
- Controlled environment: Indoor brooding allows for precise management of temperature, humidity, and safety.
- Early monitoring: It’s easier to observe and address any health issues that may arise in a contained setting.
Cons
- Space limitations: As chicks grow, they require more space, which can be challenging to accommodate indoors.
- Cleanliness: Maintaining a clean brooder requires regular effort and vigilance.
Related Articles:
- Best Bedding For Chickens
- Best Safe Chicken Coop Heater
- 8×8 Chicken Coop Plans
- Turning a Shed Into a Chicken Coop
- How to Make a Chicken Coop Out of Pallets
- Best Sand for Chicken Coop
- How To Insulate a Chicken Coop
- How To Heat a Chicken Coop
- How To Keep Water from Freezing in Chicken Coop
- How to Build a Chicken Coop
- How To Build Chicken Nesting Boxes
- How to Raise Happy and Healthy Chickens in Your Backyard
- When Can Chicks Go Outside? Timing and Tips for a Smooth Transition
- 12 Reasons why Ducks are Better than Chickens
- Best Automatic Chicken Coop Doors 2024: Expert Reviews & Buyer’s Guide
- Best Fans for Chicken Coop 2024: Effective Cooling Solutions Reviewed
Comparative Insights and Recommendations
While every brooder setup offers unique challenges and rewards, incorporating a dirt trap for feeders and waterers, ensuring ample space and proper bedding, and engaging with the chicks regularly emerged as key factors in creating a thriving environment. The journey taught me the importance of adaptability, proactive problem-solving, and the joy of witnessing the growth and development of these fascinating creatures.
Final Concluding Thoughts
Raising chicks indoors is a rewarding journey that requires patience, care, and a willingness to learn from both successes and setbacks. My adventure into chicken brooding highlighted the importance of creating a safe, comfortable, and engaging environment for the chicks. It’s a process filled with moments of joy, challenges, and invaluable learning opportunities. Whether you’re a seasoned poultry enthusiast or a curious newcomer, the journey of brooding chicks indoors offers a unique blend of challenges and rewards, fostering a deeper connection with these remarkable animals and the natural world.
Frequently Asked Questions
- What is a chicken brooder?
A chicken brooder is a controlled environment designed to keep chicks warm, safe, and well-fed during their first few weeks of life, until they are ready to regulate their own body temperature and can be moved to a more permanent outdoor coop. - Why do chicks need a brooder?
Chicks lack the ability to regulate their body temperature until they are about 6 weeks old. A brooder provides the necessary warmth, protection, and access to food and water that chicks need to thrive during their early life stages. - What temperature should the brooder be?
The brooder should start at around 95°F (35°C) during the first week and decrease by 5°F (about 3°C) each week until the temperature in the brooder matches that of the surrounding environment or until chicks are feathered enough to regulate their own body temperature. - How can I tell if the brooder is too hot or too cold for the chicks?
Observe the chicks’ behavior: If they are huddled together under the heat source, they are likely too cold. If they are spread out to the edges of the brooder or panting, it may be too hot. Adjust the heat source accordingly. - What should I use for bedding in the brooder?
Pine shavings are commonly used for bedding due to their absorbency and low dust. Avoid cedar shavings, as they can be toxic to chicks. Paper towels can be used for the first few days for easier clean-up and monitoring of droppings. - How often should I clean the brooder?
Daily spot cleaning is recommended, with a full bedding change once a week or more frequently if it becomes damp or heavily soiled. Keeping the brooder clean is crucial to prevent the spread of disease. - What do chicks eat?
Chicks should be fed a starter feed specifically formulated for their nutritional needs. This can be found in crumble form to make it easier for them to eat. At around 6-8 weeks, you can transition them to a grower feed. - Do chicks need water in the brooder?
Yes, fresh and clean water must be available at all times. Use a shallow waterer to prevent drowning, and consider adding marbles or small stones to make it even safer for the first few days. - How do I introduce grit to the chicks?
If you are feeding your chicks anything other than commercial chick feed, like treats or greens, you’ll need to provide them with chick-sized grit to help them digest their food. It can be sprinkled on their feed or provided in a separate dish. - When can chicks be moved from the brooder to an outdoor coop?
Chicks are usually ready to transition to an outdoor coop by 6 to 8 weeks of age, depending on their feather development and the outside temperature. They should be fully feathered and acclimated to near-outdoor temperatures before the move.
We can’t wait to hear from you! Join the conversation by recounting your experiences and knowledge gained from setting up an indoor chicken brooder, as guided by ‘How To Set-Up An Indoor Chicken Brooder: A Guide From Fledglings To Feathers.’ Sharing your journey, alongside any advice or hacks you’ve discovered, could be incredibly beneficial to fellow enthusiasts on this fulfilling path. Together, let’s assist each other in crafting the ideal haven for our feathered charges. Drop your comments below and assist others in navigating their way to making educated choices!

Edward Smith
Forestry AuthorWoodworking is about more than crafting; it's a harmonious connection with nature, mastering tools, and preserving our environment. I'm here to share my knowledge and experiences with you, forging a future where we can embrace wood's beauty and utility while safeguarding our forests' health and diversity.


Leave your comment