How To Build a Chicken Coop Using Chicken Wire: Beginner’s Guide
- February 15, 2024
- 0 comment
It didn’t take long for me to grasp the critical importance of creating a secure and safe environment for my feathered companions. The journey of building a chicken coop from the ground up, with a special emphasis on employing chicken wire, presented both significant challenges and moments of profound insight. I’m excited to share a comprehensive review and a guide tailored for beginners. This resource is designed to assist you through this process, ensuring that your chickens are both content and well-protected.
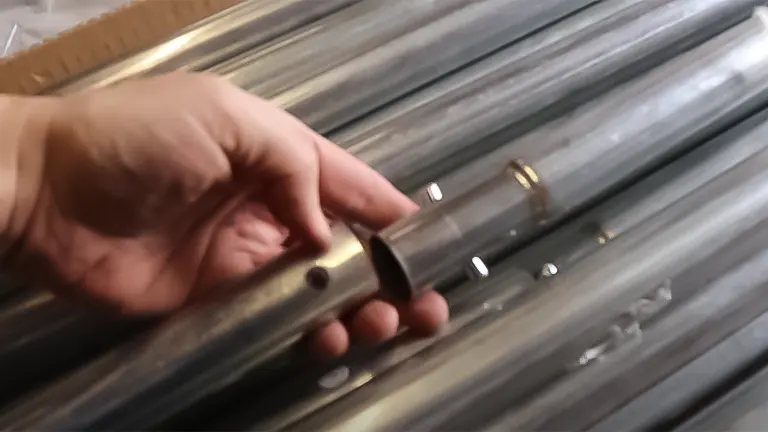
Chicken wire, also known as poultry netting, is a versatile mesh fencing material characterized by its distinctive hexagonal wire pattern. It is commonly available in two varieties: galvanized steel and green PVC-coated chicken mesh fencing. The galvanization process provides the steel with a protective zinc coating to prevent rusting, while the PVC coating offers an additional layer of durability and blends more seamlessly with the environment due to its green color.
This mesh excels in a variety of uses beyond just constructing chicken coops. Its lightweight nature allows for easy handling and manipulation, enabling you to shape and tailor it to fit your specific requirements. Whether you’re crafting a secure enclosure for your chickens, creating a garden barrier, or embarking on a different DIY project, chicken wire proves to be an adaptable and invaluable material.
List of How To Build a Chicken Coop Using Chicken Wire:
- Planning and Designing the Coop
- Gathering Materials
- Building the Frame
- Attaching the Chicken Wire
- Adding the Roof
- Building the Entrance and Nesting Boxes
- Final Touches
Galvanized Steel vs PVC Coated Chicken Wire
When considering chicken wire options, you’ll encounter two primary materials: hot-dipped galvanized steel chicken wire and its counterpart, galvanized steel chicken wire coated with green PVC. Each type serves its purpose well in construction and offers unique benefits.
Hot-dipped galvanized steel chicken wire boasts a metallic silver finish and is made from mild steel that undergoes a hot-dipping process in a galvanized coating. This process significantly enhances the wire’s durability, providing it with robust protection against the elements and corrosion, making it an ideal choice for outdoor applications where it will be exposed to varying weather conditions.
On the other hand, the green PVC-coated galvanized steel chicken wire includes an additional layer of polyvinyl chloride (PVC) over the galvanized steel. PVC is a type of plastic resin that not only covers the wire but also imbues it with added protection.
This coating safeguards against sharp edges that could potentially harm animals or humans and offers an extra defense against corrosion. The green color of the PVC coating allows the wire to blend more naturally with outdoor environments, making it a preferred choice for garden and landscape projects.

Moreover, both types of chicken wire are available in a variety of aperture sizes, including 13mm, 25mm, 31mm, and 50mm, catering to a range of needs and specifications. Whether in galvanized steel or green PVC-coated form, these aperture sizes provide flexibility in choosing the appropriate mesh size for specific projects, from securing small chicks in a coop to protecting gardens from pests.
In addition to that, whether you opt for the traditional resilience of hot-dipped galvanized steel chicken wire or the added protective features and aesthetic appeal of green PVC-coated wire, both materials offer excellent solutions for building and fencing projects. Your choice will depend on the specific requirements of your project, including environmental conditions, safety considerations, and visual preferences.
1. Planning and Designing the Coop
The initial phase of constructing a chicken coop involves meticulous planning and design, particularly in terms of space allocation. Recognizing that each chicken requires approximately 2-3 square feet of interior coop space and an additional 8-10 square feet in the outdoor run is essential for their well-being.
Drafting a basic blueprint, factoring in the number of chickens intended to be housed, is crucial for accurately estimating the required quantity of chicken wire and other construction materials. This step lays the groundwork for a functional and comfortable living environment for the chickens.
Selecting an optimal location for the chicken coop is pivotal for the health and safety of the chickens. A dry, elevated area within the backyard minimizes the risk of flooding and maximizes sunlight exposure, crucial for the chickens’ health. Proximity to the house is also considered to facilitate monitoring of the coop and to act as a deterrent against potential predators, ensuring a secure habitat for the chickens.
2. Gathering Materials
With my design in hand, I gathered the necessary materials:
- Chicken wire (with 1/2 inch to 1-inch hexagonal mesh to prevent predators from reaching in)
- Wood for the frame (treated lumber for durability)
- Nails and screws
- Hinges and latches for doors
- Tools (hammer, saw, wire cutters, drill)
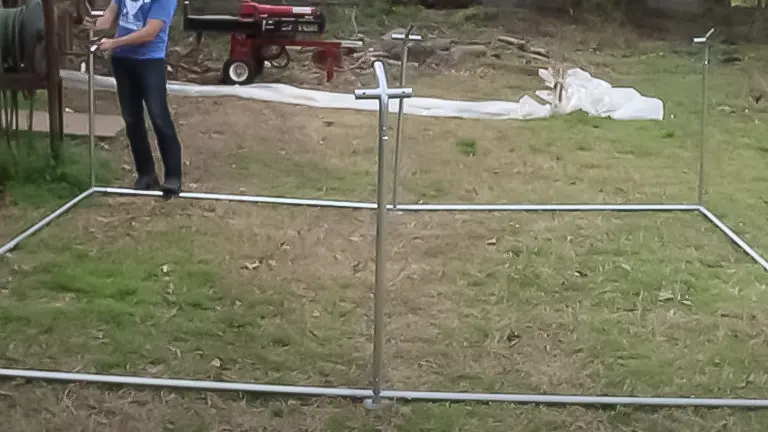
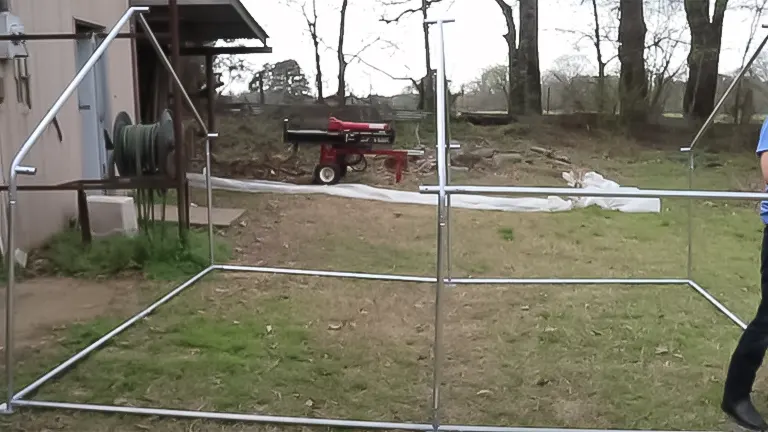
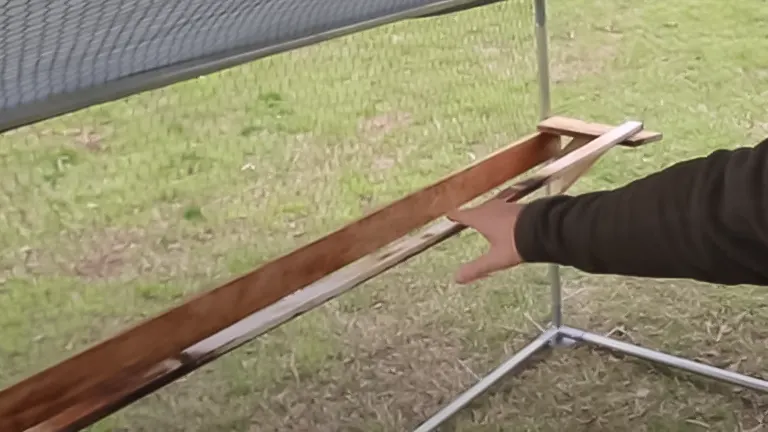
3. Building the Frame
The construction phase begins with the assembly of a robust frame, a fundamental component that dictates the overall stability and durability of the coop.
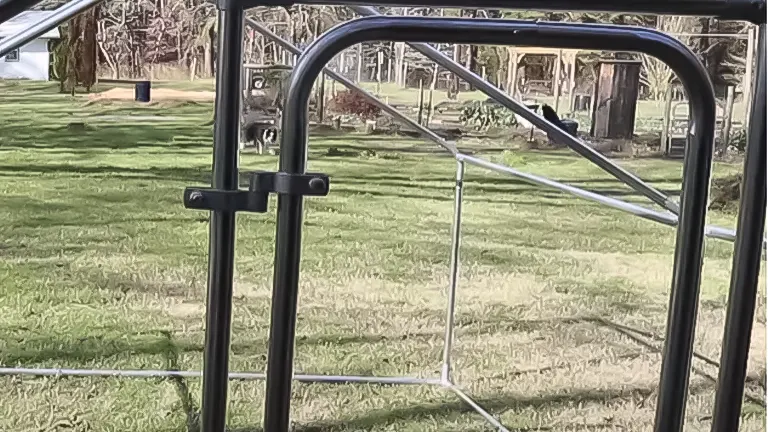
Precision in cutting and assembling lumber according to the design specifications is necessary to form the base, sides, and roof frame. Utilizing screws for assembly enhances the structure’s resilience, demanding accuracy to achieve perfect alignment and a solid foundation for the subsequent steps.
4. Attaching the Chicken Wire
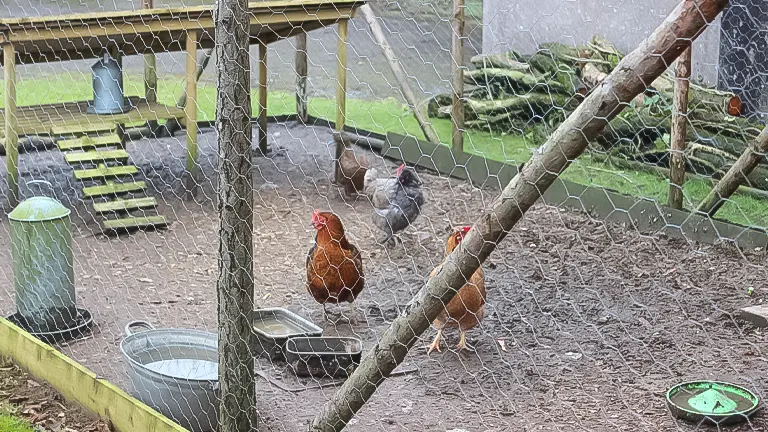
Securing the coop against predators is paramount, with the application of chicken wire serving as a critical defense mechanism.
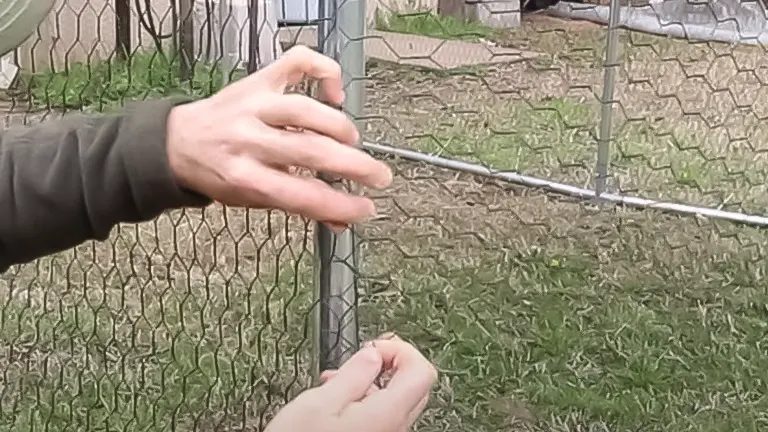
Careful unrolling, stretching, and fastening of the chicken wire over the frame are conducted to eliminate gaps and prevent potential breaches. Special attention is required at the corners and junctions to ensure comprehensive coverage, a labor-intensive but vital process for the protection of the chickens.
5. Adding the Roof
The roof’s installation incorporates waterproof materials to shield the coop from rain, thereby maintaining a dry and comfortable environment for the chickens.
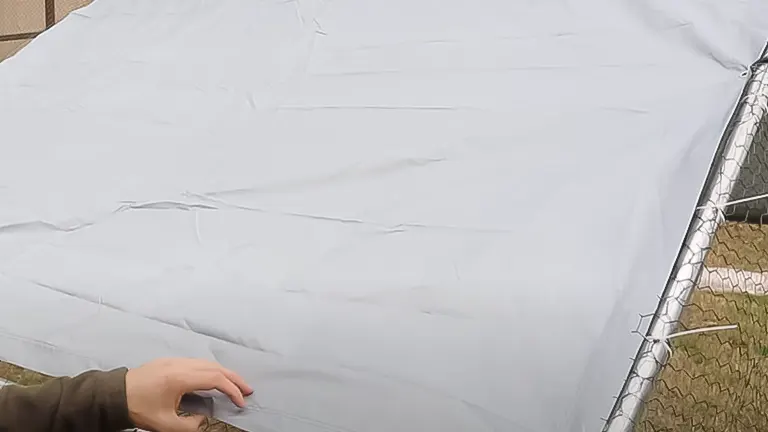
The integration of chicken wire along the roof’s edges further fortifies the coop, safeguarding against aerial and climbing predators and ensuring a fully enclosed, secure habitat.
6. Building the Entrance and Nesting Boxes
Accessibility and comfort are addressed through the construction of a door with secure hinges and latches, alongside the creation of nesting boxes from surplus wood.
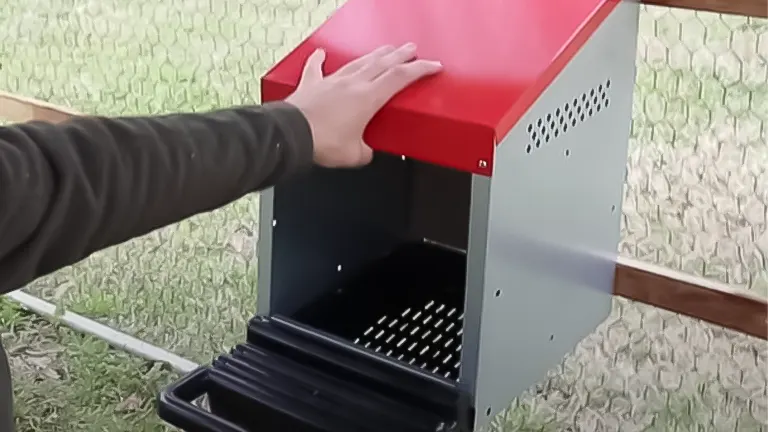
These boxes, lined with straw, provide a cozy and inviting space for egg-laying, reflecting thoughtful consideration for the chickens’ nesting instincts and overall well-being.
7. Final Touches
Personal touches transform the coop into a welcoming home for the chickens. Adding perches allows for natural roosting behaviors, while a ramp to the outdoor run offers freedom and exercise.
Enclosing the run with chicken wire, buried underground, prevents predator intrusion, completing the coop with considerations for both security and the chickens’ quality of life.
Lessons Learned and Tips for Beginners
- Precision is key: Take your time measuring and cutting both wood and chicken wire to ensure a secure fit.
- Security is paramount: Pay extra attention to securing the chicken wire and closing potential gaps.
- Functionality over aesthetics: While it’s tempting to focus on making the coop look appealing, prioritize the safety and comfort of your chickens.
- Regular maintenance: Inspect the coop and run regularly for wear and tear or potential security breaches.
Related Articles:
- Best Bedding For Chickens
- Best Safe Chicken Coop Heater
- 8×8 Chicken Coop Plans
- Turning a Shed Into a Chicken Coop
- How to Make a Chicken Coop Out of Pallets
- Best Sand for Chicken Coop
- How To Insulate a Chicken Coop
- How To Heat a Chicken Coop
- How To Keep Water from Freezing in Chicken Coop
- How to Build a Chicken Coop
- How To Build Chicken Nesting Boxes
- How to Raise Happy and Healthy Chickens in Your Backyard
- When Can Chicks Go Outside? Timing and Tips for a Smooth Transition
- 12 Reasons why Ducks are Better than Chickens
- Best Automatic Chicken Coop Doors 2024: Expert Reviews & Buyer’s Guide
- Best Fans for Chicken Coop 2024: Effective Cooling Solutions Reviewed
Final Conclusion
Building a chicken coop from scratch was an immensely rewarding experience. It taught me not only about basic carpentry skills but also the importance of creating a safe environment for my backyard chickens. Using chicken wire effectively was crucial for protection against predators, and though the process required patience and meticulousness, the peace of mind it provided was worth every effort. For fellow beginners, I hope this guide demystifies the process and encourages you to embark on this fulfilling project. Remember, the key to a successful chicken coop is planning, patience, and prioritizing the well-being of your chickens. Happy building!
Frequently Asked Questions
- What materials do I need to build a chicken coop using chicken wire?
You will need chicken wire (1/2 inch to 1-inch hexagonal mesh is recommended), treated lumber for the frame, nails and screws, hinges and latches for doors, a roofing material, and basic tools like a hammer, saw, wire cutters, and a drill. - How much space does each chicken need inside the coop?
Each chicken requires about 2-3 square feet of space inside the coop. Ensure you plan your coop size based on the number of chickens you intend to keep. - What is the best location for a chicken coop in my backyard?
Choose a dry, elevated area to avoid flooding, with good sunlight exposure. Make sure it’s visible from your house to keep an eye on the chickens and deter predators. - How do I secure the chicken wire to the coop frame?
Stretch the chicken wire tightly over the frame and secure it with staples or nails, ensuring there are no gaps or loose areas. Pay special attention to corners and junctions. - What type of roof should I use for the chicken coop?
Use a waterproof material for the roof to protect the chickens from rain. Covering the roof’s edges with chicken wire can also prevent predators from entering. - How do I make the coop predator-proof?
Ensure the chicken wire is securely attached without gaps, bury the wire at least a foot underground around the perimeter, and use secure locks on doors. Consider adding a wire mesh on the coop’s windows and vents. - Can I use any type of wood for the coop frame?
It’s best to use treated lumber as it is more durable and resistant to rot and pests. However, ensure the treatment is safe for animals to avoid potential health risks to your chickens. - How many nesting boxes do I need?
Provide at least one nesting box for every three to four hens. The boxes should be filled with straw or similar material for comfort. - What should I consider when adding perches to the coop?
Install perches at varying heights to accommodate the natural pecking order among chickens. Ensure they are wide enough for the chickens to comfortably roost. - How do I maintain and clean the chicken coop?
Regularly replace bedding, remove droppings, and check for signs of wear or damage to the coop. Ensure proper ventilation to keep the air fresh and reduce moisture buildup inside the coop.
We’d love to hear from you! If you’ve embarked on building a chicken coop using chicken wire based on this beginner’s guide, share your personal journey and insights in the comments section below. Your experiences and tips could greatly benefit fellow enthusiasts looking to create a safe haven for their feathered friends. Whether it’s challenges you overcame, innovations you applied, or simply your thoughts on the process, your input can help others navigate their own coop construction projects with confidence!

Edward Smith
Forestry AuthorWoodworking is about more than crafting; it's a harmonious connection with nature, mastering tools, and preserving our environment. I'm here to share my knowledge and experiences with you, forging a future where we can embrace wood's beauty and utility while safeguarding our forests' health and diversity.


Leave your comment