How To Build A Simple A-Frame Chicken Coop: Step-by-Step Guide
- February 16, 2024
- 1 comment
As someone with a keen interest in sustainable practices and cultivating my own food through backyard farming, I decided to take on the project of constructing an A-frame chicken coop. This decision was driven by a desire to not only improve my backyard’s utility but also to provide a practical, effective, and aesthetically pleasing living space for my chickens.
In this article, I aim to deliver an in-depth analysis and guide based on my personal experience, assessing the design, the building process’s challenges, and the functionality of the final product.
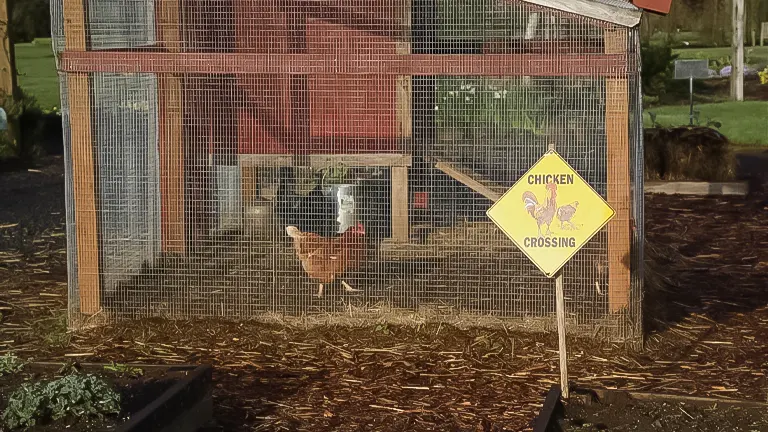
The primary goal of a chicken coop is to offer protection to chickens from the elements—shielding them from cold winds during the winter and providing a cool environment during the summer’s heat. It should also include wooden perches for the chickens to roost on at night and nesting boxes for laying eggs.
It’s advisable to locate the coop in a shaded area, ideally under a tree, to ensure it remains cool during hot weather. The floor of the coop should be covered with materials such as straw, wood shavings, or sawdust to absorb moisture and provide a comfortable surface for the chickens. This is particularly important beneath the perches to maintain cleanliness and comfort.
List of How To Build A Simple A-Frame Chicken Coop:
- Planning and Materials
- Building the Frame
- Adding the Roof and Walls
- Interior Setup and Security
- Install the Wire
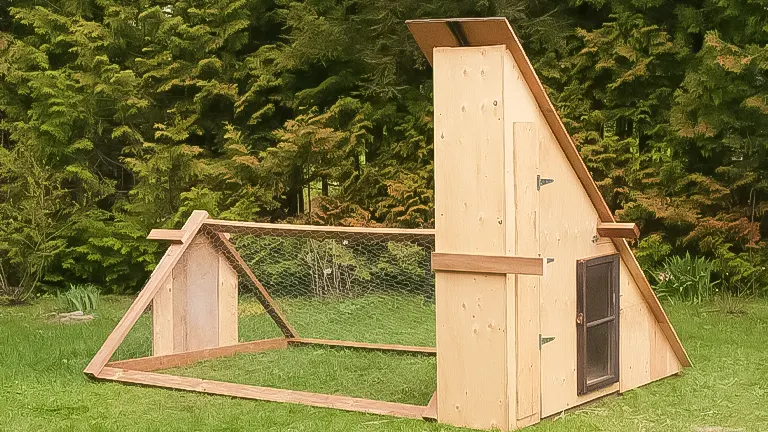
Choosing the A-Frame Design
In my quest to find the perfect chicken coop design, I delved into a comprehensive study of multiple styles and structures, eventually settling on the A-frame model for its notable advantages. The A-frame’s distinct triangular shape immediately caught my attention for several reasons: its simplicity meant that even with minimal carpentry skills, I could tackle the construction process without the need for professional help, making it a more accessible project.
Additionally, its cost-effectiveness was a significant factor; the design requires fewer materials than more elaborate coops, leading to savings on expenses. Moreover, the compact footprint of the A-frame design is especially appealing for those with limited space, as it maximizes the use of vertical space without sacrificing ground area.
- Construction Materials: The construction of this chicken coop utilizes reclaimed oregon timber, specifically dimensions of 42 x 35mm and 42 x 19mm. For the cladding of the floor, walls, and back door, recycled hardwood fence palings measuring 100 x 15mm are employed. The front door and the front portion of the coop are outfitted with chicken wire to ensure adequate ventilation and security.
- Assembly Hardware: To ensure durability and resistance to weathering, galvanized fasteners are recommended for assembling the coop. The frame is constructed using 50mm x 8g timber screws, while the floor and wall palings are secured in place with 40 x 2mm nails. Additionally, 12mm U nails are utilized for firmly attaching the chicken wire, providing a sturdy and rust-resistant finish.
Beyond these practical benefits, the A-frame structure inherently supports ample ventilation, crucial for maintaining a healthy environment for the chickens by ensuring a constant flow of fresh air. It also provides a robust shield against adverse weather conditions, ensuring the chickens’ safety and comfort regardless of the seasonal changes. This combination of factors made the A-frame design an unbeatable choice for my needs, blending efficiency, affordability, and optimal living conditions for my backyard flock.
Step-By-Step Construction Review
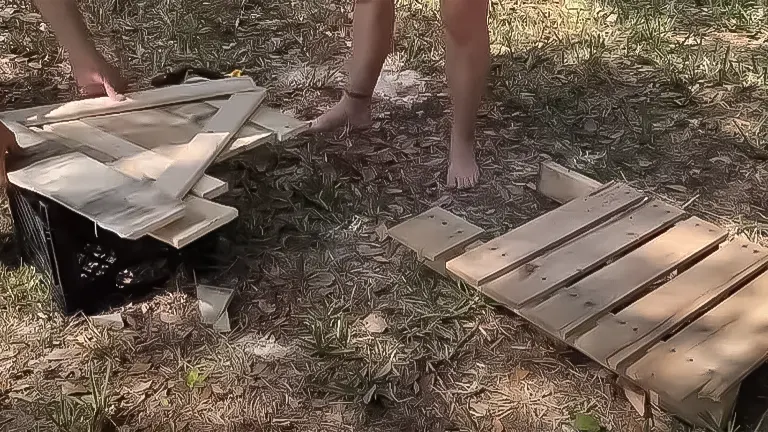
Step 1: Planning and Materials
The first step in my chicken coop project involved careful planning and selection of materials. I dedicated time to sketching out the design, ensuring it met my requirements for space, functionality, and aesthetics. Choosing materials was a deliberate process; I selected untreated, robust wood for the structural frame to ensure the coop’s longevity and resistance to weather conditions.
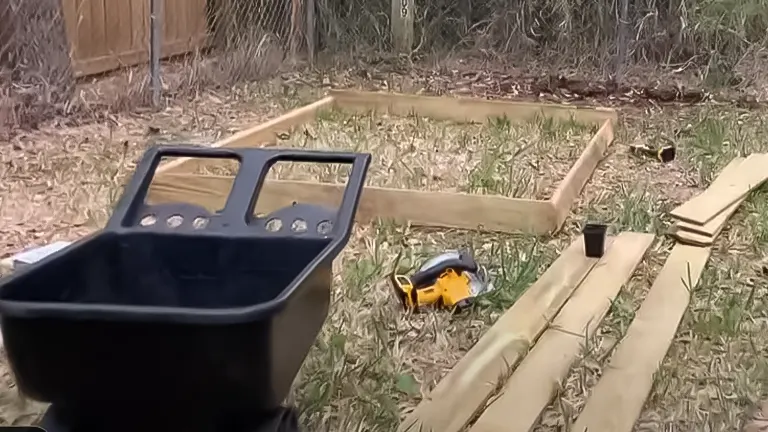
For the roofing, corrugated metal was chosen for its durability and ability to effectively channel water away during rainstorms. This planning stage was not only about design and material selection but also about ensuring that the materials chosen were environmentally friendly, aligning with my commitment to sustainable living. This phase, including material sourcing, spanned approximately two days, setting a strong foundation for the construction phase.
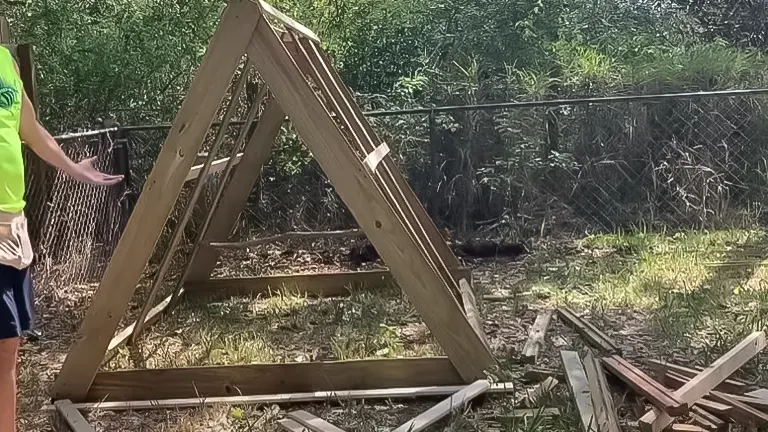
Step 2: Building the Frame
Constructing the A-frame proved to be a relatively straightforward process, thanks in large part to the design’s inherent simplicity. The task of cutting the wood to precise angles was meticulous, requiring careful measurement and execution to ensure the pieces fit together perfectly.
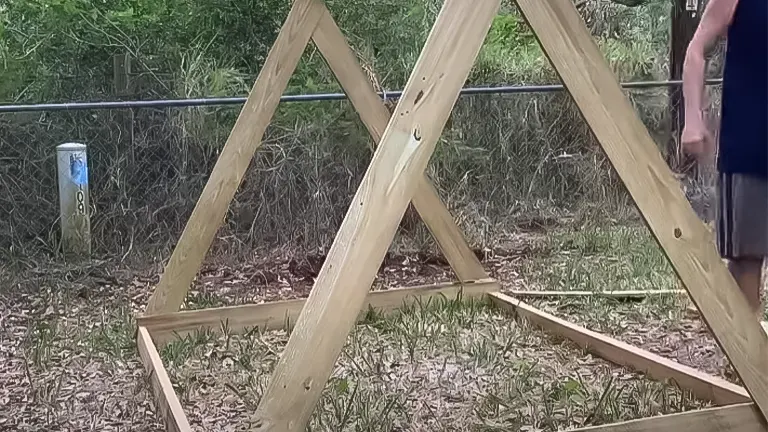
Despite this precision work, the overall assembly of the frame was uncomplicated, allowing me to erect the structure over a single weekend. This quick assembly highlighted the efficiency of the A-frame design, making it an ideal choice for those looking for a balance between simplicity and structural integrity in their chicken coop.
Step 3: Adding the Roof and Walls
The next step involved attaching the corrugated metal pieces to serve as the roof and walls of the coop. This stage presented some challenges, particularly in the need for precise cutting of the metal sheets to fit the frame accurately and the requirement for secure attachment to withstand strong winds.
Despite these challenges, the corrugated metal was an excellent choice, offering superior durability and effective water runoff, which is essential for maintaining a dry and comfortable living space for the chickens.
Step 4: Interior Setup and Security
Ensuring the interior of the coop was both comfortable for the chickens and secure from predators was my next focus. I installed nesting boxes for egg-laying, perches for roosting, and a secure door for access.
The layout was designed to be simple yet functional, optimizing the available space without causing overcrowding.
Security measures were paramount; I reinforced all potential entry points with hardware cloth and installed secure latches on doors, prioritizing the safety and well-being of the chickens against potential threats.
Step 5: Install the Wire
The final step in constructing the coop involved installing chicken wire over the sides and front of the structure. This task required precision to ensure the wire was cut to the exact dimensions needed, eliminating any gaps that could allow predators to enter or chickens to escape. The chicken wire was affixed to the frame using U nails, creating a secure barrier.
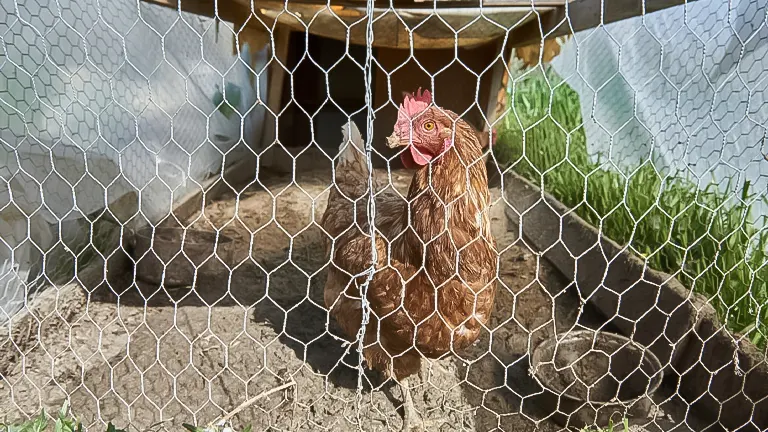
Additionally, I installed the front and back doors using pairs of galvanized 40mm hinges, ensuring they operated smoothly and securely closed with gate hooks and eyes. This not only completed the structural aspects of the coop but also added an extra layer of security and functionality to the overall design.
Related Articles:
- Best Bedding For Chickens
- Best Safe Chicken Coop Heater
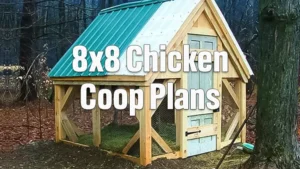
- 8×8 Chicken Coop Plans
- Turning a Shed Into a Chicken Coop
- How to Make a Chicken Coop Out of Pallets
- Best Sand for Chicken Coop
- How To Insulate a Chicken Coop
- How To Heat a Chicken Coop
- How To Keep Water from Freezing in Chicken Coop
- How to Build a Chicken Coop
- How To Build Chicken Nesting Boxes
- How to Raise Happy and Healthy Chickens in Your Backyard
- When Can Chicks Go Outside? Timing and Tips for a Smooth Transition
- 12 Reasons why Ducks are Better than Chickens
- Best Automatic Chicken Coop Doors 2024: Expert Reviews & Buyer’s Guide
- Best Fans for Chicken Coop 2024: Effective Cooling Solutions Reviewed
Final Conclusion
Based on my experience, the A-frame chicken coop is an excellent choice for small-scale backyard farmers looking for a simple, cost-effective solution. Its construction is accessible for beginners, yet it doesn’t compromise on the chickens’ safety and comfort. While it may have limitations in size and requires careful consideration for ventilation, its benefits in efficiency, aesthetics, and cost make it a standout option.
For anyone considering building their own chicken coop, I highly recommend the A-frame design for its balance of functionality, ease of construction, and sustainability. This project not only enriched my backyard farming experience but also provided a safe, comfortable home for my chickens, contributing to their overall wellbeing and productivity.
Frequently Asked Questions
- What materials do I need to build an A-frame chicken coop?
You’ll need untreated, sturdy wood for the frame (such as 42 x 35mm and 42 x 19mm oregon), corrugated metal for the roof, recycled hardwood fence palings for cladding (100 x 15mm recommended), chicken wire for the front door and sections of the coop, galvanized fasteners, timber screws (50mm x 8g), nails (40 x 2mm for palings, 12mm U nails for chicken wire), and hinges and latches for doors. - How much space do I need for an A-frame chicken coop?
The size of your A-frame chicken coop will depend on the number of chickens you plan to keep. Generally, each chicken requires about 2-3 square feet of space inside the coop and 8-10 square feet in the run. Adjust the dimensions of your coop accordingly. - 3. Can I build an A-frame chicken coop with no prior carpentry experience?
Yes, the A-frame design is particularly suitable for beginners due to its simplicity. Basic tools and a detailed guide can help you through the process, though precision in measuring and cutting is crucial. - How long does it take to build an A-frame chicken coop?
The construction time can vary based on your skill level and the complexity of your design. On average, the frame can be built over a weekend, with additional time required for adding the roof, walls, and interior features. - How do I ensure the coop is predator-proof?
To protect your chickens from predators, reinforce all potential entry points with hardware cloth instead of chicken wire, as it’s more durable. Secure the coop’s doors and windows with strong latches, and consider burying the wire around the perimeter to prevent digging predators. - What is the best location for an A-frame chicken coop?
Choose a location that offers shade during the hottest parts of the day, ideally under a tree or near a building. Ensure the site is well-drained to avoid moisture buildup inside the coop. - How do I ventilate the A-frame chicken coop?
Incorporate vents or windows at the top of the coop to allow hot air to escape, and ensure the door or part of the wall is covered with hardware cloth to provide additional airflow without compromising security. - How many nesting boxes do I need?
As a general rule, provide one nesting box for every 3-4 hens. These should be placed in a dark, quiet part of the coop to encourage egg-laying. - How do I maintain and clean the A-frame chicken coop?
Regularly remove and replace the bedding (straw, wood shavings, or sawdust) to keep the coop clean. Perform a thorough cleaning every few months by removing all bedding, scrubbing the surfaces with a mild disinfectant, and letting it dry completely before adding fresh bedding. - 1Can the A-frame chicken coop be moved?
While the A-frame design is compact and efficient, its mobility depends on its size and weight. For a portable coop, consider adding wheels to one side and handles to the other, ensuring it’s light enough to be lifted and moved to fresh ground periodically.
We’re eager to connect with you! Please share your personal journey and insights on constructing a Simple A-Frame Chicken Coop in the comments section below. Your experiences and advice could be incredibly valuable to fellow enthusiasts looking to embark on this project. Whether it’s tips on materials, construction challenges, or how your chickens are enjoying their new home, your input can help others make well-informed decisions. Join the conversation and let’s build a community of backyard farmers together!

Edward Smith
Forestry AuthorWoodworking is about more than crafting; it's a harmonious connection with nature, mastering tools, and preserving our environment. I'm here to share my knowledge and experiences with you, forging a future where we can embrace wood's beauty and utility while safeguarding our forests' health and diversity.


This looks an excellent chicken house⁹
Rusty Barnes
February 19, 2024 6:46 pm