How To Clean A Chicken Coop: Effective & Easy Maintenance Tips
- February 7, 2024
- 0 comment
Keeping chickens has always been a rewarding part of my life. There’s something incredibly grounding about caring for these creatures and reaping the benefits of fresh eggs every morning. However, as any pet or livestock owner can attest, with the joy comes the responsibility of maintenance, particularly when it comes to cleaning their living spaces.
Today, I want to share my personal journey on how I transformed my chicken coop cleaning routine from a dreaded chore into a streamlined, efficient process. This isn’t just a guide; it’s a review of the methods I’ve tried, what worked, what didn’t, and how I found a system that keeps both me and my feathered friends happy.
Maintaining a pristine coop is essential for the well-being of your chickens. The process of cleaning your coop thoroughly hinges on several factors, including the dimensions of your coop and the number of chickens you are tending to. Selecting appropriate tools and cleaning materials plays a significant role in the successful upkeep of the coop.
It’s also vital to consider your health during the cleaning process. Wearing gloves and a face mask can protect you from potential health hazards, and adhering to good hygiene practices is crucial. Neglecting the cleanliness of your coop can lead to health risks for both your chickens and yourself, underscoring the importance of regular and effective cleaning routines.
List of How To Clean A Chicken Coop:
- Performing Routine Daily Clean-Up
- Thoroughly Sanitizing Your Chicken Coop
- Preparing Your Poultry Enclosure
- Essential Protective Gear For Coop Cleaning
- Selecting An Appropriate Coop Cleaner
The Starting Point of Conventional Cleaning
Every few weeks, I dedicated a day to a comprehensive overhaul of the entire habitat, a process as arduous and demanding as it conjures in one’s mind. The ritual commenced with the exhaustive removal of all the bedding, a task that was not only physically taxing but also a battle against the pervasive dust and feathers that seemed to cling to every surface.
Once the coop was stripped bare, I armed myself with soap, water, and a stiff-bristled brush to tackle the grime that had accumulated on the wood and wire of the coop’s interior. The scrubbing was vigorous and thorough, leaving no corner unattended, ensuring every inch gleamed with cleanliness. Following this, I would douse the surfaces with a disinfectant, a necessary precaution to ward off the invisible threats of bacteria and viruses that could compromise the health of my flock.
The waiting game then began, as I allowed ample time for the coop to air dry, a pause in the proceedings that was as necessary as it was frustrating, often at the mercy of the weather’s whims. The final step was to introduce fresh bedding, laying down a clean, inviting foundation for my chickens, a symbol of a fresh start until the cycle would inevitably repeat.
This entire endeavor, though undertaken with the best of intentions, often left me feeling defeated. Despite my laborious efforts and the meticulous care I invested in this routine, the specter of odors that refused to be banished and the persistent threat of parasites that seemed to mock my every move lingered. It was a perpetual battle against the elements of nature within the confines of the coop, a Sisyphean task that, while necessary, seemed to yield little in the way of victory or satisfaction.
Step-By-Step On How To Clean Your Chicken Coop
Step 1: Performing Routine Daily Clean-Up
- Daily Dropping Board Maintenance: Clean dropping boards under roosts daily by wearing gloves and using a taping knife to scrape droppings into a compost pile or pail. Also, scrape any droppings from the roosts to keep the area tidy.
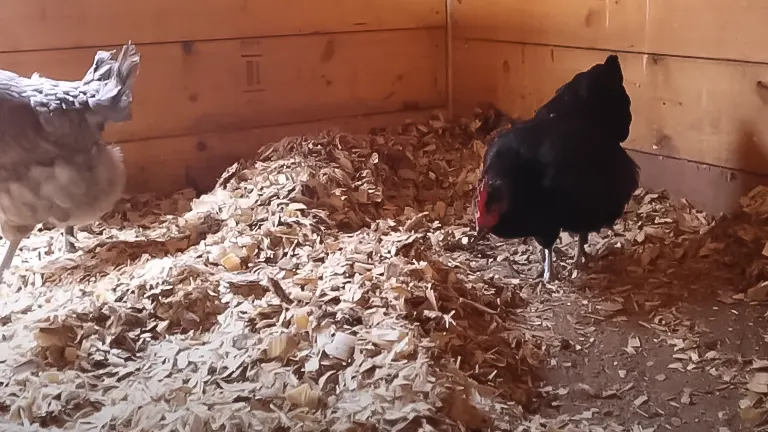
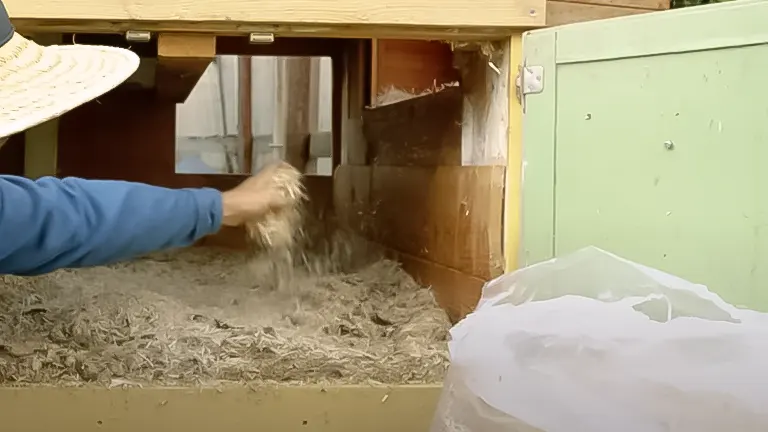
- Bedding Evaluation: Check the coop’s bedding regularly for cleanliness. Compost any soiled or smelly bedding and sun-dry the rest to kill pathogens. Replace dirty bedding daily to ensure a clean coop environment.
- Refreshing the Bedding: After removing and treating the old bedding, replenish the coop with fresh, clean bedding. If you opted to dry out slightly soiled bedding in the sun, now is the time to return it to the coop, ensuring a comfortable and sanitary environment for your chickens.
- Nesting Box Upkeep: Daily checks of the bedding within your nesting boxes are equally important. Any bedding that’s become dirty should be replaced to ensure the health and comfort of your laying hens. Fresh straw or pine shavings should be added as necessary to maintain cleanliness. Positioning of the nesting boxes is key; they should be placed lower than the roosts to discourage chickens from roosting and defecating in them. Additionally, avoid placing nesting boxes directly beneath roosts to prevent contamination.
Step 2: Thoroughly Sanitizing Your Chicken Coop
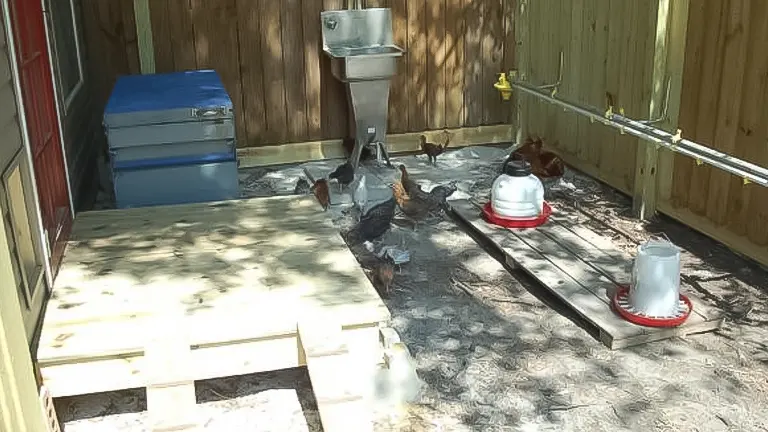
- Evacuate the Chickens: For free-range chickens, let them roam outside temporarily. Otherwise, relocate them to a secure area like a shed or garage. Given chickens’ limited flight capabilities, especially if their wings are clipped, they’re unlikely to escape. Ensure your yard’s gate is closed for added security. If available, this time also presents an opportunity to clean the chickens themselves, perhaps with the help of a partner while you focus on the coop.
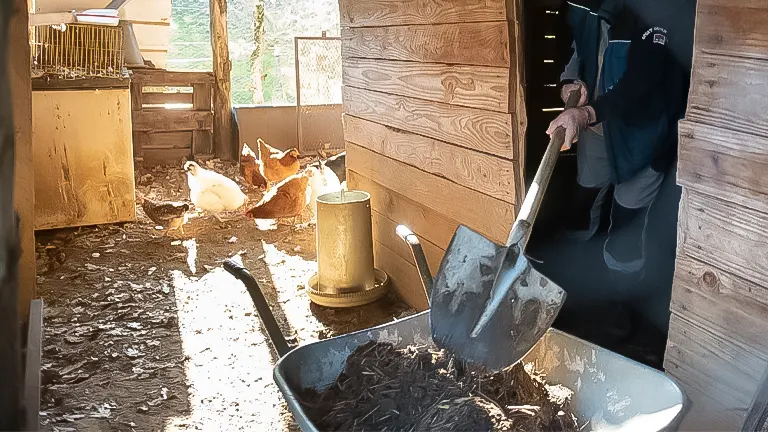
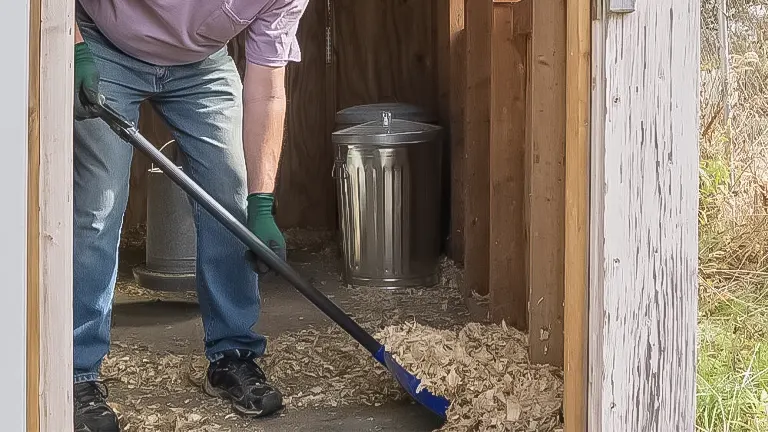
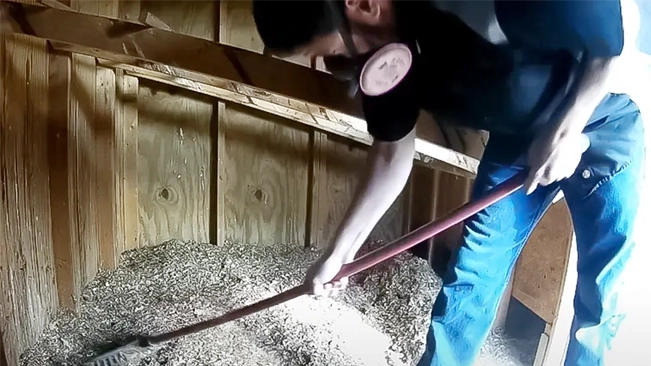
- Clear the Coop Floor: Start by removing all bedding, waste, and debris using a shovel or rake, along with any tools or items inside the coop. This includes feeders, waterers, nesting boxes, and removable roosts, which should be cleaned with a safe household cleaner. After removing these items, sweep the floor to catch any missed particles and check the ceiling for cobwebs, using a broom to clear them away.
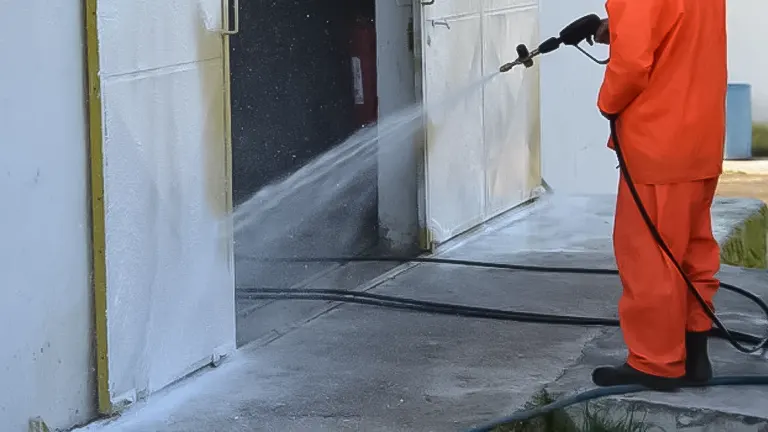
- Wash the Floor Thoroughly: After clearing the floor, use a high-powered hose or power washer to thoroughly rinse the floor, ensuring to cover every area with a sweeping motion. The water will help loosen any stuck-on manure or dirt. For stubborn areas, use a paint scraper for removal. If water drainage is slow, mop up the excess water to prevent pooling.
- Deep Clean with Coop Cleaner: Generously apply a non-toxic coop cleaner across the floor, targeting any grimy spots on the walls or floor with a stiff-bristled brush. Scrub these areas thoroughly in wide, circular motions for a deep clean. Afterwards, allow the coop to air dry by opening all doors and windows, and mopping up any cleaner that doesn’t drain properly to ensure a thoroughly sanitized environment.
Step 3: Preparing Your Poultry Enclosure
- Distribute Diatomaceous Earth on the Floor: Sprinkle food-grade Diatomaceous Earth (DE), a powdery substance derived from fossilized diatoms (algae), across your coop’s floor once it is dry and cleared of removable items like feeders and nesting boxes. DE is effective against a variety of pests including ticks, fleas, mites, and digestive worms. The quantity of DE needed depends on your coop’s size; larger coops require more DE. For application, either use a small spoon to scatter the DE evenly across the floor or a duster for more thorough coverage, especially in cracks and crevices. Be cautious not to inhale DE, as it may irritate the lungs.
- Lay Out Fresh Bedding: Completing your coop’s transformation back into a comfortable home for your chickens involves laying down new bedding. If you’ve opted to sun-dry and reuse old bedding, now is the time to spread it back on the floor.
- Welcome Your Chickens Back: Once the new bedding is in place and all removed items are returned and replenished, it’s time to reintroduce your chickens to their clean environment.
- Determine Cleaning Frequency: Daily tasks such as inspecting nesting boxes, dropping boards, and bedding are essential, but the frequency of a comprehensive coop cleaning depends on the number of chickens and the size of your coop. More frequent cleanings are necessary for larger flocks in smaller spaces. Be vigilant about odors, particularly the smell of ammonia, as this indicates the need for an immediate deep clean. While some coops may only require cleaning a few times a year, others might need it every fortnight. Always prioritize cleanliness, and ensure a thorough cleaning before introducing a new flock to your coop.
Step 4: Essential Protective Gear For Coop Cleaning
- Gloves: Always wear disposable gloves to protect your hands from dirt and reduce the risk of contracting or spreading germs, such as Salmonella. Disposable gloves are easily found at gardening or home improvement stores and should be discarded after each use. Replace them immediately if they tear.
- Footwear: Dedicate a pair of shoes for coop cleaning tasks to prevent tracking dirt into your home. Choose an old pair of sneakers for this purpose, and make sure to take them off before entering your living space.
- Face Mask: Wear a face mask to avoid inhaling dust and other particles, especially in enclosed or poorly ventilated coops. Earloop masks are comfortable, covering both the mouth and nose effectively. Ensure your coop is well-ventilated to reduce dust accumulation.
- Appropriate Clothing: Opt for old, durable clothing that you won’t mind getting dirty. Since cleaning activities may involve kneeling or close contact with the coop’s interior, avoid wearing anything precious or hard to clean. Change out of these clothes immediately after finishing, and wash them promptly.
Step 5: Selecting An Appropriate Coop Cleaner
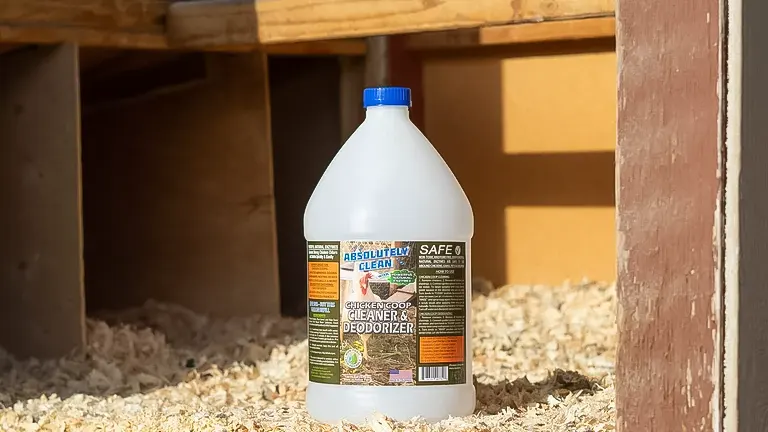
- Commercial Coop Cleaners: opt for non-toxic cleaners specifically formulated for chicken coops, available at farm supply stores. These should be free from harmful chemicals like bleach and creosote, and aerosol sprays should be avoided due to the risk of inhaling harmful substances. Prefer cleaners that leave a pleasant smell.
- DIY Cleaning Solutions: Create your own effective and natural coop cleaner using vinegar, water, and aromatic herbs. For a homemade lavender-mint cleaner, combine fresh mint, lavender, and a split vanilla bean in a mason jar filled with white vinegar, letting it infuse for 3-4 weeks with periodic shaking. Strain and use the scented vinegar solution diluted with water in a spray bottle for a non-toxic cleaning option.
- Mix and Match: Don’t limit yourself to a single cleaning agent. Different cleaners have unique benefits, so experimenting with various products can help you tackle different types of messes effectively, from fecal matter to mud.
Safety Note: Mixing bleach with ammonia, which can be present in chicken waste, creates dangerous fumes. Always choose or create cleaners with safety in mind to avoid harmful reactions.
The Role of Preventative Measures
I learned that cleaning wasn’t just about dealing with waste; it was also about preventing problems before they started. I began implementing more robust biosecurity measures, such as foot dips and designated coop shoes, to prevent the spread of disease. Regularly adding diatomaceous earth to the bedding helped control parasites, and ensuring the coop had adequate ventilation kept respiratory issues at bay.
Reflections and Recommendations
Looking back on my journey, the evolution of my chicken coop cleaning routine has been transformative. By embracing the deep litter method, making strategic design changes to my coop, and prioritizing preventative care, I’ve created a system that’s not only efficient but sustainable.
For anyone feeling overwhelmed by their chicken coop maintenance, my advice is to start small. Implement one change at a time and see how it impacts your routine and your flock’s health. Cleaning the chicken coop will never be the highlight of anyone’s day, but with the right approach, it can become a less burdensome, more rewarding part of your homesteading activities.
Related Articles:
- Best Bedding For Chickens
- Best Safe Chicken Coop Heater
- 8×8 Chicken Coop Plans
- Turning a Shed Into a Chicken Coop
- How to Make a Chicken Coop Out of Pallets
- Best Sand for Chicken Coop
- How To Insulate a Chicken Coop
- How To Heat a Chicken Coop
- How To Keep Water from Freezing in Chicken Coop
- How to Build a Chicken Coop
- How To Build Chicken Nesting Boxes
- How to Raise Happy and Healthy Chickens in Your Backyard
- When Can Chicks Go Outside? Timing and Tips for a Smooth Transition
- 12 Reasons why Ducks are Better than Chickens
- Best Automatic Chicken Coop Doors 2024: Expert Reviews & Buyer’s Guide
- Best Fans for Chicken Coop 2024: Effective Cooling Solutions Reviewed
Final Thoughts
In conclusion, maintaining a clean chicken coop is paramount for the health and happiness of your chickens, as well as for the safety and sanitation of your homestead. By choosing the right non-toxic cleaners, donning appropriate protective gear, and employing a systematic approach to daily and deep-cleaning tasks, you can ensure a pleasant environment for your poultry. Whether you opt for commercial products or homemade solutions, the key lies in regular upkeep and vigilance against pests and pathogens. Remember, a clean coop not only supports the well-being of your chickens but also enhances the overall productivity and enjoyment of your backyard farming experience.
Frequently Asked Questions
- How often should I clean my chicken coop?
Daily spot cleaning is recommended to remove droppings and refresh water and feed. A more thorough cleaning, including changing bedding and scrubbing surfaces, should be done every 1-2 weeks, with a deep clean 2-4 times a year or as needed based on the coop’s condition and flock size. - What is the best cleaner to use in a chicken coop?
Use a non-toxic, pet-safe cleaner specifically designed for chicken coops or a homemade solution of water and vinegar. Avoid harsh chemicals like bleach and ammonia, which can harm your chickens and produce dangerous fumes. - Can I use bleach to clean my chicken coop?
While bleach is effective for disinfection, it should be used cautiously and never mixed with ammonia. If you choose to use bleach, ensure the coop is well-ventilated and thoroughly rinse and dry the coop before reintroducing your chickens. - What protective gear should I wear when cleaning the coop?
Wear disposable gloves, a dust mask or respirator, and protective eyewear to avoid contact with harmful bacteria or dust. Also, consider wearing dedicated clothing or a coverall that you can wash separately. - How do I control pests in the coop?
Regular cleaning helps control pests. Additionally, sprinkle food-grade diatomaceous earth on the coop floor and in nesting boxes to combat mites, lice, and other pests. Ensure proper coop ventilation to deter damp conditions that attract pests. - Should I remove my chickens from the coop while cleaning?
Yes, relocating your chickens to a safe, temporary space prevents stress and exposure to cleaning products and dust. - How do I dispose of old bedding?
Compost old bedding if it’s biodegradable, like straw or wood shavings. Composting turns bedding into valuable fertilizer for your garden while properly disposing of waste. - Can I pressure wash my chicken coop?
Yes, pressure washing can be an effective way to remove dirt and grime. However, ensure the coop is completely dry before adding new bedding and reintroducing your chickens to prevent mold and mildew growth. - How do I clean and disinfect the waterers and feeders?
Clean and disinfect waterers and feeders weekly with hot soapy water, followed by a rinse with a vinegar-water solution. Allow them to dry thoroughly before refilling. - What should I do if I notice a foul odor coming from the coop?
A persistent bad odor can indicate a buildup of ammonia from droppings, which is harmful to chickens’ respiratory systems. Increase cleaning frequency, ensure adequate ventilation, and consider adding more absorbent bedding or employing the deep litter method to manage waste better.
We’re eager to learn from your journey! Share your personal tips, tricks, and experiences on cleaning your chicken coop in the comments section below. Your firsthand knowledge could greatly assist fellow poultry enthusiasts in creating a healthier and cleaner environment for their flocks. Whether it’s a clever cleaning hack, a preferred cleaner, or a time-saving strategy, your input can help others navigate their coop cleaning routines more effectively!

Edward Smith
Forestry AuthorWoodworking is about more than crafting; it's a harmonious connection with nature, mastering tools, and preserving our environment. I'm here to share my knowledge and experiences with you, forging a future where we can embrace wood's beauty and utility while safeguarding our forests' health and diversity.


Leave your comment