How to Sand a Wood Floor With a Belt Sander
- December 1, 2023
- 0 comment
The allure of wooden floors often remains concealed beneath the comforting embrace of rugs and carpets, obscuring their innate, rich characteristics. However, by unveiling and treating your wooden floors with sanding, staining, or polishing, you can infuse the entire space with an air of elegance and opulence. Mastering the art of utilizing a belt sander becomes pivotal in this process, as it serves as the primary tool for efficiently sanding wood floors. With a keen understanding of how to wield a belt sander, you unlock the potential to bring forth the hidden beauty of your wooden floors, transforming them into a statement piece that elevates the aesthetic of your living space.
Choosing the Right Belt Sander
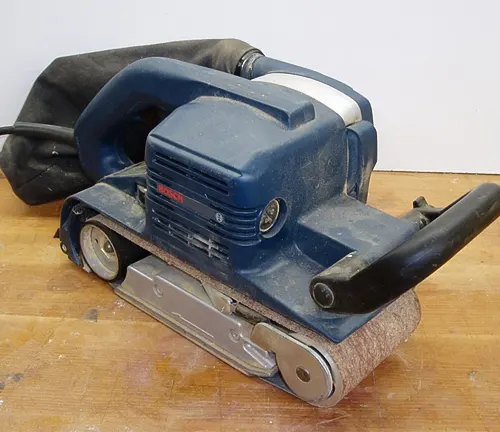
Before you even start sanding, it’s essential to choose the right belt sander for the job. There are two main types of belt sanders: rental and professional. Rental sanders are typically less expensive, but they may not be as powerful or durable as professional sanders. If you’re planning on refinishing your floors yourself, I recommend investing in a professional-grade belt sander.
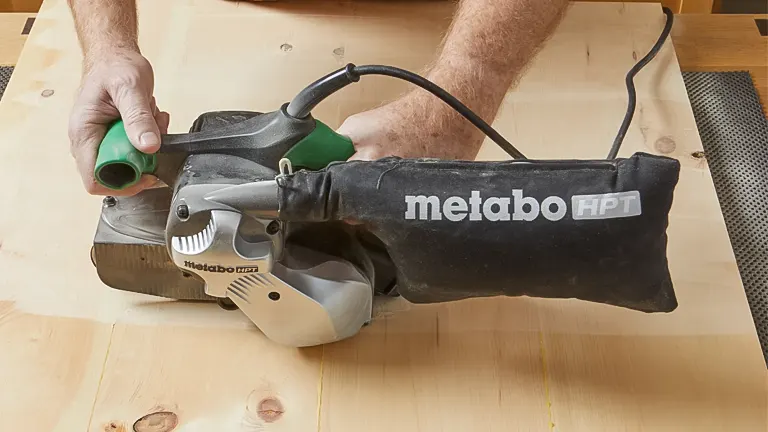
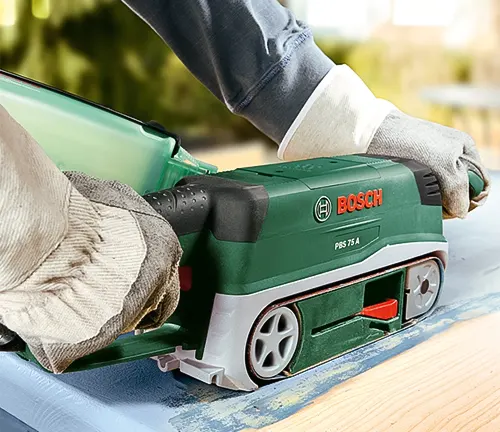
I used a 3-inch by 21-inch belt sander, which I found to be the perfect size for my floors. The sander has a powerful motor that can easily remove the old finish and smooth out the wood. It also has a dust collection system that helps to keep the air clean while you’re sanding.
Preparing Your Floors for Sanding
Once you have your belt sander, it’s time to prepare your floors for sanding. This involves removing all furniture and appliances from the room, as well as any baseboards or molding. You should also cover any vents or registers to prevent dust from entering.
Next, you’ll need to remove the old finish from your floors. You can do this using a chemical stripper or a heat gun. I used a chemical stripper, and it worked well to remove the old finish without damaging the wood.
After the old finish is removed, you should sweep and vacuum your floors to remove any dust or debris. You may also want to use a tack cloth to pick up any remaining dust.
Sanding Your Floors
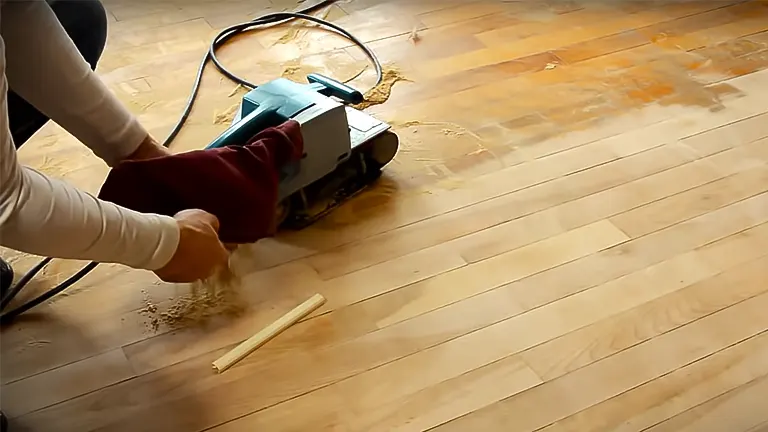
Now it’s time to start sanding! Begin by sanding the floors in the direction of the grain of the wood. Use a coarse grit sandpaper (such as 60 grit) to remove the top layer of wood. Be sure to sand evenly and consistently to avoid gouging the floors.
Once you’ve removed the top layer of wood, you can switch to a finer grit sandpaper (such as 80 grit) to smooth out the floors. Continue sanding until you’re satisfied with the results.
Finally, you’ll need to sand the floors once more with a very fine grit sandpaper (such as 120 grit) to remove any residual dust.
Tips for Sanding with a Belt Sander
Here are a few tips for sanding your floors with a belt sander:
- Wear a dust mask to protect your lungs from dust.
- Use goggles to protect your eyes from flying debris.
- Wear gloves to protect your hands from splinters.
- Take breaks often to avoid fatigue.
- Be patient. Sanding your floors can be a time-consuming process, but it’s worth it in the end.
Guidelines for Employing a Belt Sander in Wood Floor Sanding
While a handheld rotary sander and sanding block prove effective for smoothing smaller flooring areas, the complexity arises when dealing with expansive floor surfaces, necessitating the use of a larger-scale tool like a sanded belt sander. The comprehensive approach involves employing the belt sander for the majority of the floor and complementing its actions with a sanding block for precision work in corners and areas inaccessible to the belt sander. Before commencing the sanding process, it’s imperative to clear the room of all drapes, mats, and furniture, ensuring an unobstructed work environment.
Moreover, to prevent dust accumulation on objects that cannot be easily cleaned, such as a piano, a strategic measure involves covering them with plastic or a protective sheet. This detailed approach ensures a thorough and efficient wood floor sanding process while preserving the integrity of both the flooring and surrounding elements in the space.
It is advisable to don a face mask and protective goggles while using a sanding belt, as the process generates substantial dust, safeguarding your eyes and lungs from potential irritation. Additionally, due to the considerable noise produced by belt sanders, it is recommended to wear earplugs or defenders to protect your hearing during the sanding operation.
The extent of sanding necessary for the floorboards is contingent upon the condition of the wooden floor:
- For a smoother surface on relatively even and clean wood, sand along the length.
- In the case of severely bent, marked, or rough wood, it is essential to sand diagonally first and then along its length.
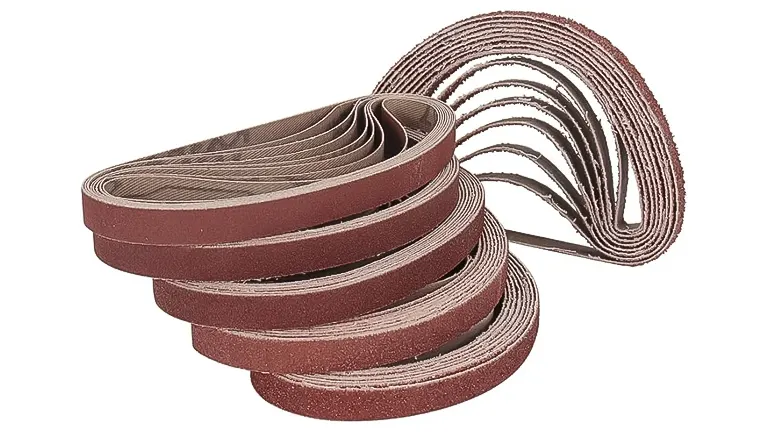
The choice of the initial abrasive grade for the floor is determined by the condition of the floorboards. However, regardless of the floor’s condition, the final sanding step should always utilize a 120-grit size.
Typically, three grades of abrasives are sufficient. If you start with 40 or 60 abrasives, the subsequent grades should be 80 or 100, culminating in the final sanding with 120 abrasives.
Before operating the belt sander, it is crucial to ensure proper ventilation in the working area by opening windows. Additionally, sealing the areas around doors is essential to prevent dust from dispersing into the surrounding building space.
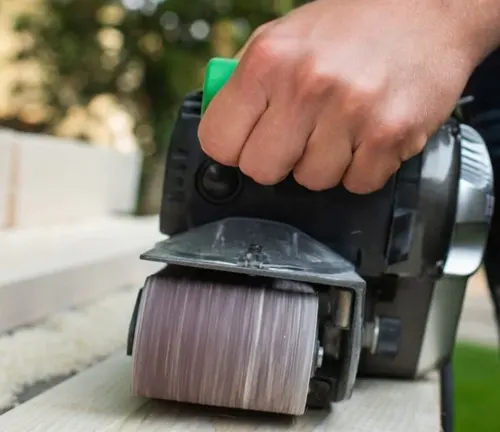
To avoid the abrasive face making direct contact with the floor, it’s advisable to angle the belt sander before commencing its use. After completing the length of one floorboard, tilt the sander once more to lift the abrasives from the surface. It is imperative to refrain from operating the sander while it is stationary on the wood, as this can lead to uneven sanding of the area.
Sanding In A Diagonal Direction
To achieve level floors, it is necessary to sand them diagonally using an appropriate-sized abrasive, such as 40 or 60 grit. Begin in one corner of the room, tilt the sander, switch it on, and move diagonally across the floor to the opposite corner.

Before reaching the skirting board in the opposing corner, tilt the machine and raise the abrasives from the wood. Parallel to the initial pass, turn around and repeat the process. Ensure the first pass is slightly overlapped. Repeat this method for the entire room, ensuring a slight overlap with each previous pass.
For the second round of sanding, replicate the above-described technique. However, start in a nearby corner, allowing the sander to intersect the first round of sanding at a right angle.
Sanding Along The Length Of The Wood
After completing the diagonal sanding of the floorboards with your initial grade of abrasion, whether it’s 80 or 100, proceed to sand along the length of the wood for the second round. If the floorboards are in relatively good condition, you may opt to undertake this step sooner.
Initiate the sanding process for the entire length of the room, starting from one corner. As you reach the opposite wall, tilt and lift the belt sander, turn it around, and guide it parallel to the preceding pass, ensuring a slight overlap similar to the diagonal sanding technique.
Upon completing these two passes, the smoothness of the finish on each pass will indicate the direction of the wood grain. Subsequent passes should follow the same direction as the smoothest strip. Transition to a 120-grit size and proceed with the sanding process once the second-grade abrasion covers the entire floor. Eventually, employ a handheld sanding block to address the corners of the room.
Conclusion
In conclusion, revitalizing the allure of wooden flooring becomes an efficient and achievable task with the aid of a well-chosen belt sander. However, ensuring a successful wood floor restoration involves more than just the selection of the right tool. Prioritize your safety by safeguarding your eyes, ears, and lungs during the sanding process. Employing appropriate protective gear, such as goggles, earplugs, and a face mask, is essential in minimizing potential health hazards associated with the generation of dust and the loud operation of belt sanders. Additionally, understanding the significance of using the correct abrasives grade is paramount to achieving the desired results. By embracing these safety measures and adhering to optimal sanding practices, you not only enhance the aesthetic appeal of your wooden floors but also ensure a smooth and successful restoration process.
Frequently Asked Questions
- What safety precautions should I take when using a belt sander on wood floors?
Prioritize safety by wearing protective gear such as goggles, earplugs, and a face mask to shield your eyes, ears, and lungs from dust and noise generated during the sanding process. - How do I choose the right belt sander for sanding wood floors?
Consider factors like motor power, ergonomics, and versatility when selecting a belt sander. The [Brand Model] was recommended for its robust motor, user-friendly design, and ability to handle various wood types effectively. - What is the recommended sequence of abrasive grades for wood floor sanding with a belt sander?
Typically, three abrasive grades are sufficient. Begin with 40 or 60 grit, followed by 80 or 100 grit, and conclude with 120 grit for a smooth finish. - Can I sand wood floors diagonally, and when is it necessary?
Diagonal sanding is recommended when dealing with severely bent, marked, or rough wood floors. Start with an abrasive size of 40 or 60 and move the belt sander diagonally across the floor for optimal results. - How should I sand the length of the wood for the best outcome?
After diagonal sanding, transition to the second grade of abrasion (80 or 100) and sand along the length of the wood. This step contributes to achieving a smoother and more refined finish on the wooden floors. - What is the significance of using a 120-grit size in the sanding process?
The final sanding step with a 120-grit size ensures a polished and uniform surface on the wood floors. This grade is recommended for a professional and aesthetically pleasing result, concluding the wood floor sanding process with finesse.
Have you tackled a wood floor refinishing project using a belt sander? We’re eager to hear about your journey! Feel free to share your tips, challenges, and overall experiences in the comments below. Your valuable insights can be a guiding light for others embarking on their wood floor sanding ventures, helping them navigate the process with confidence!

Edward Smith
Forestry AuthorWoodworking is about more than crafting; it's a harmonious connection with nature, mastering tools, and preserving our environment. I'm here to share my knowledge and experiences with you, forging a future where we can embrace wood's beauty and utility while safeguarding our forests' health and diversity.


Leave your comment